Unboxing & Overview
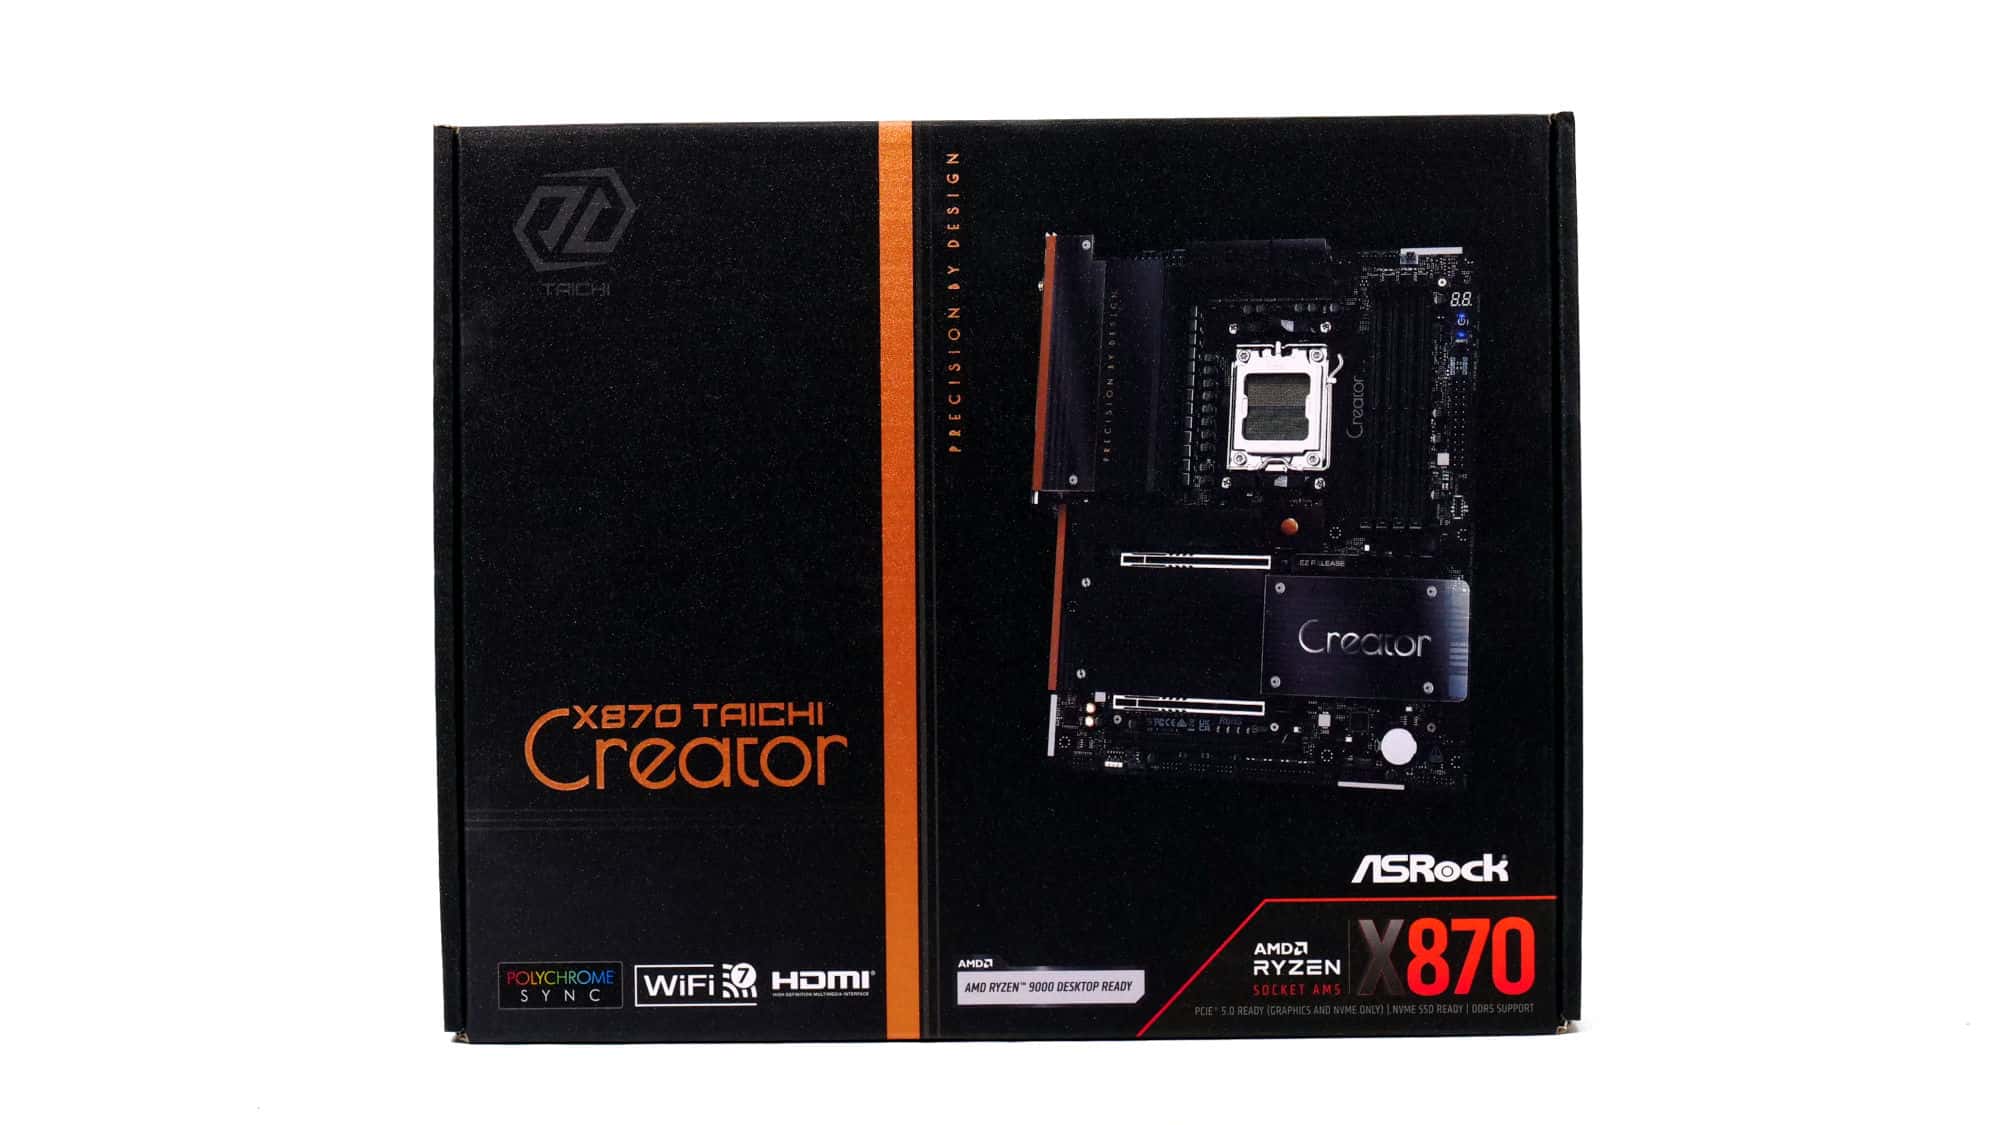
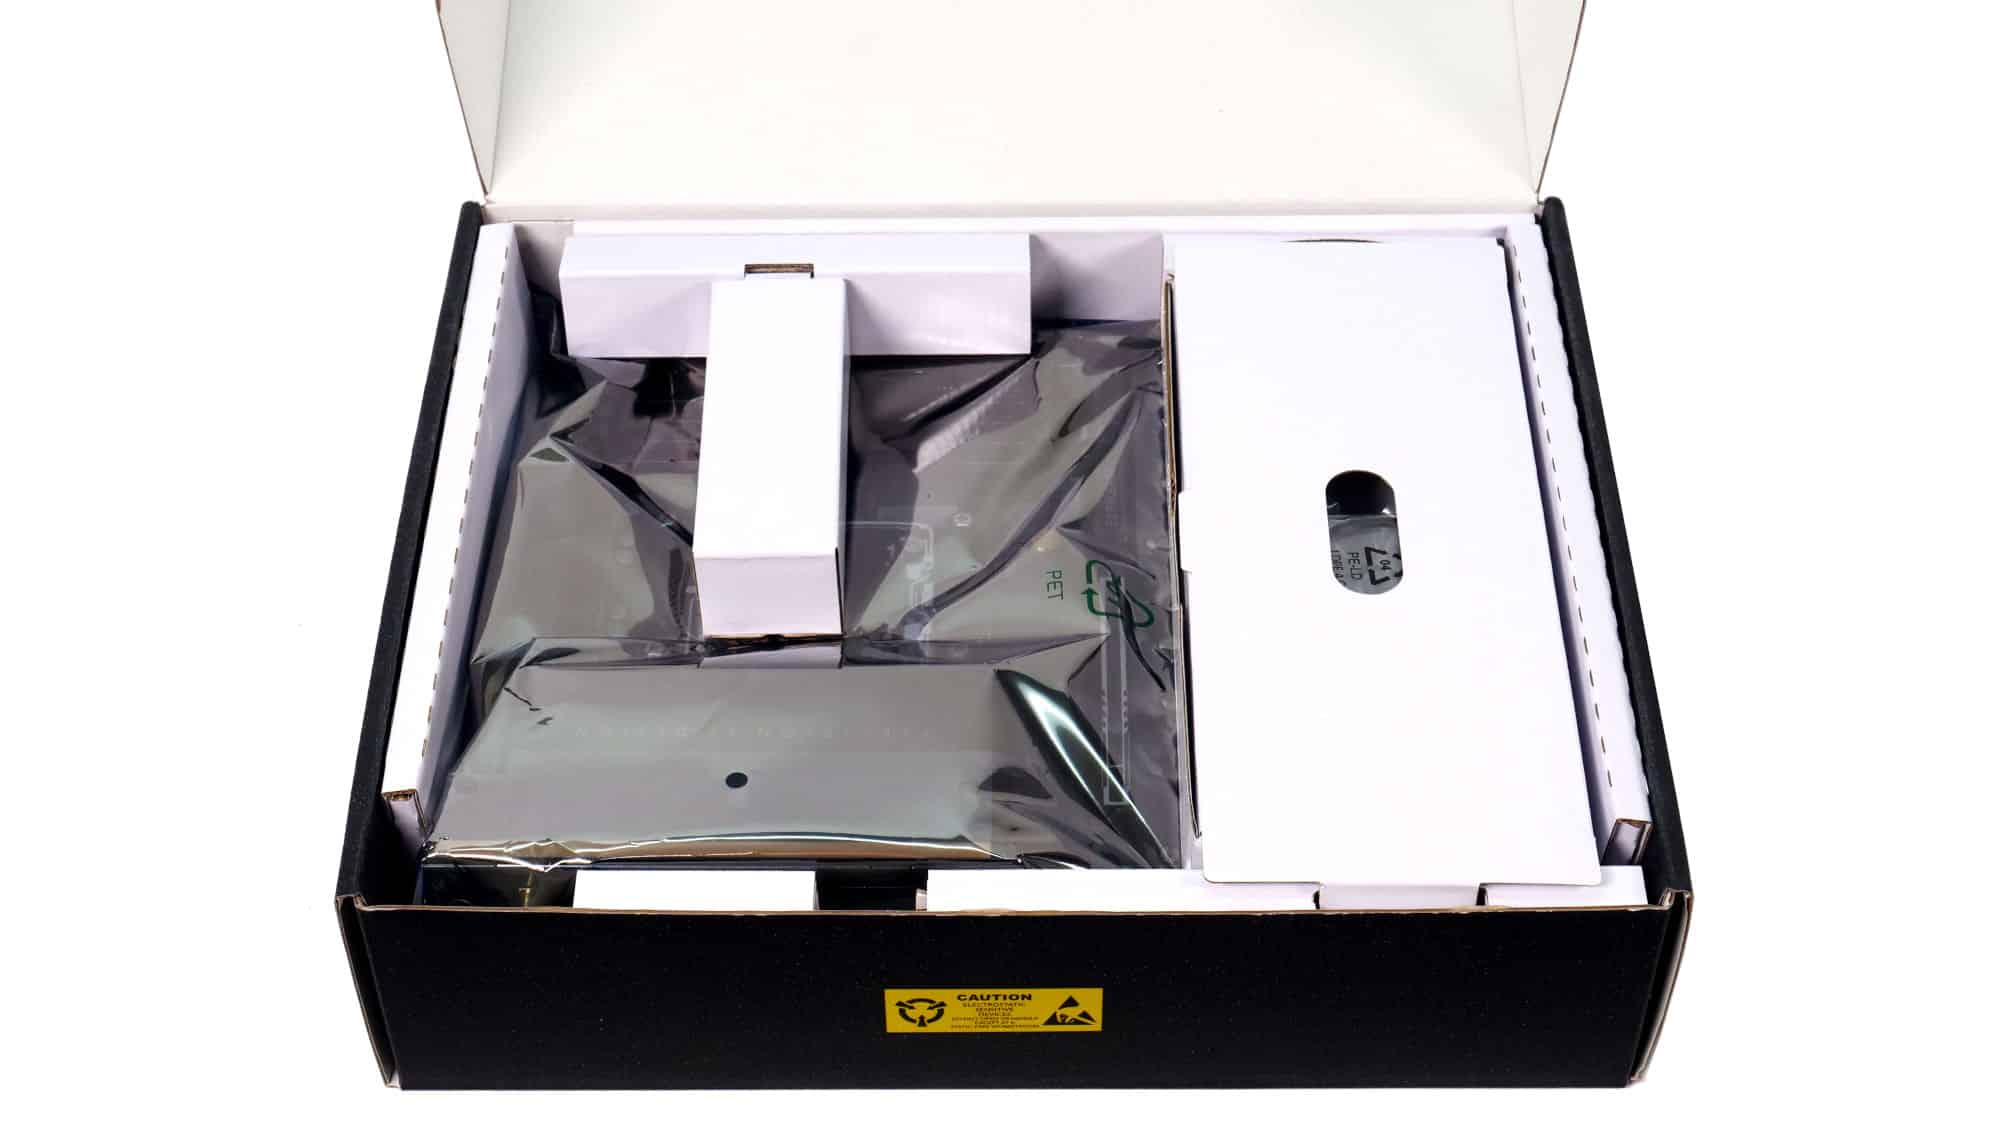
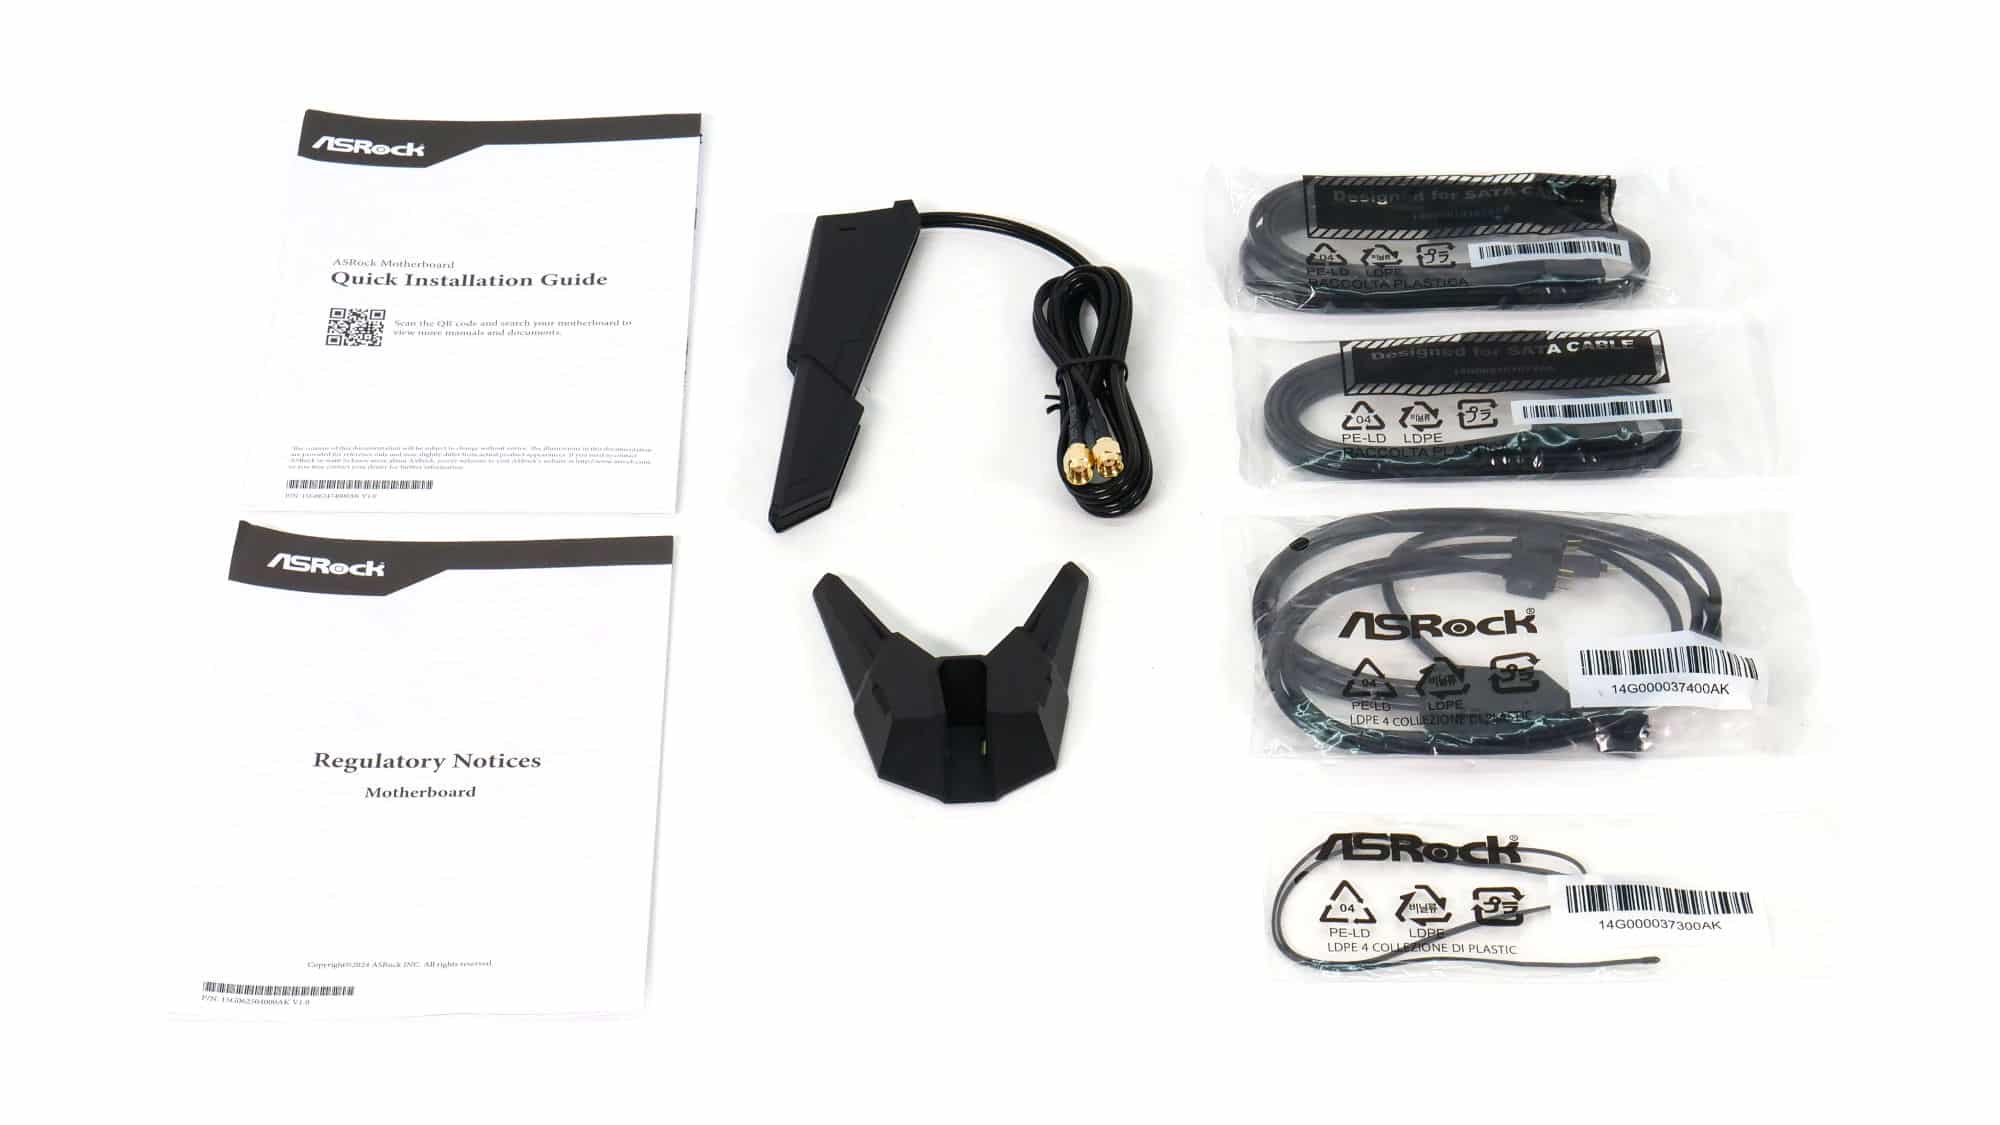
The unboxing experience follows ASRock’s classic approach. The board is well protected with cardboard bracing and an antistatic bag. Along with the motherboard, you’ll find the usual accessories neatly packed inside:
- 1x ASRock logo sticker
- 1x Sticker pack
- 1x Wi-Fi Antenna and a base
- 1x ARGB Y splitter cable
- 4x SATA 3 cables
- Quick installation guide
- Regulatory Notices
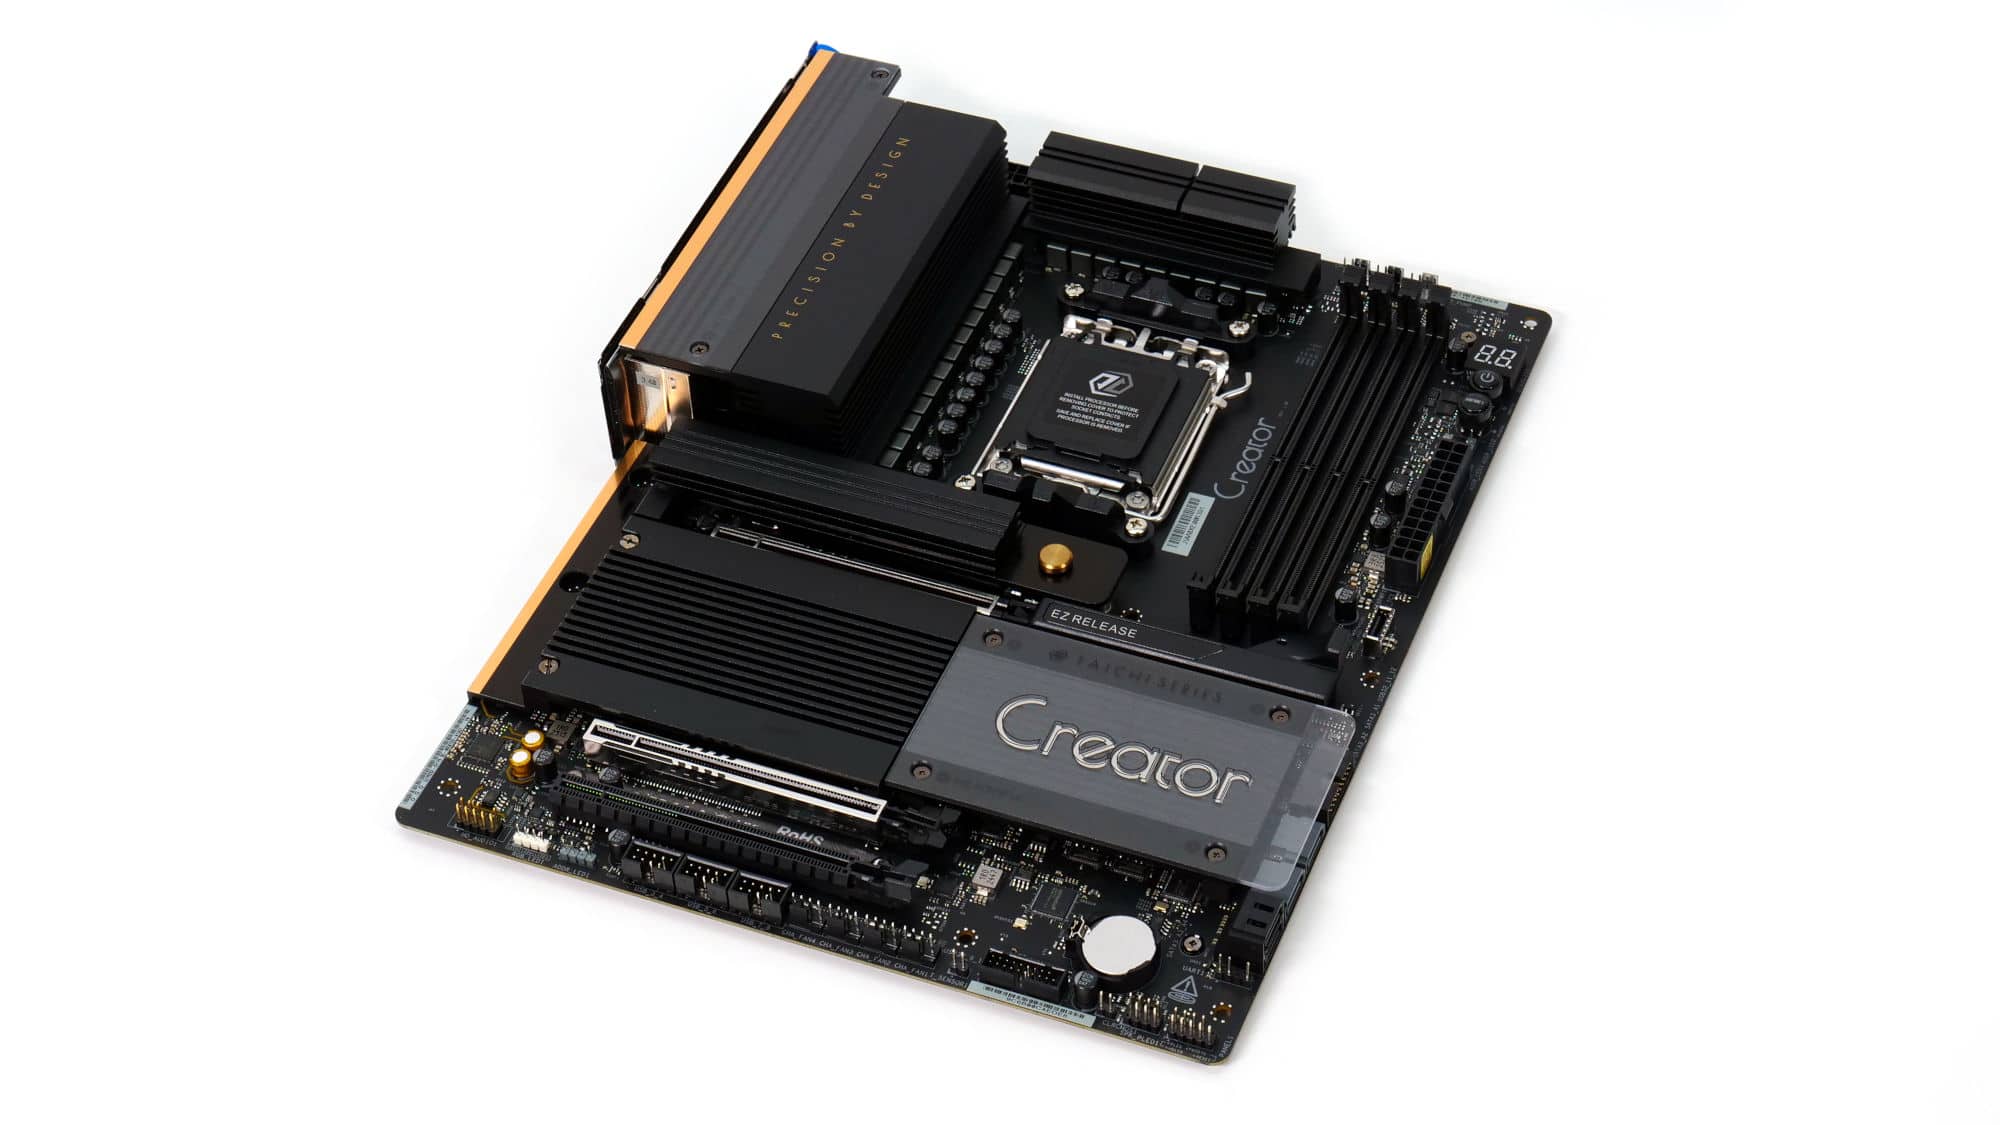
The color scheme of this board is elegant and gives off a premium feel. The design of the VRM coolers is somewhat blocky, but the overall look is very clean. The CMOS battery is a bit of an eyesore, though the acrylic panel with the “Creator” branding stands out nicely, complemented by the M.2 heatsink beside it.
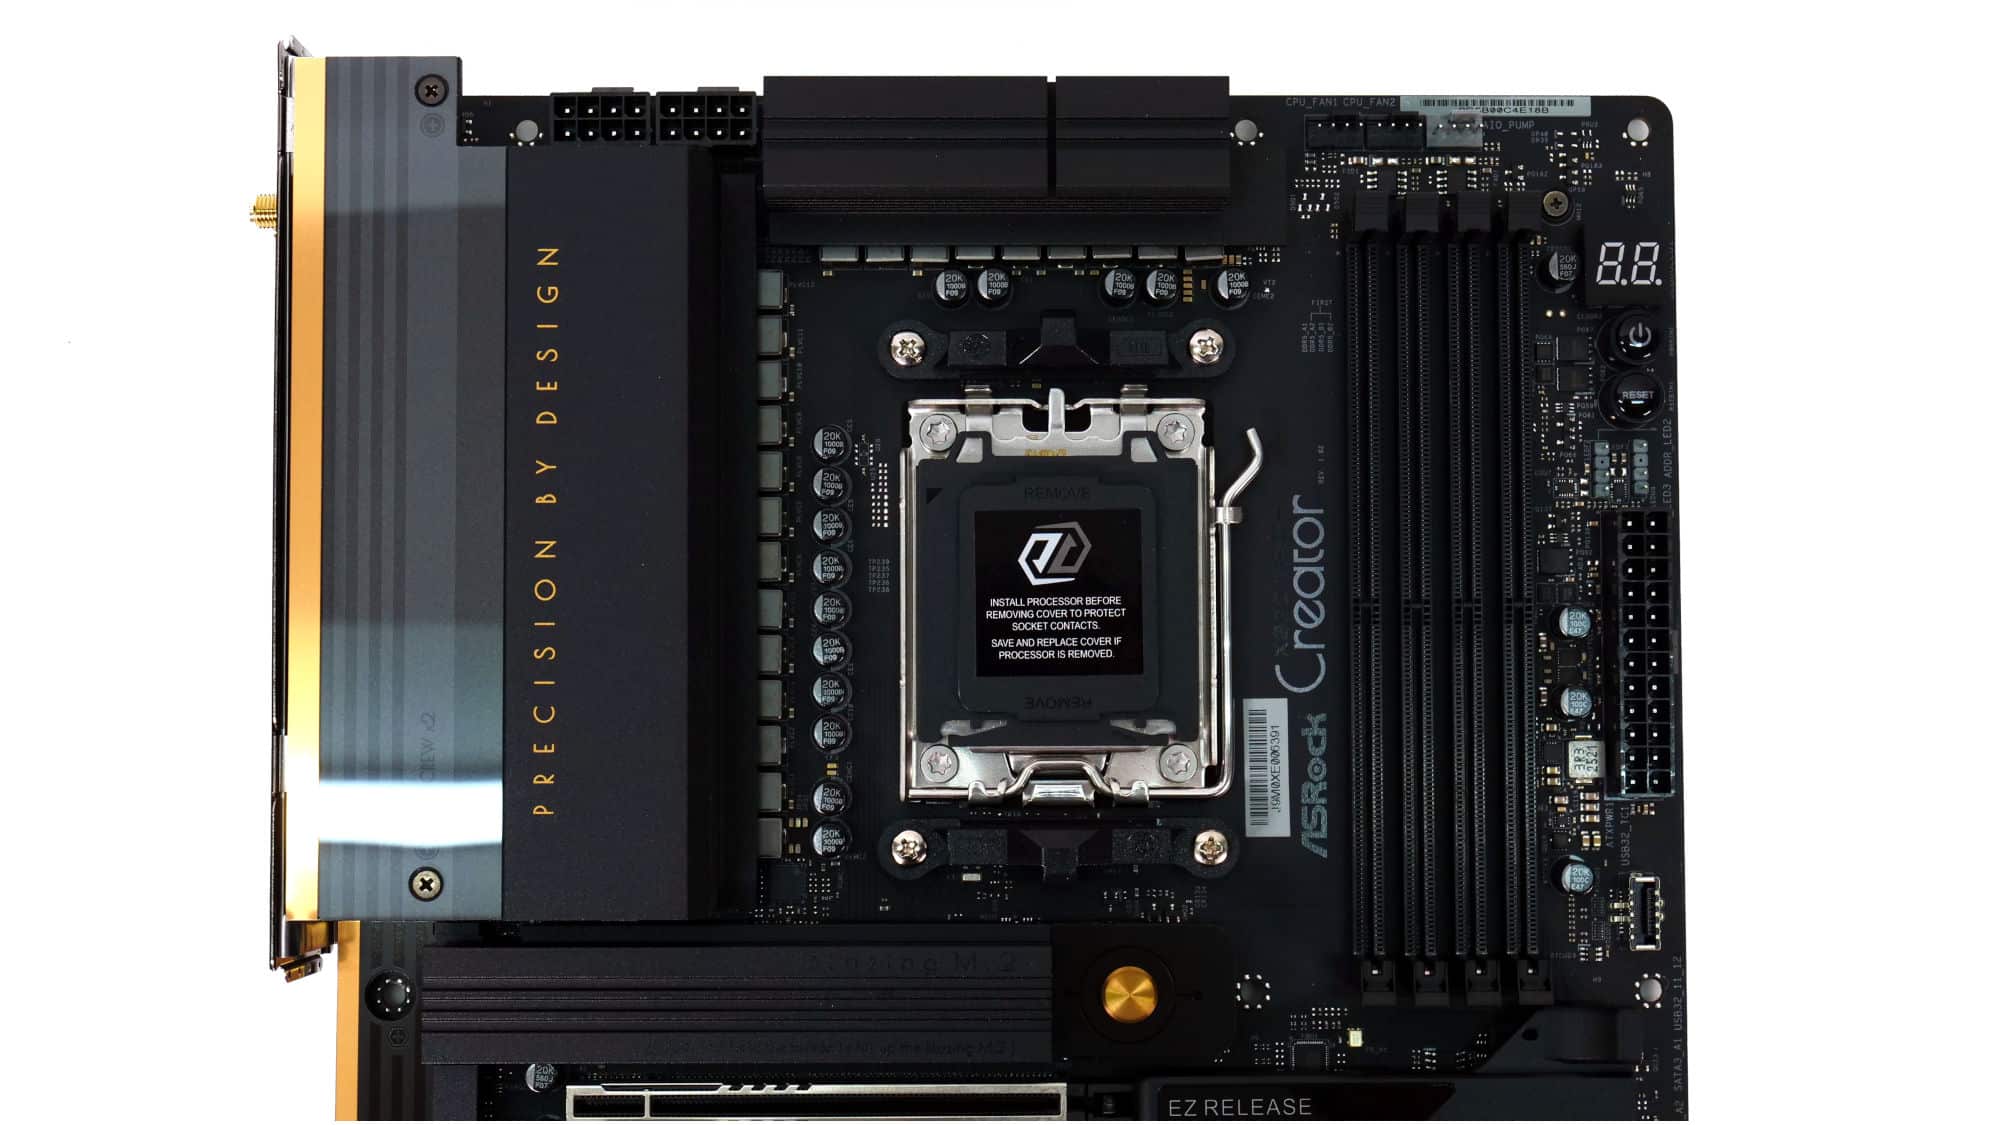
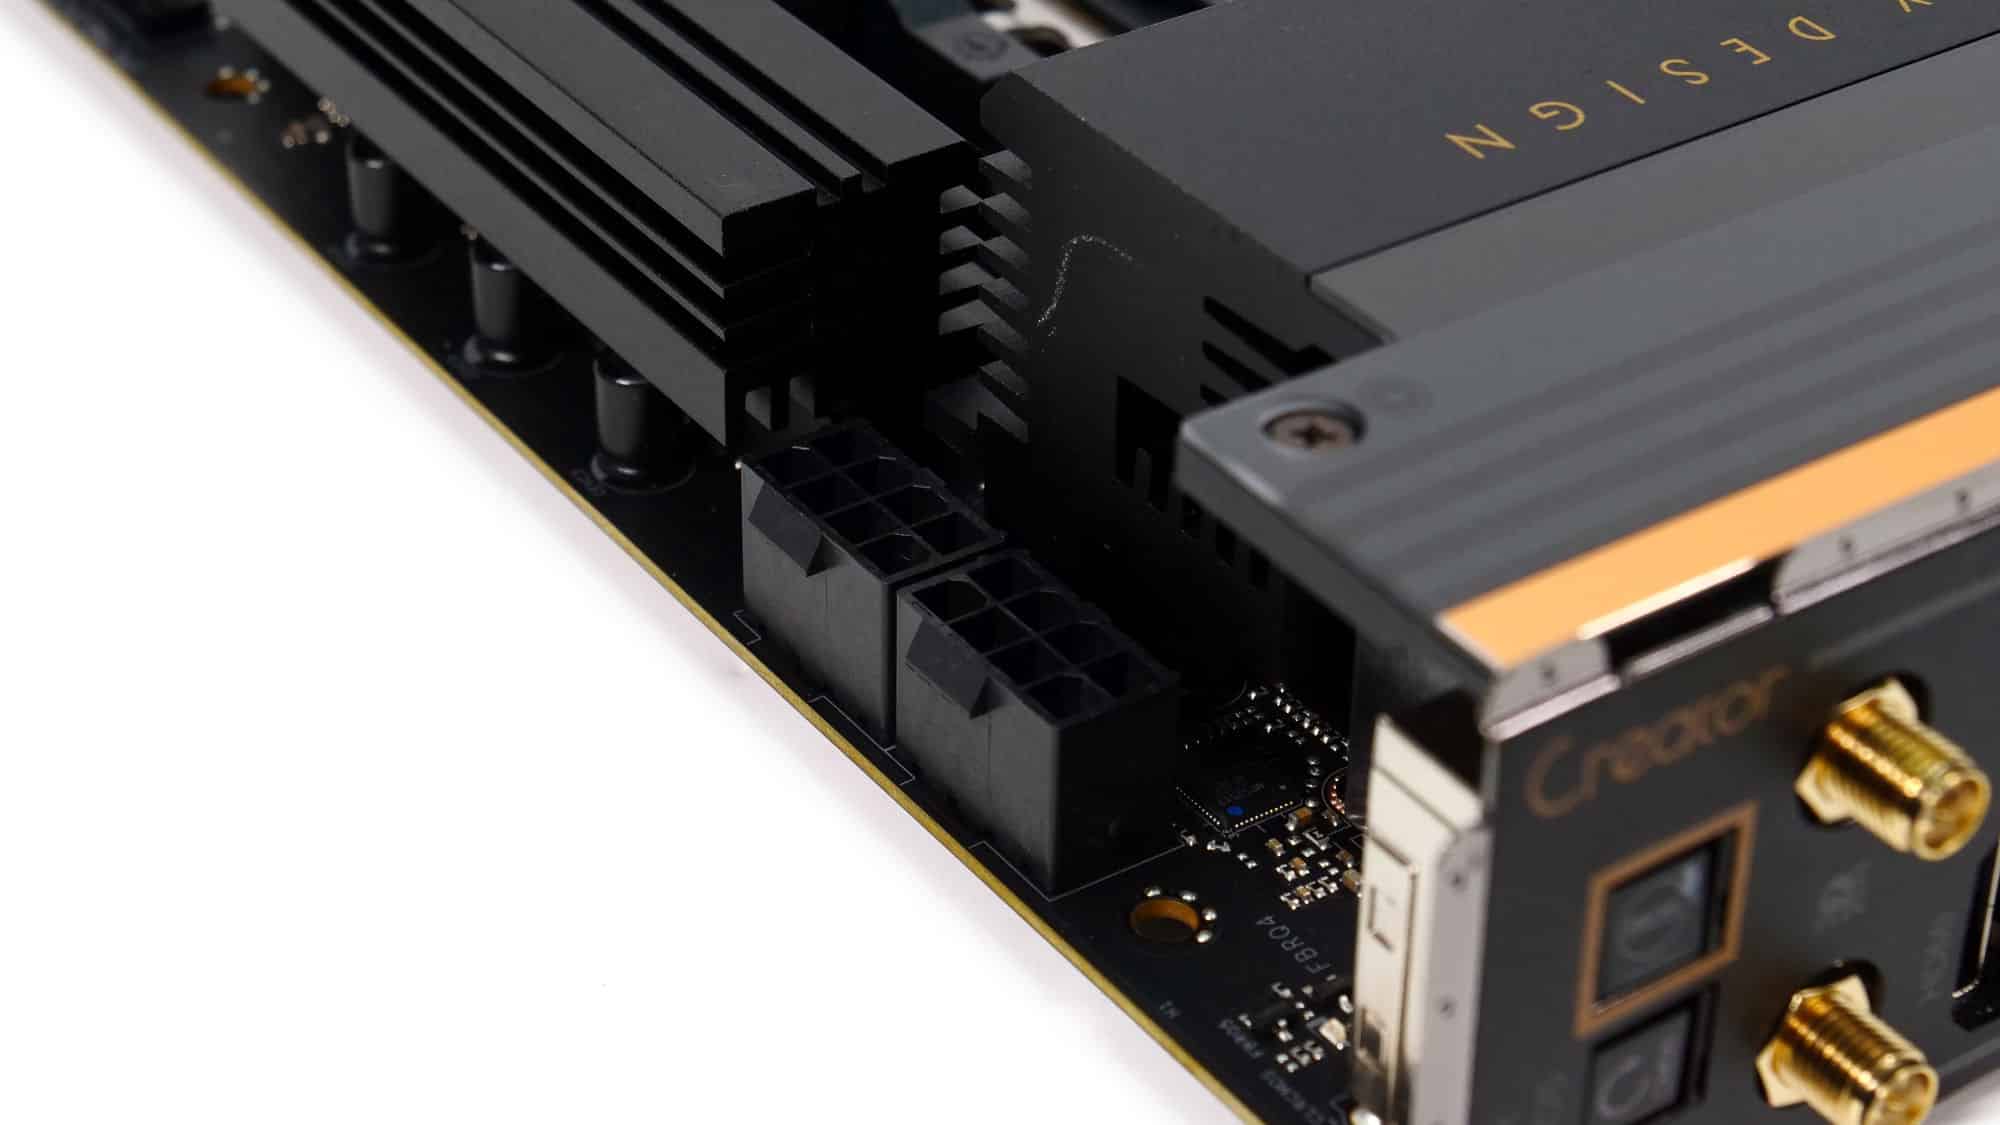
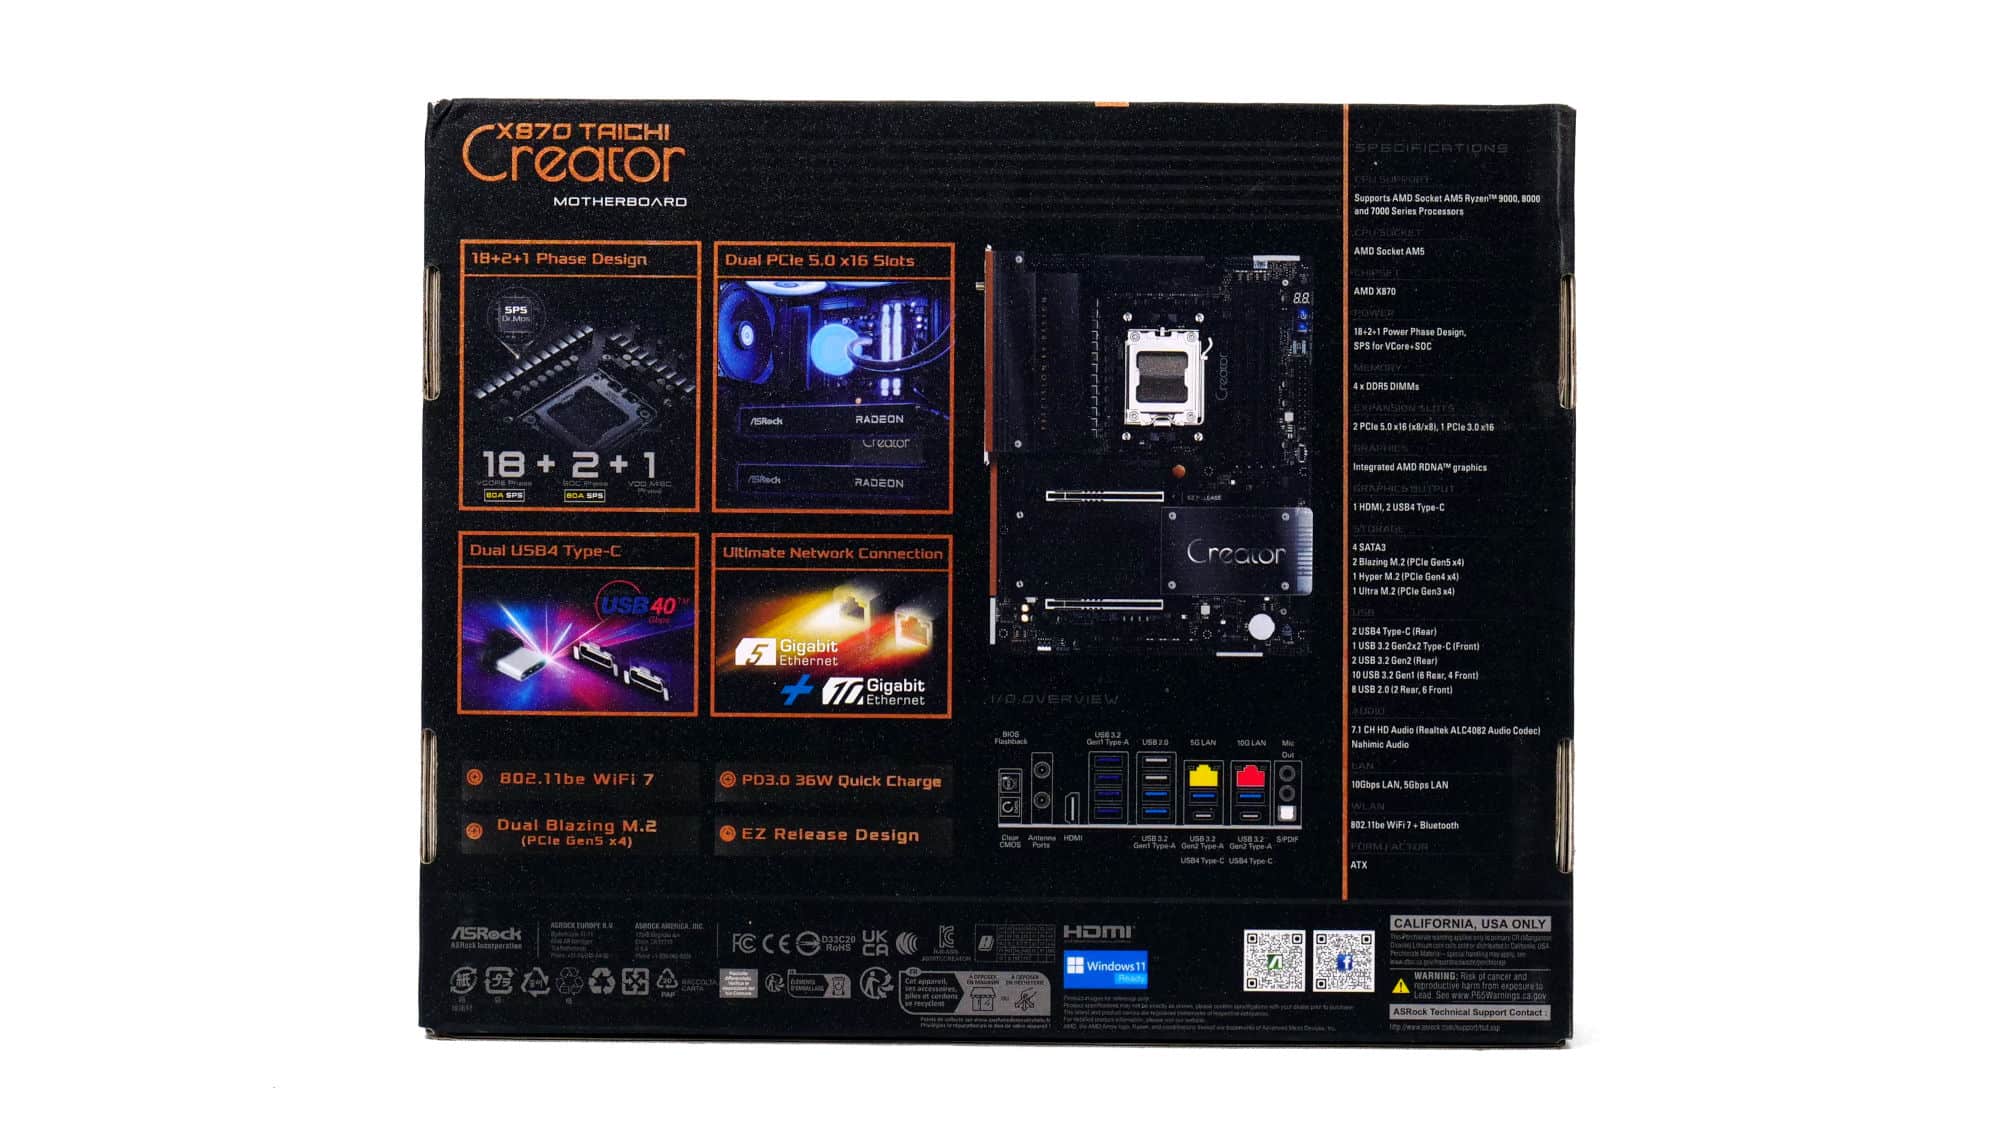
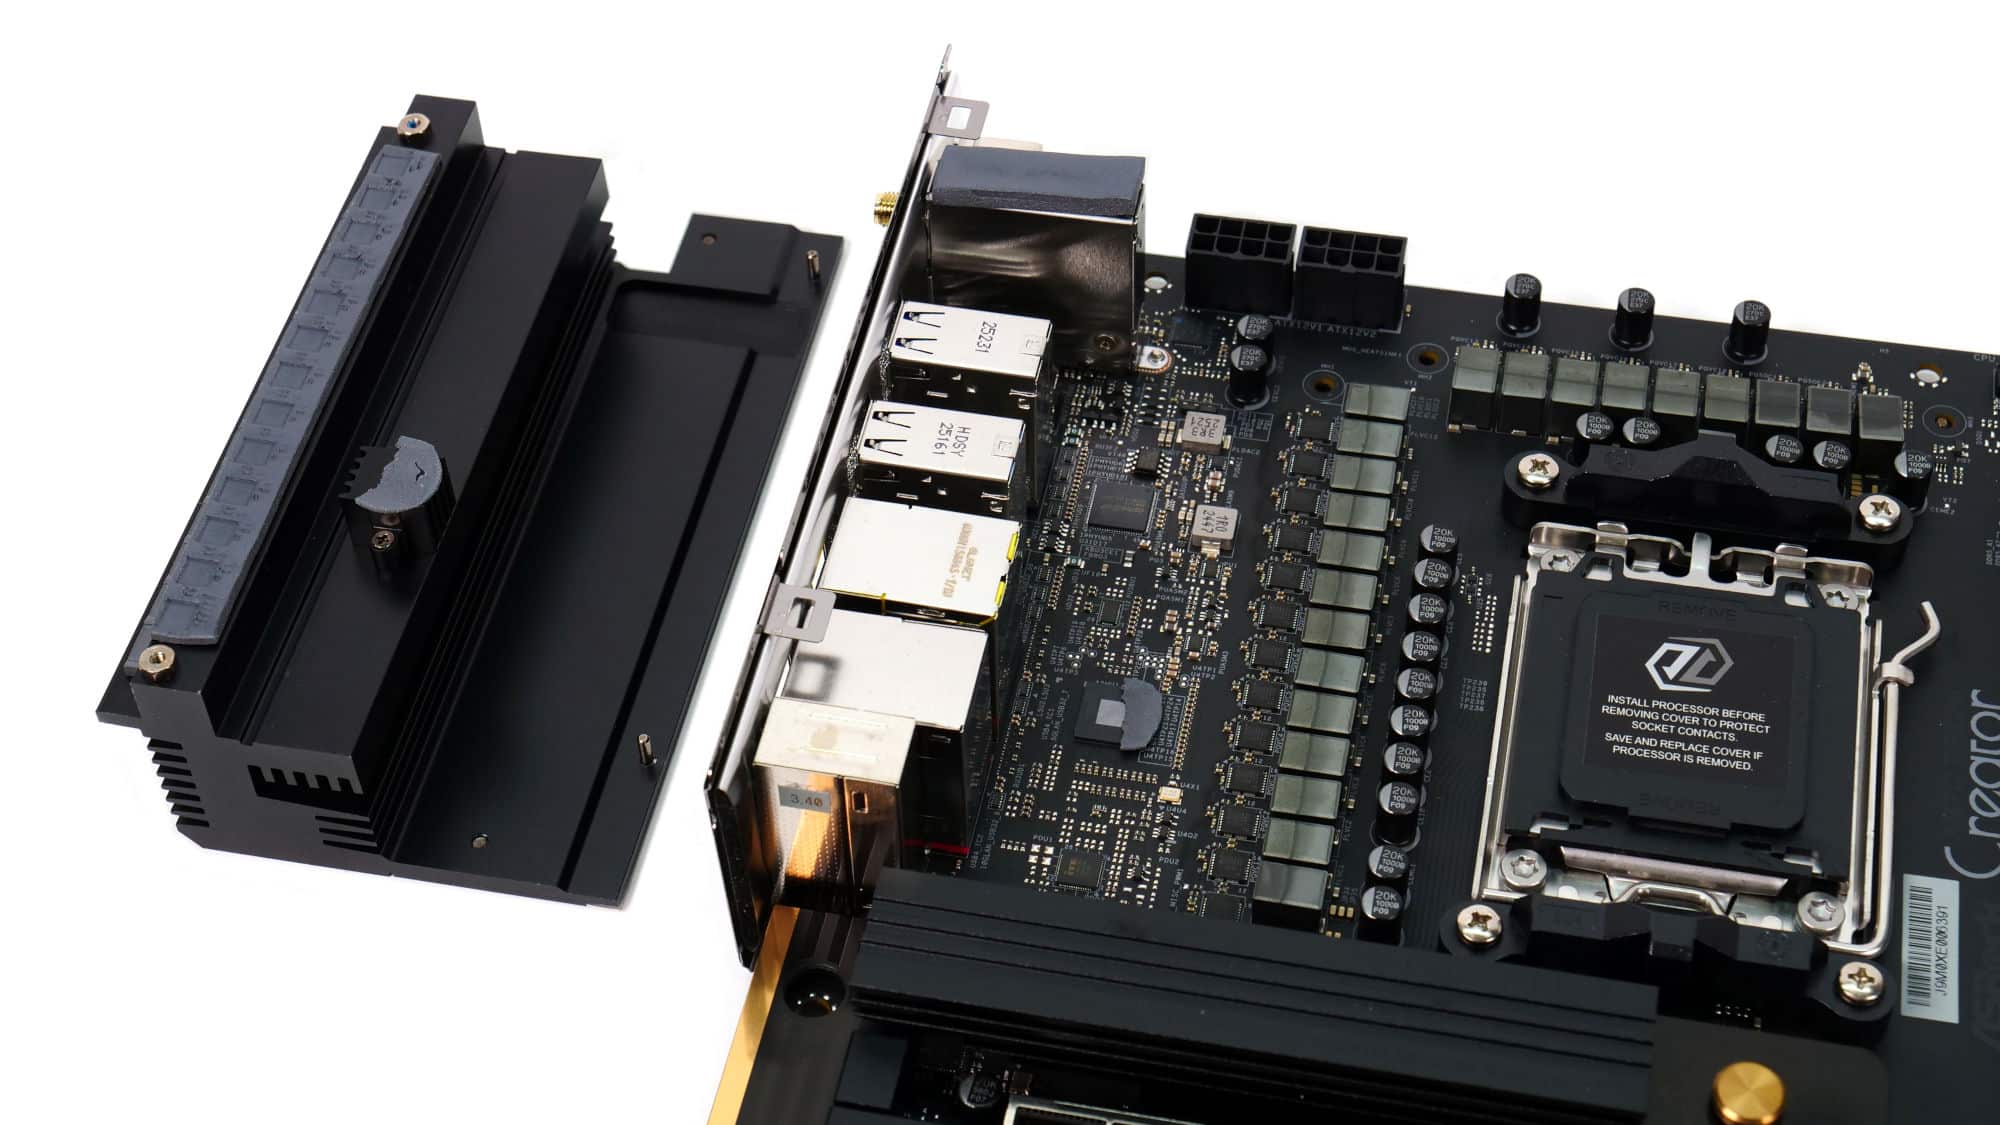
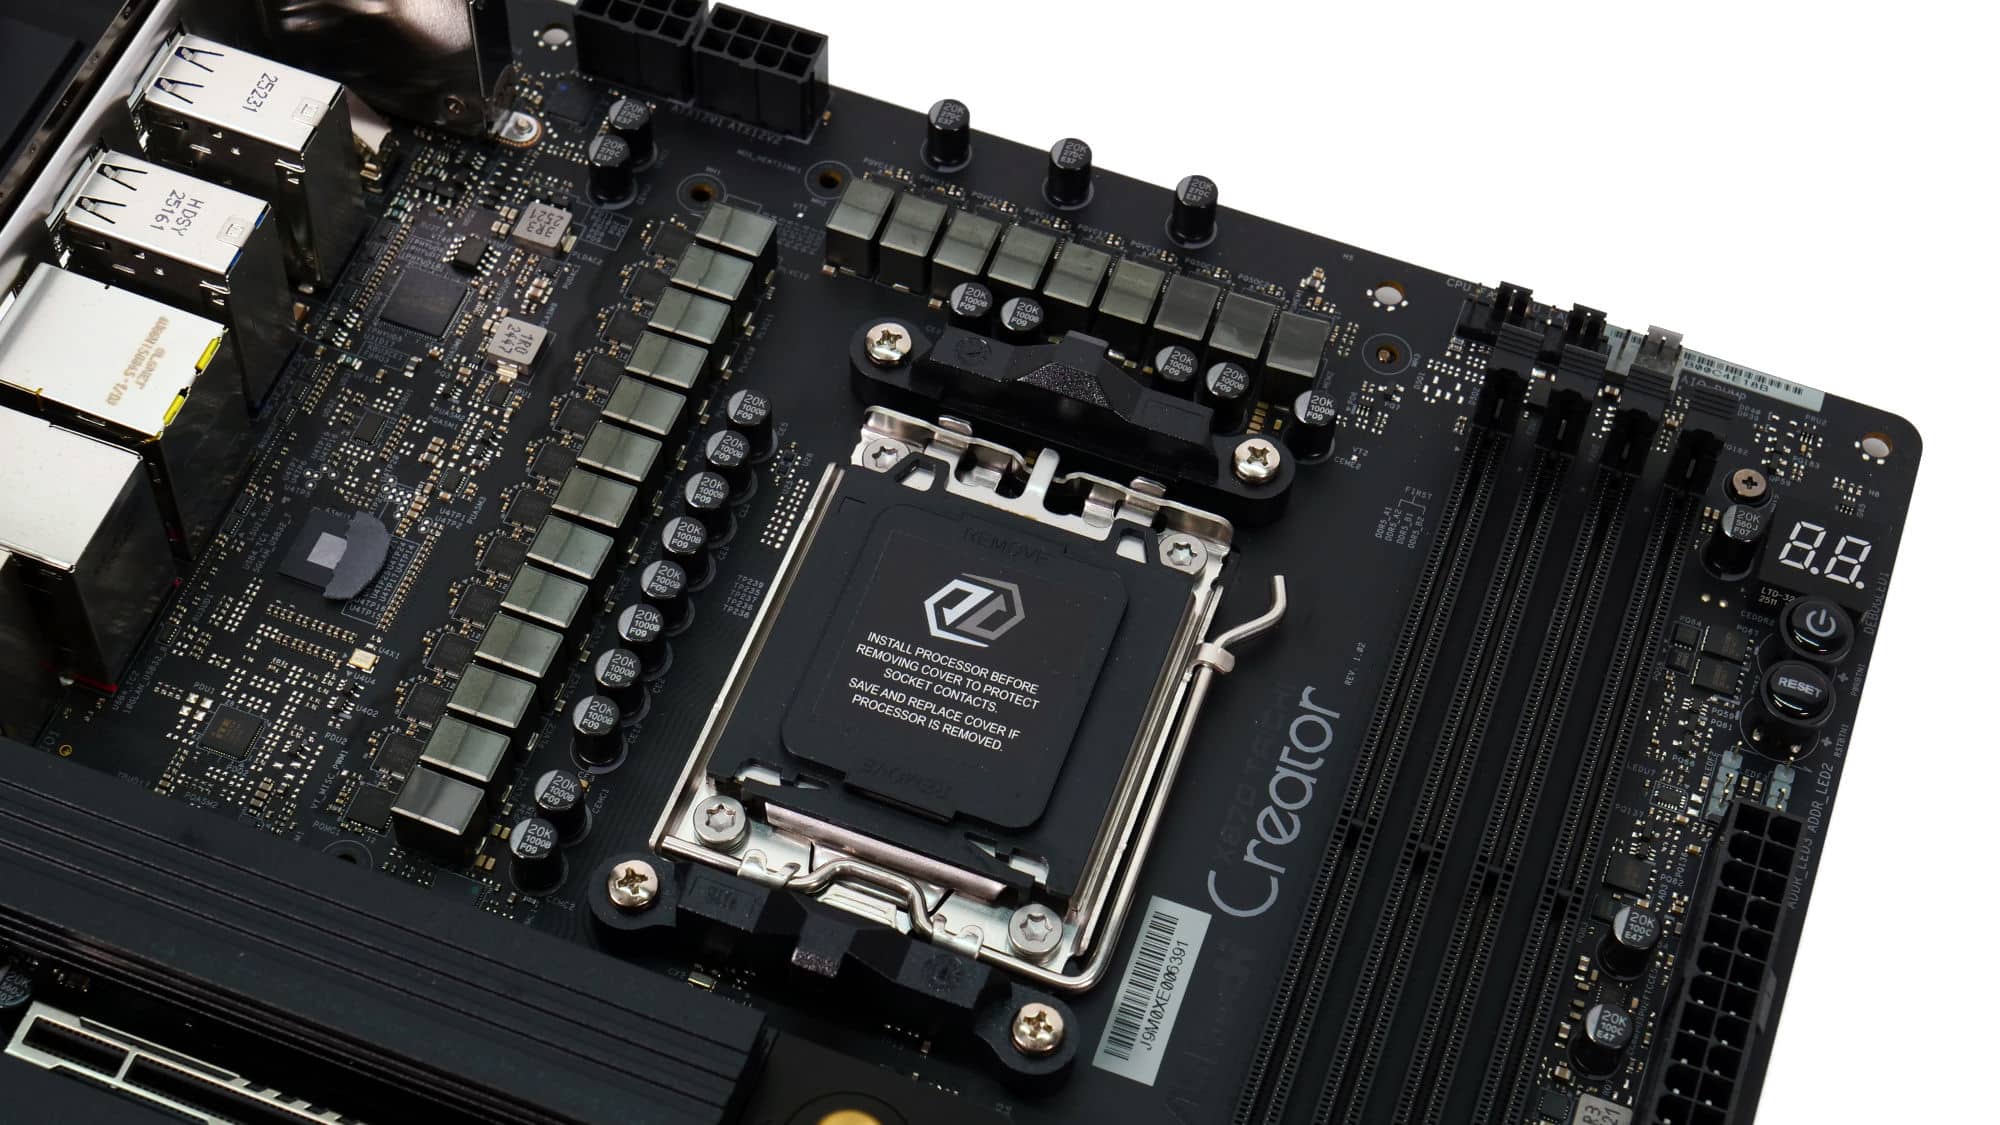
Taking a closer look at the board, the top half houses the dual CPU connectors in the upper-left corner, the VRM heatsinks that cool the 18+2+1 power phases, the CPU socket, and four RAM slots.
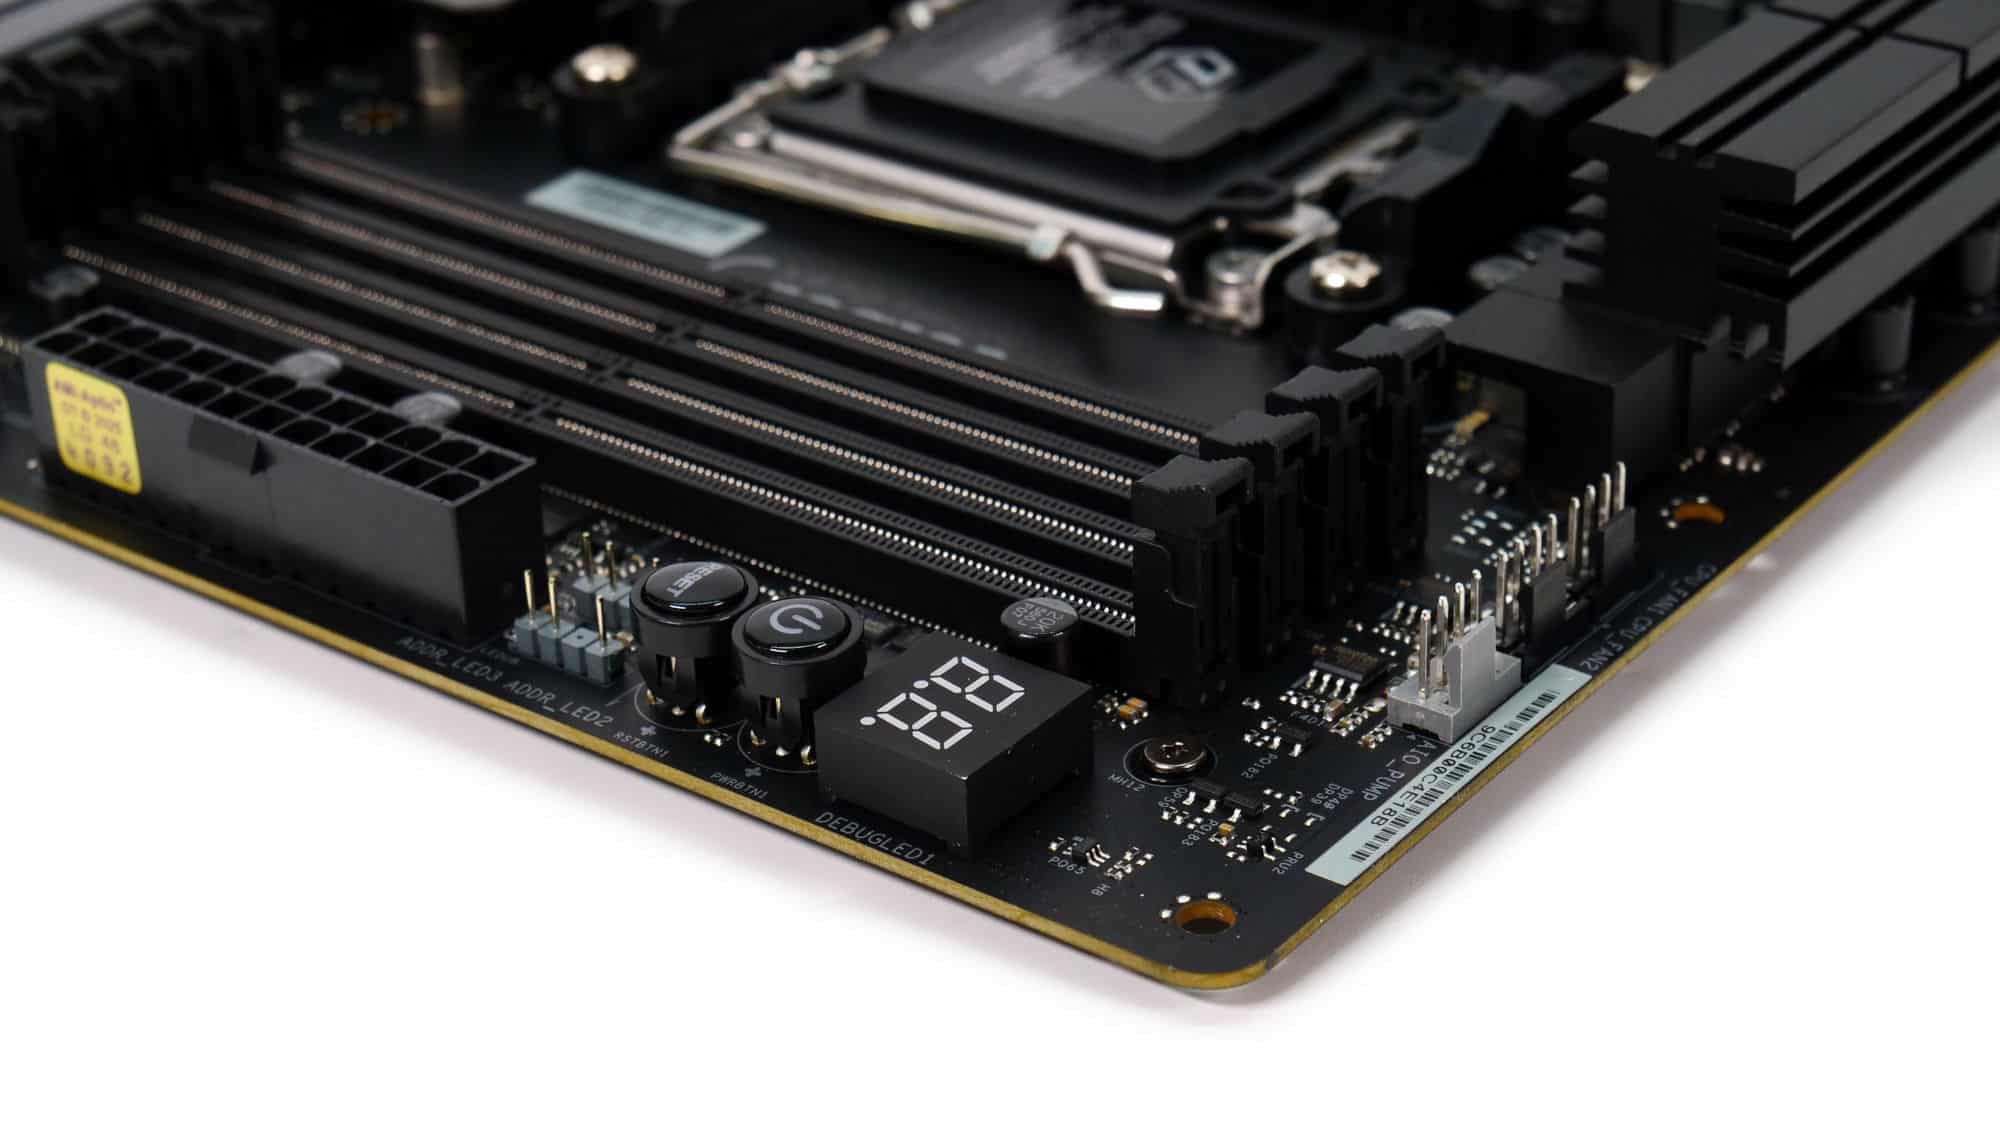
In the top-right corner, there are three PWM connectors, two for CPU fans and one for an AIO pump. You’ll also find the diagnostic screen, onboard power and reset buttons, and two 5V ARGB connectors.
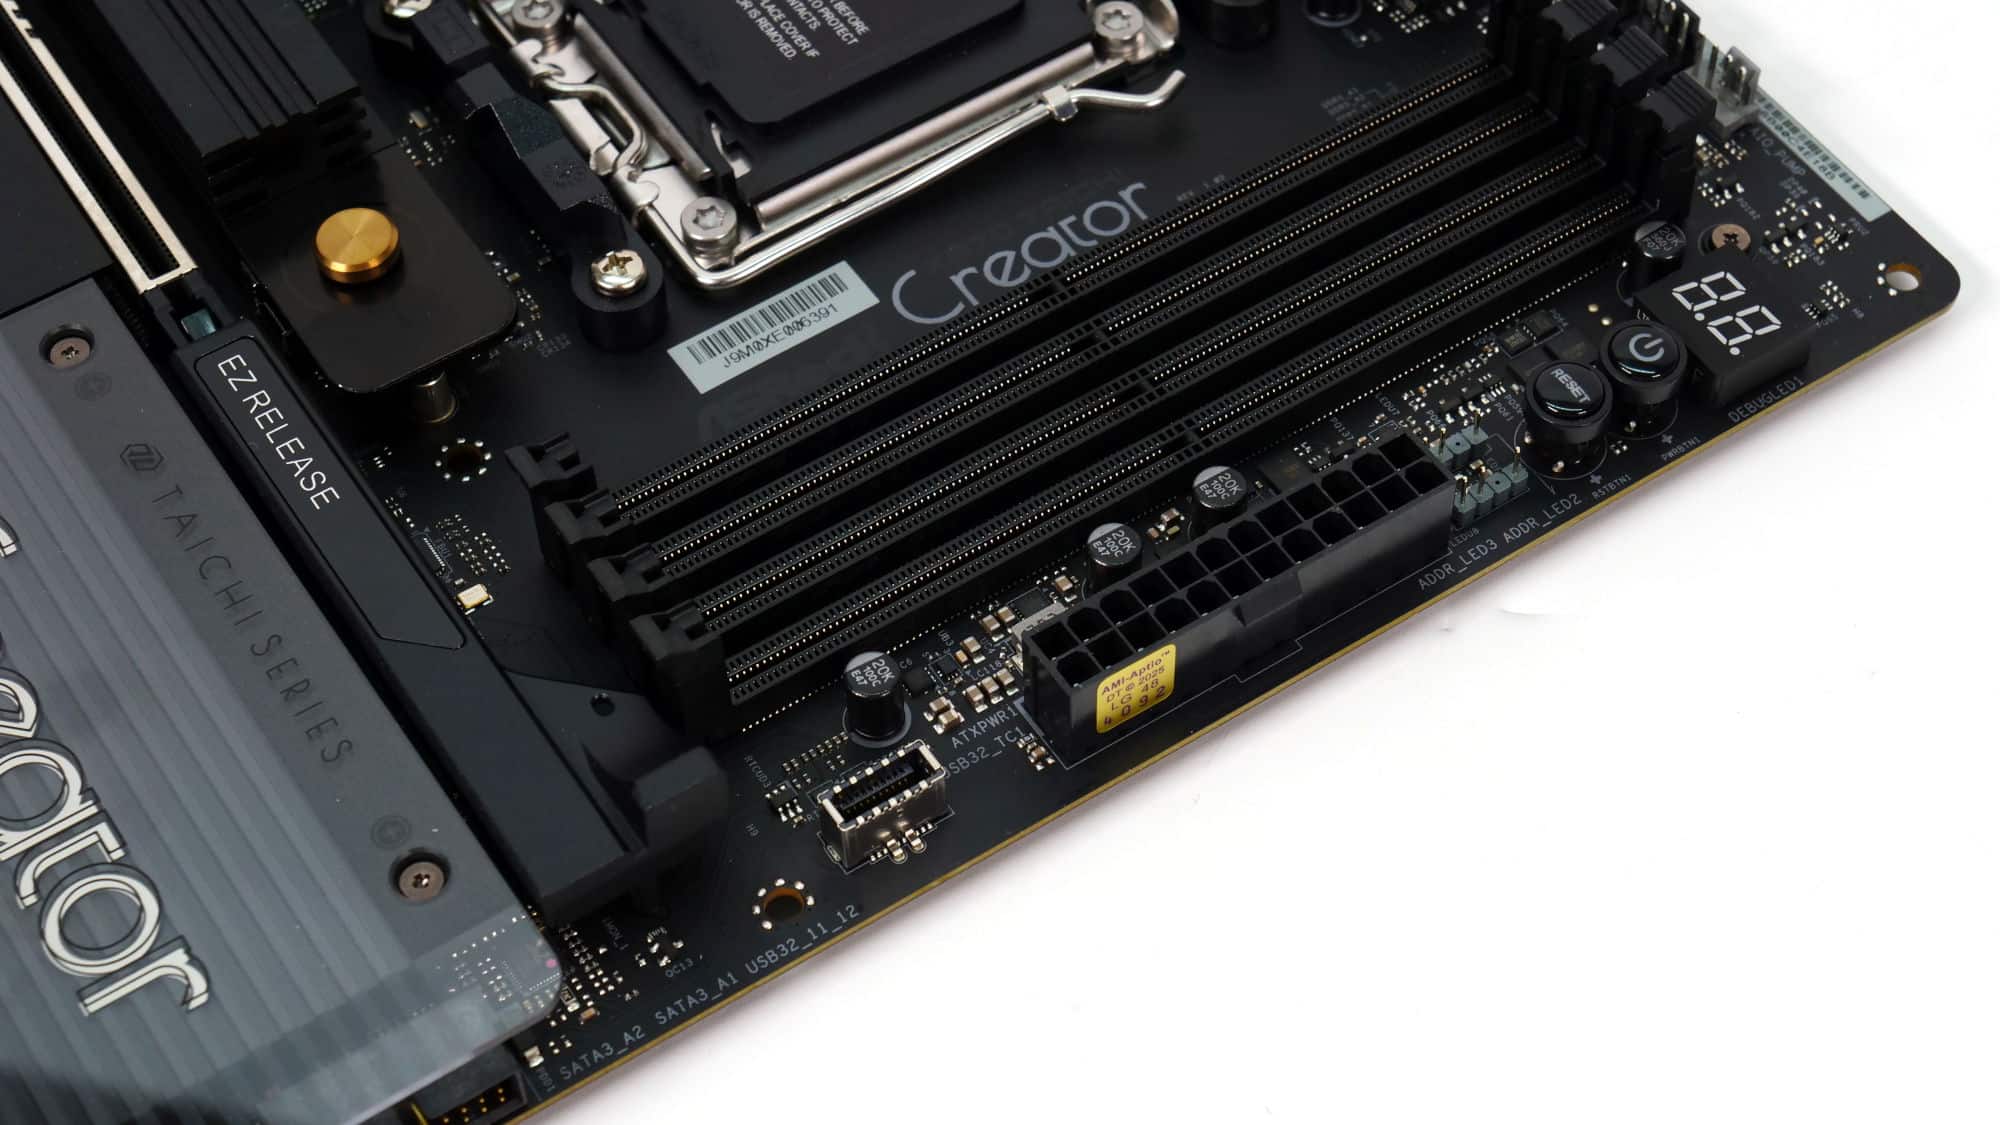
Moving further down, there’s the ATX 24-pin connector and a USB 3.2 Gen 2 Type-E connector that supports up to 36W of PD charging, perfect for powering phones or other accessories from your chassis’s front I/O.

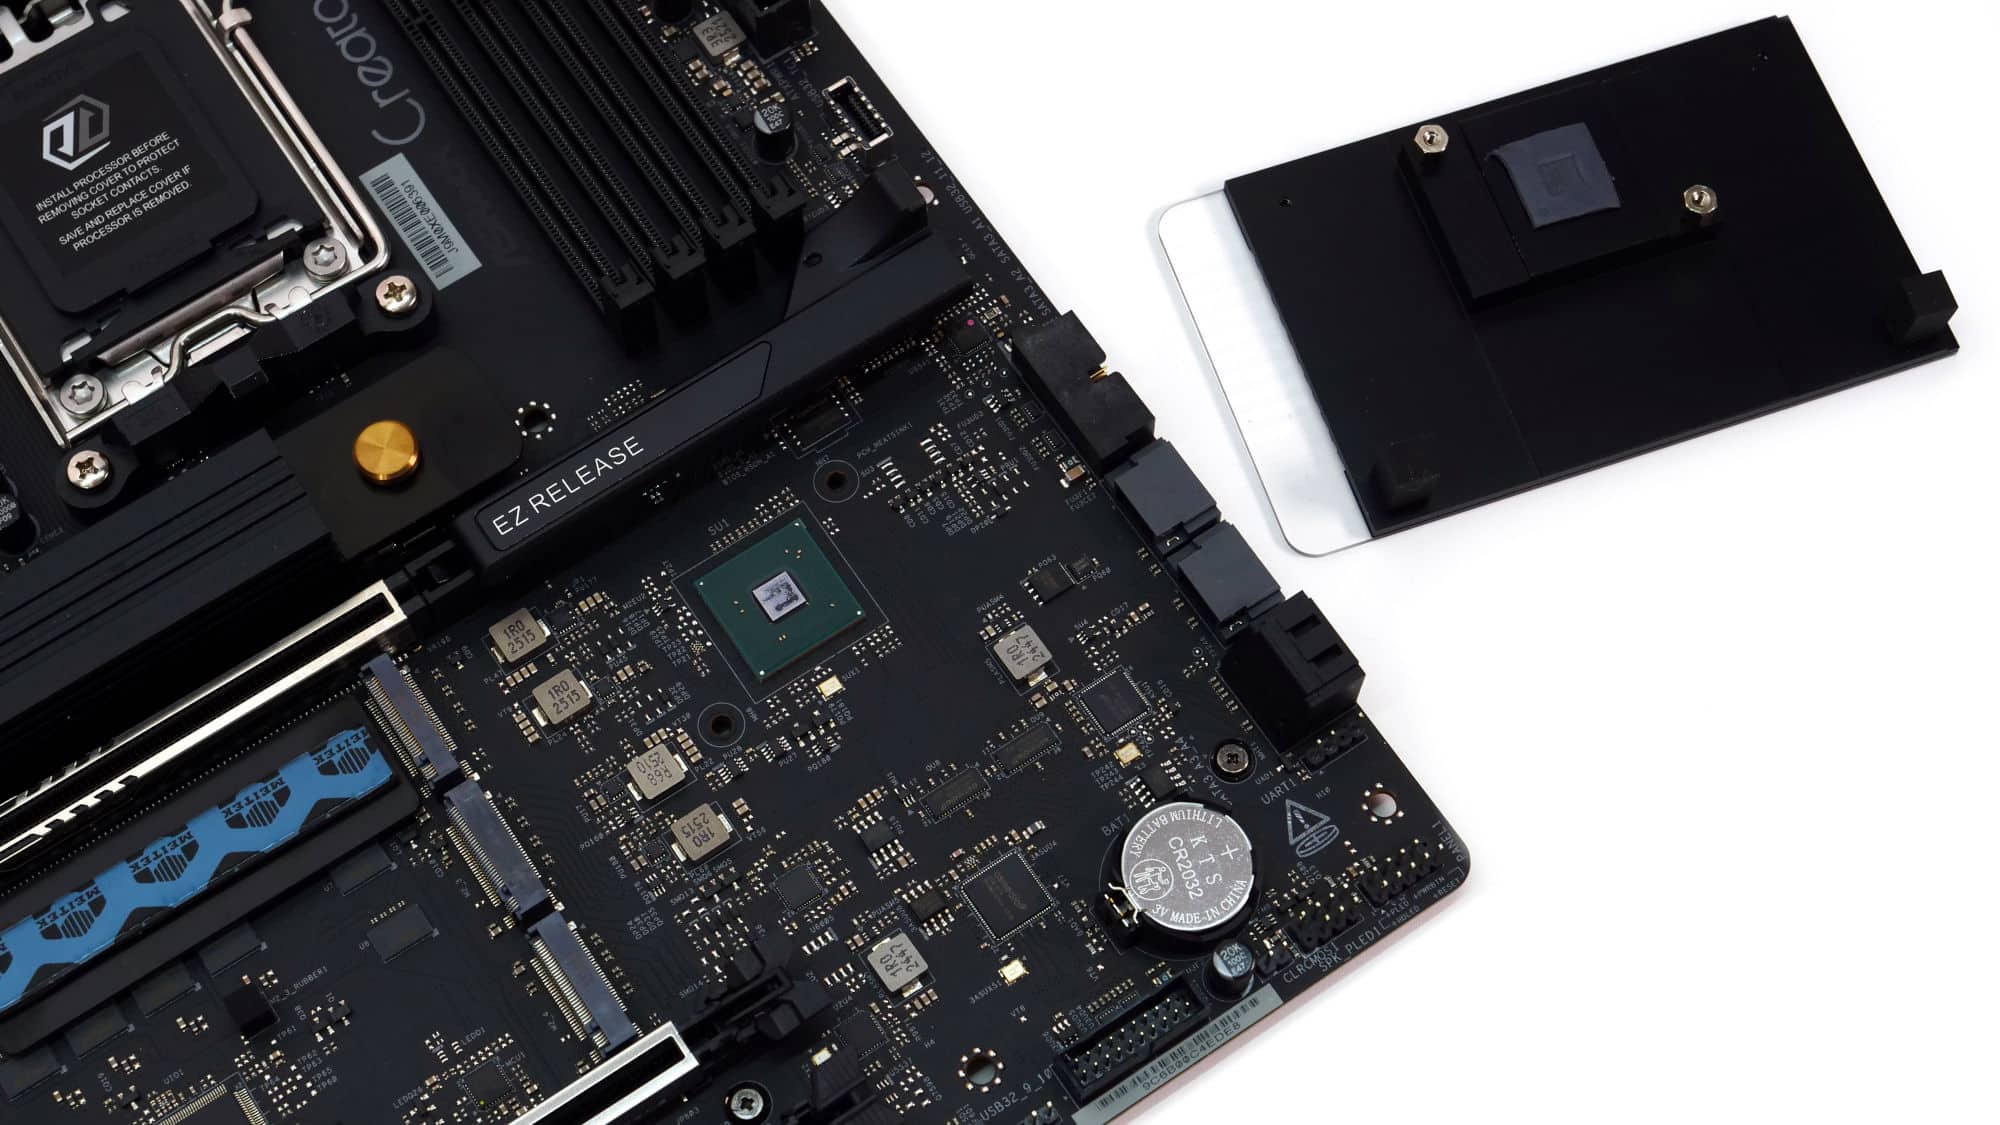
Right below the CPU sits the main M.2 slot, which runs at PCIe 5.0 x4 (128 Gb/s). Both the heatsink and drive retention mechanism are completely toolless, a design ASRock now uses across its lineup. Thermal pads are placed above and below the drive to help keep temperatures under control.
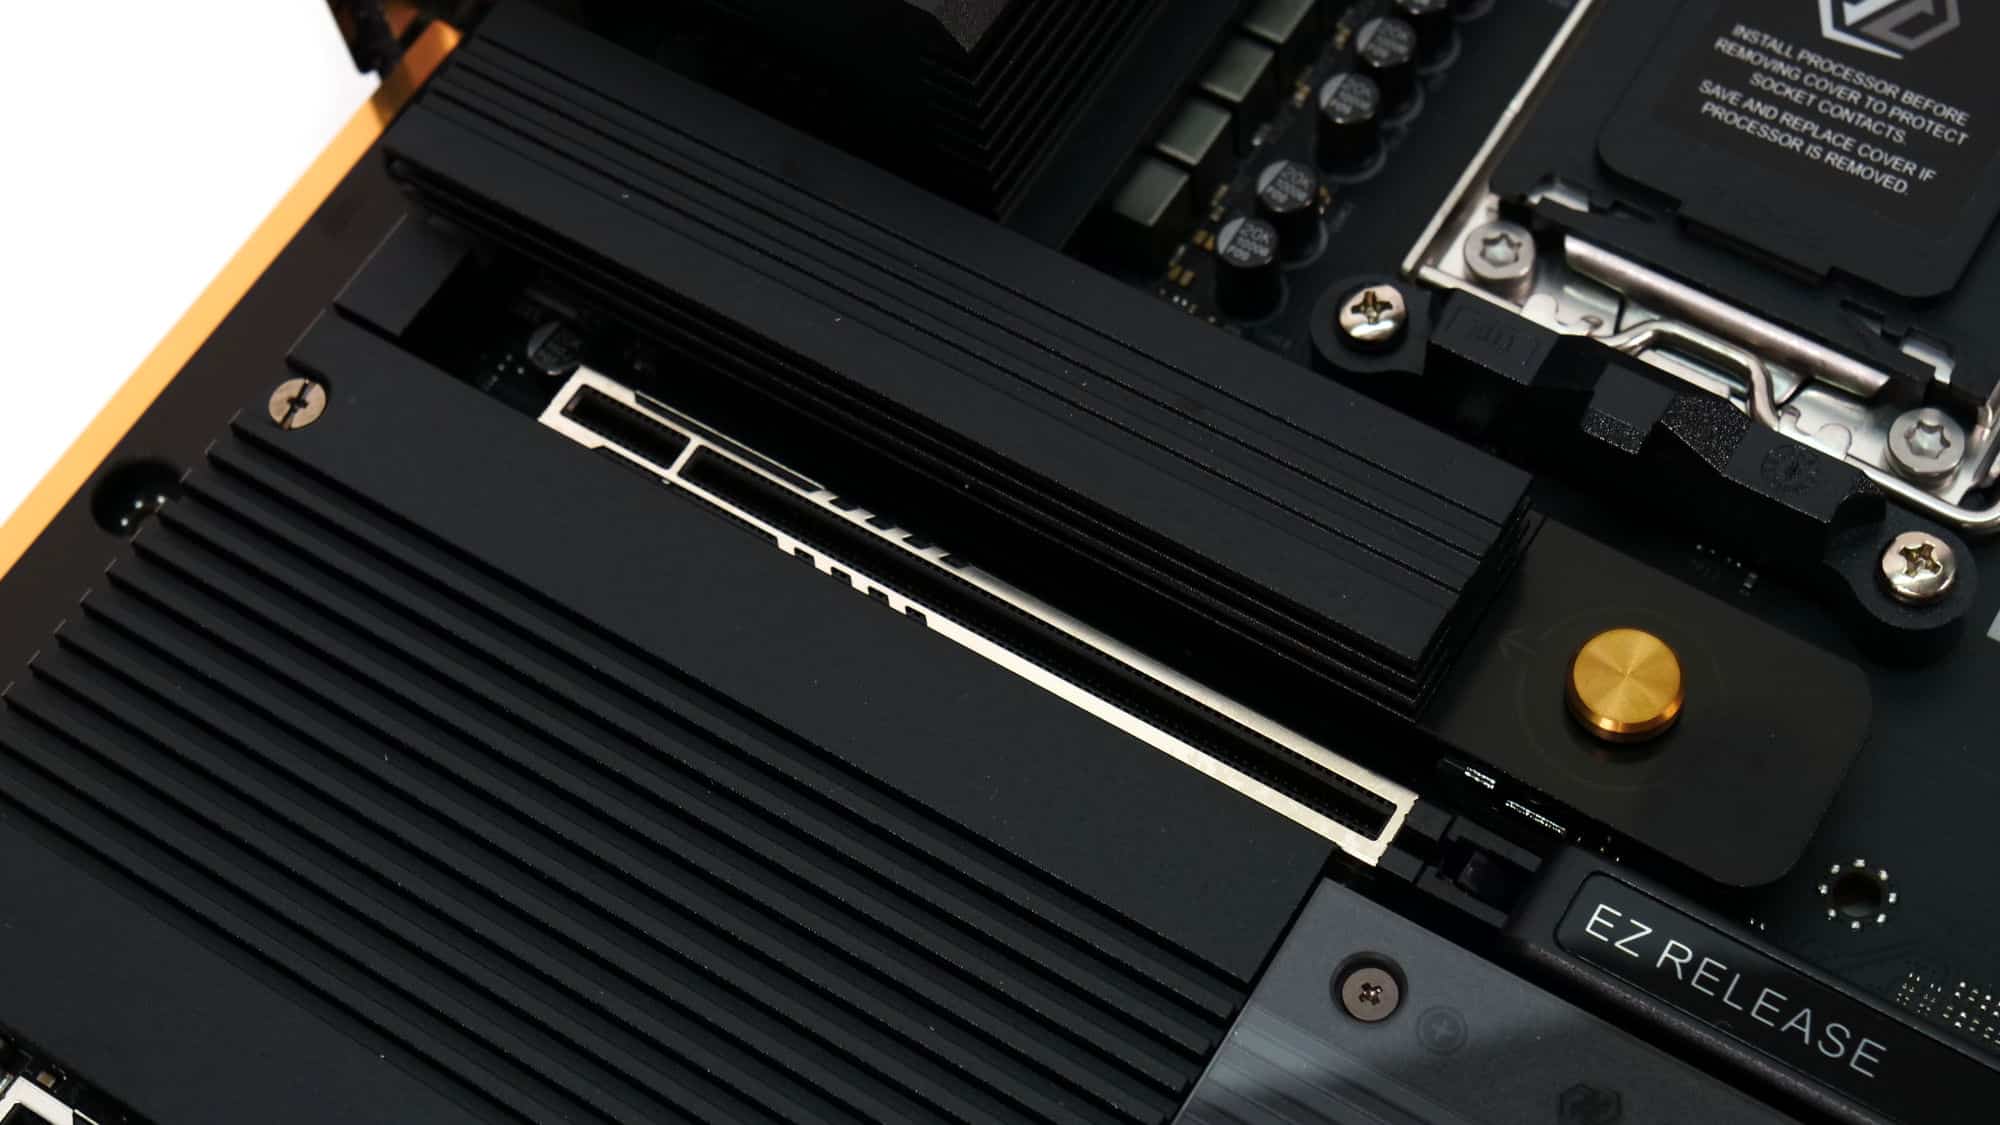
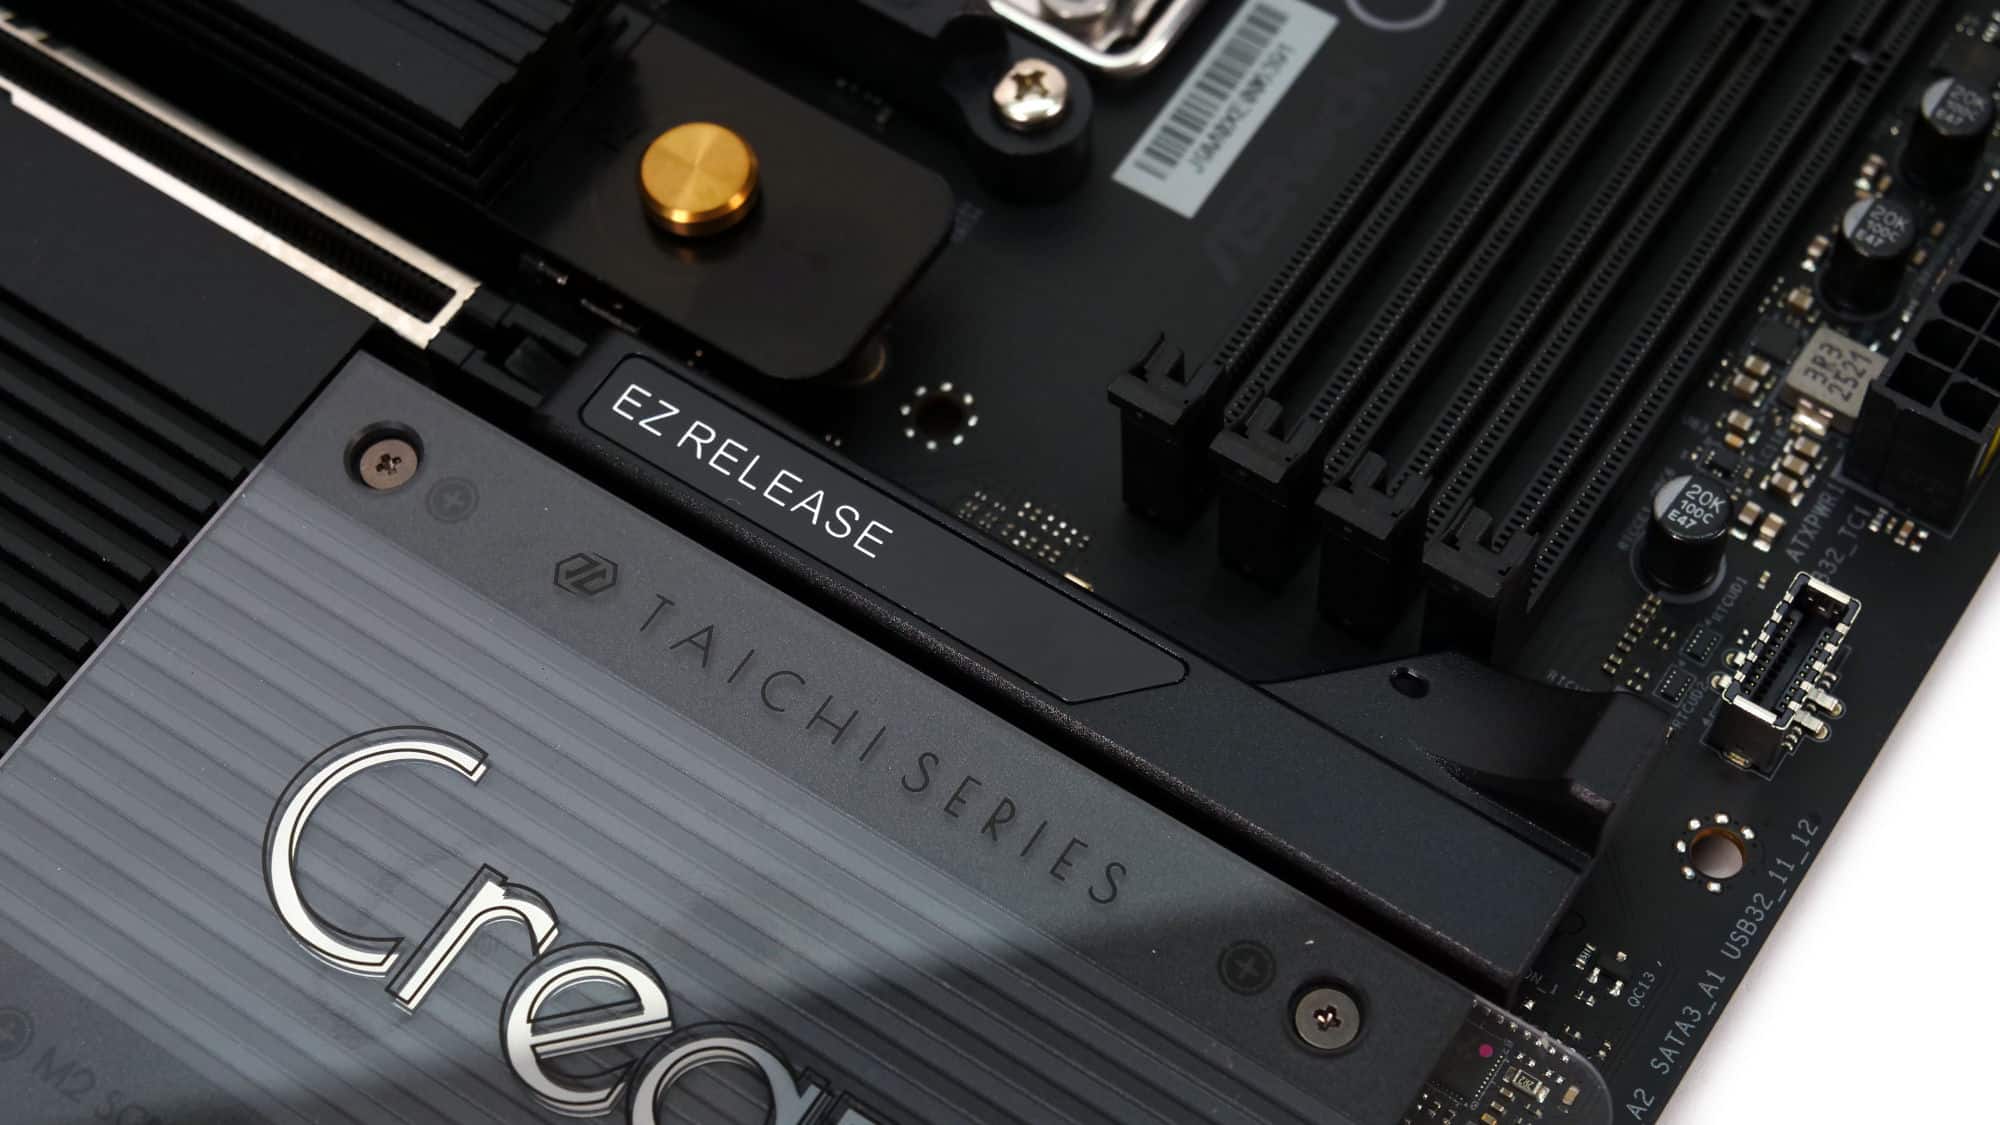
Below that, you’ll find the main PCIe 5.0 x16 slot using ASRock’s EZ Connect release mechanism, a feature we wish every motherboard included.
It supports speeds up to PCIe 5.0 x16 with 9000- and 7000-series CPUs, but with 8000-series CPUs, the slots run at either PCIe 4.0 x4 or PCIe 4.0 x8.
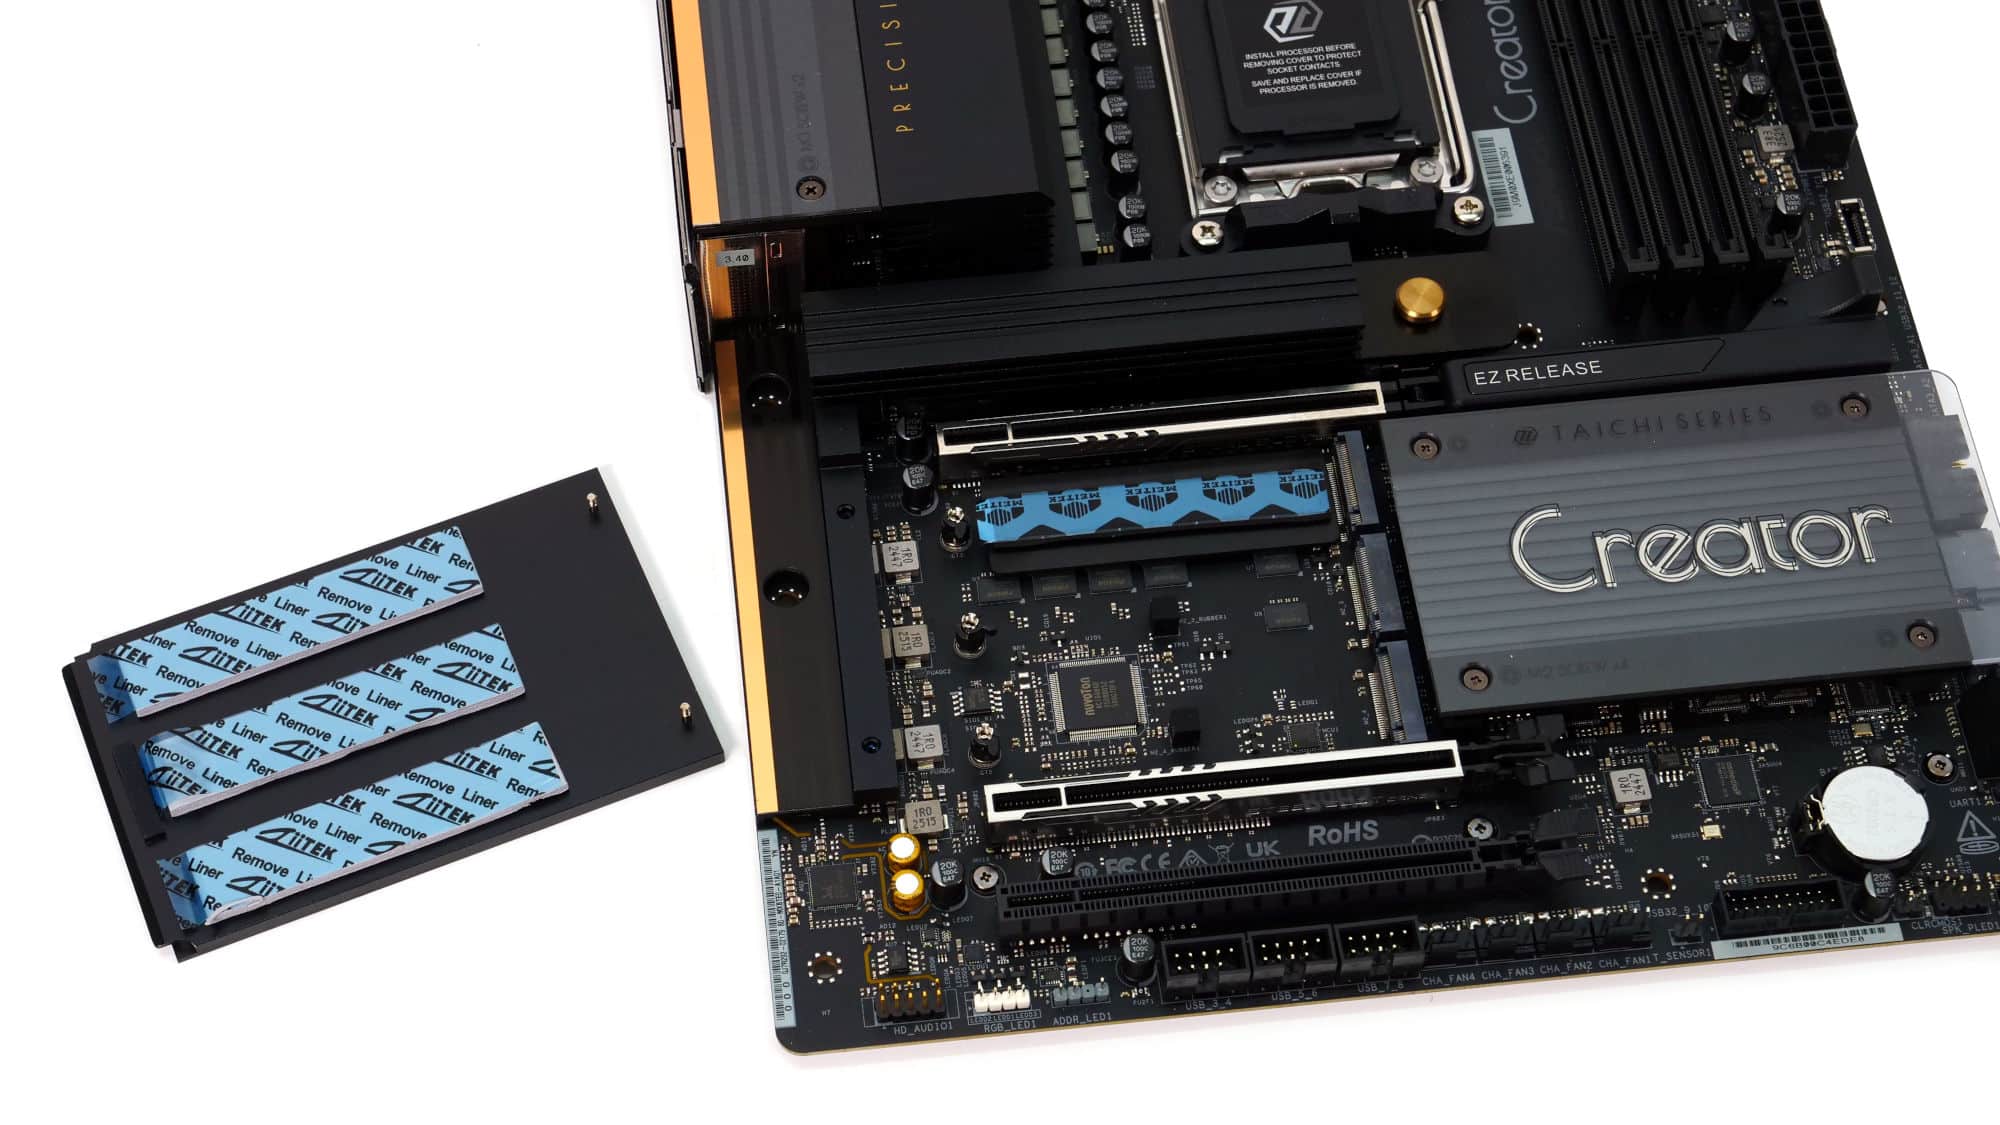
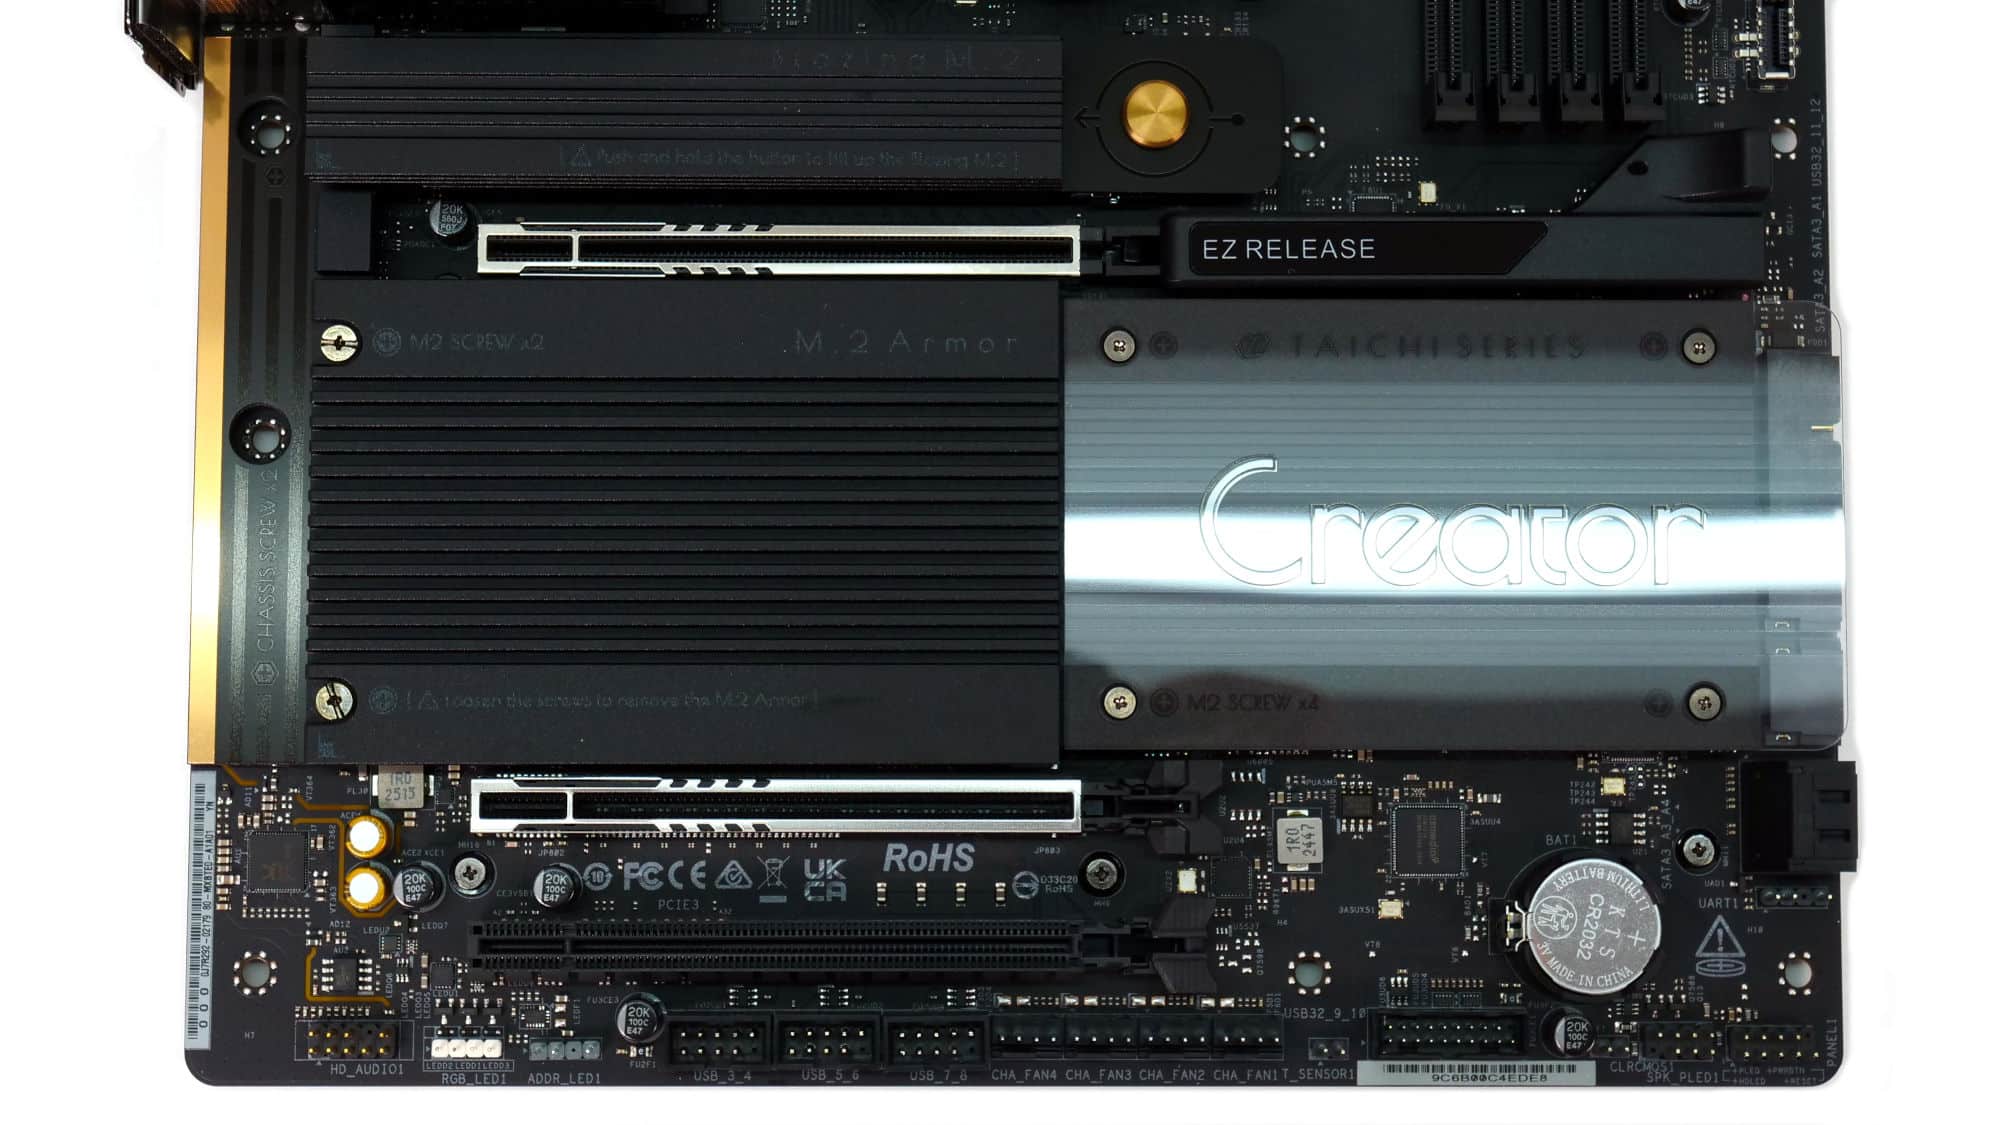
Two additional full-length PCIe slots surround the M.2 area. One is PCIe 5.0 x8 (the silver slot), and the other is PCIe 3.0 x4, though it uses an x16 connector for maximum compatibility. This layout supports two large GPUs, ideal for professional workflows that benefit from multi-GPU setups. It’s one of the most competitively priced boards to offer this flexibility.
Keep in mind there is some lane sharing: if the bottom M.2 slot is used at the same time as the bottom PCIe 3.0 slot, both will operate at x2 speeds.
ASRock’s website currently lists two PCIe 5.0 x16 slots, but one of them is actually x8, though it retains an x16 physical slot for compatibility.
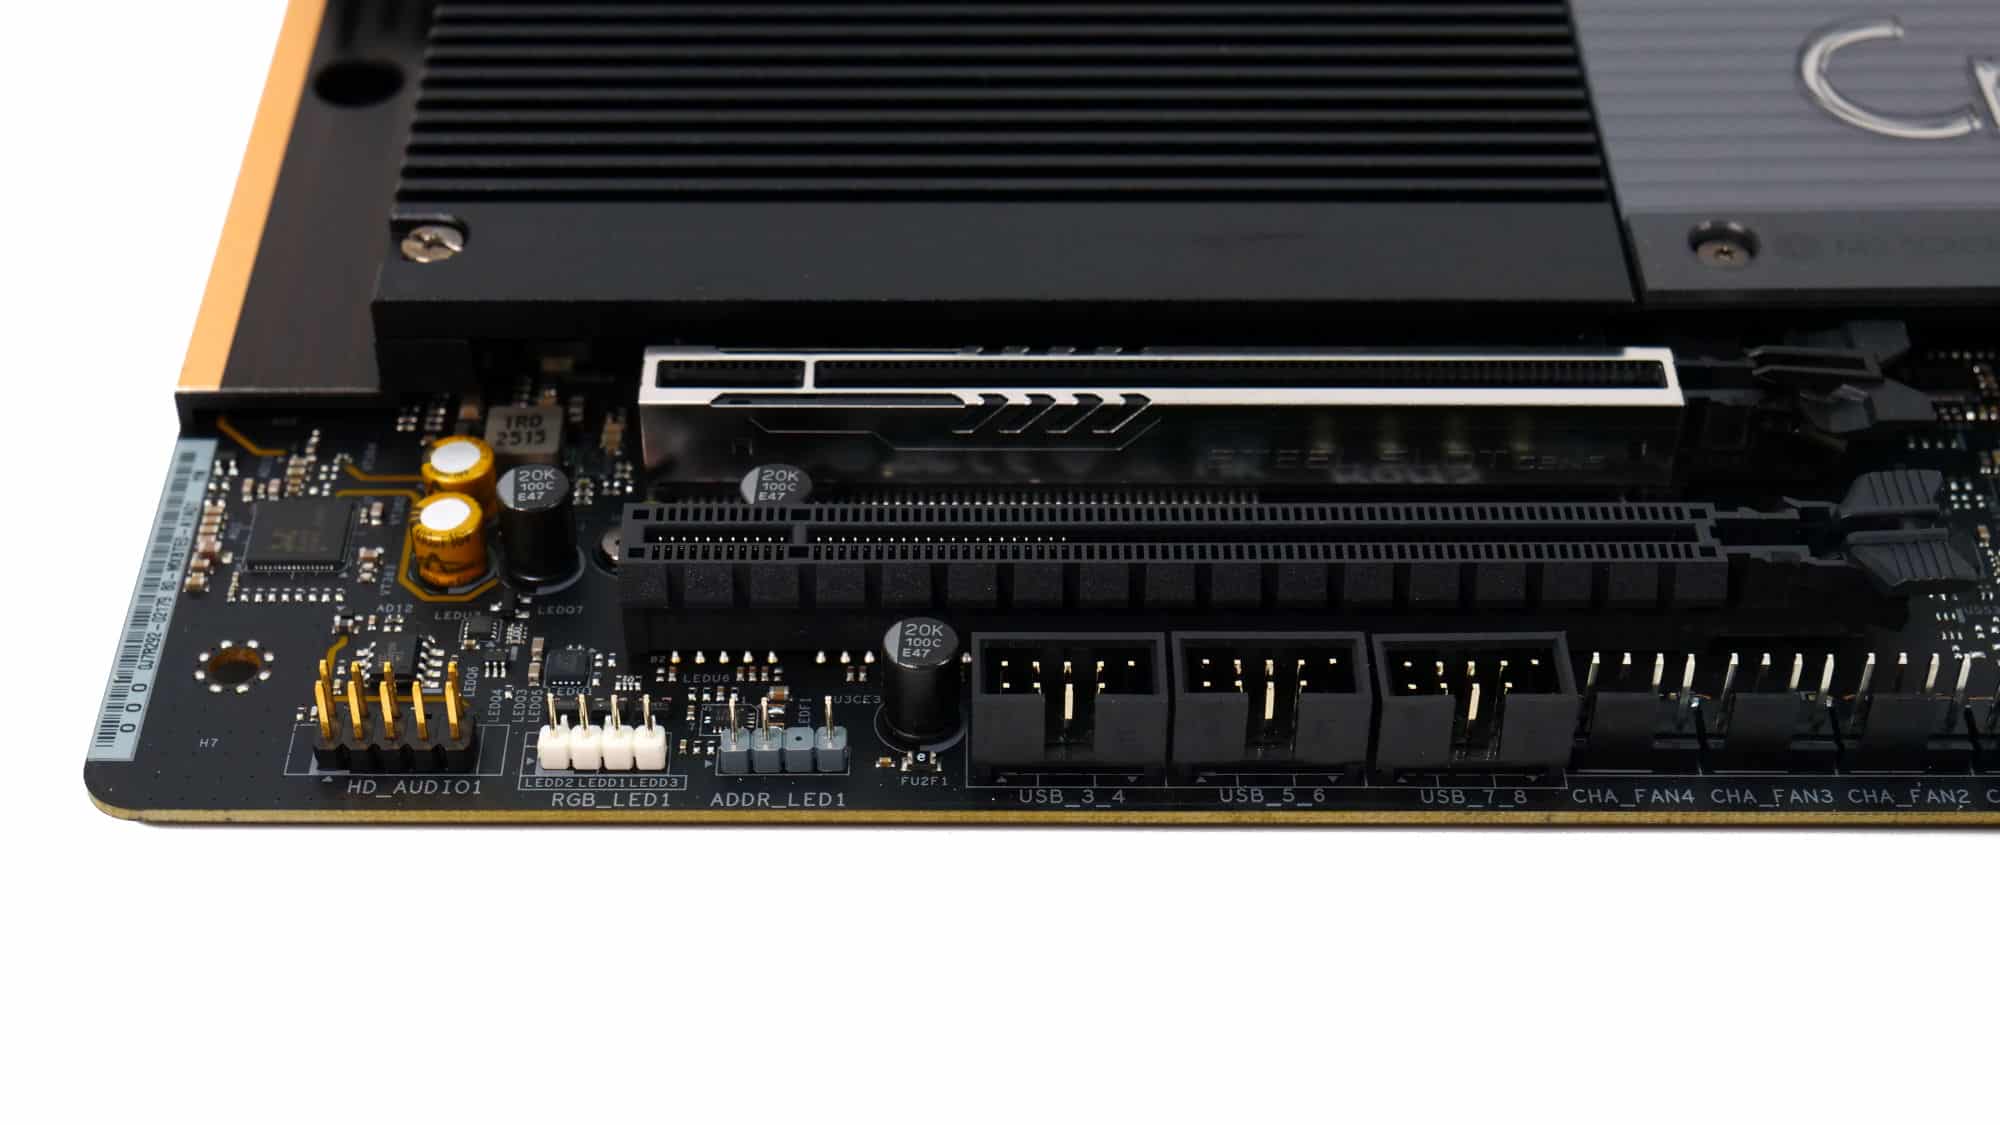

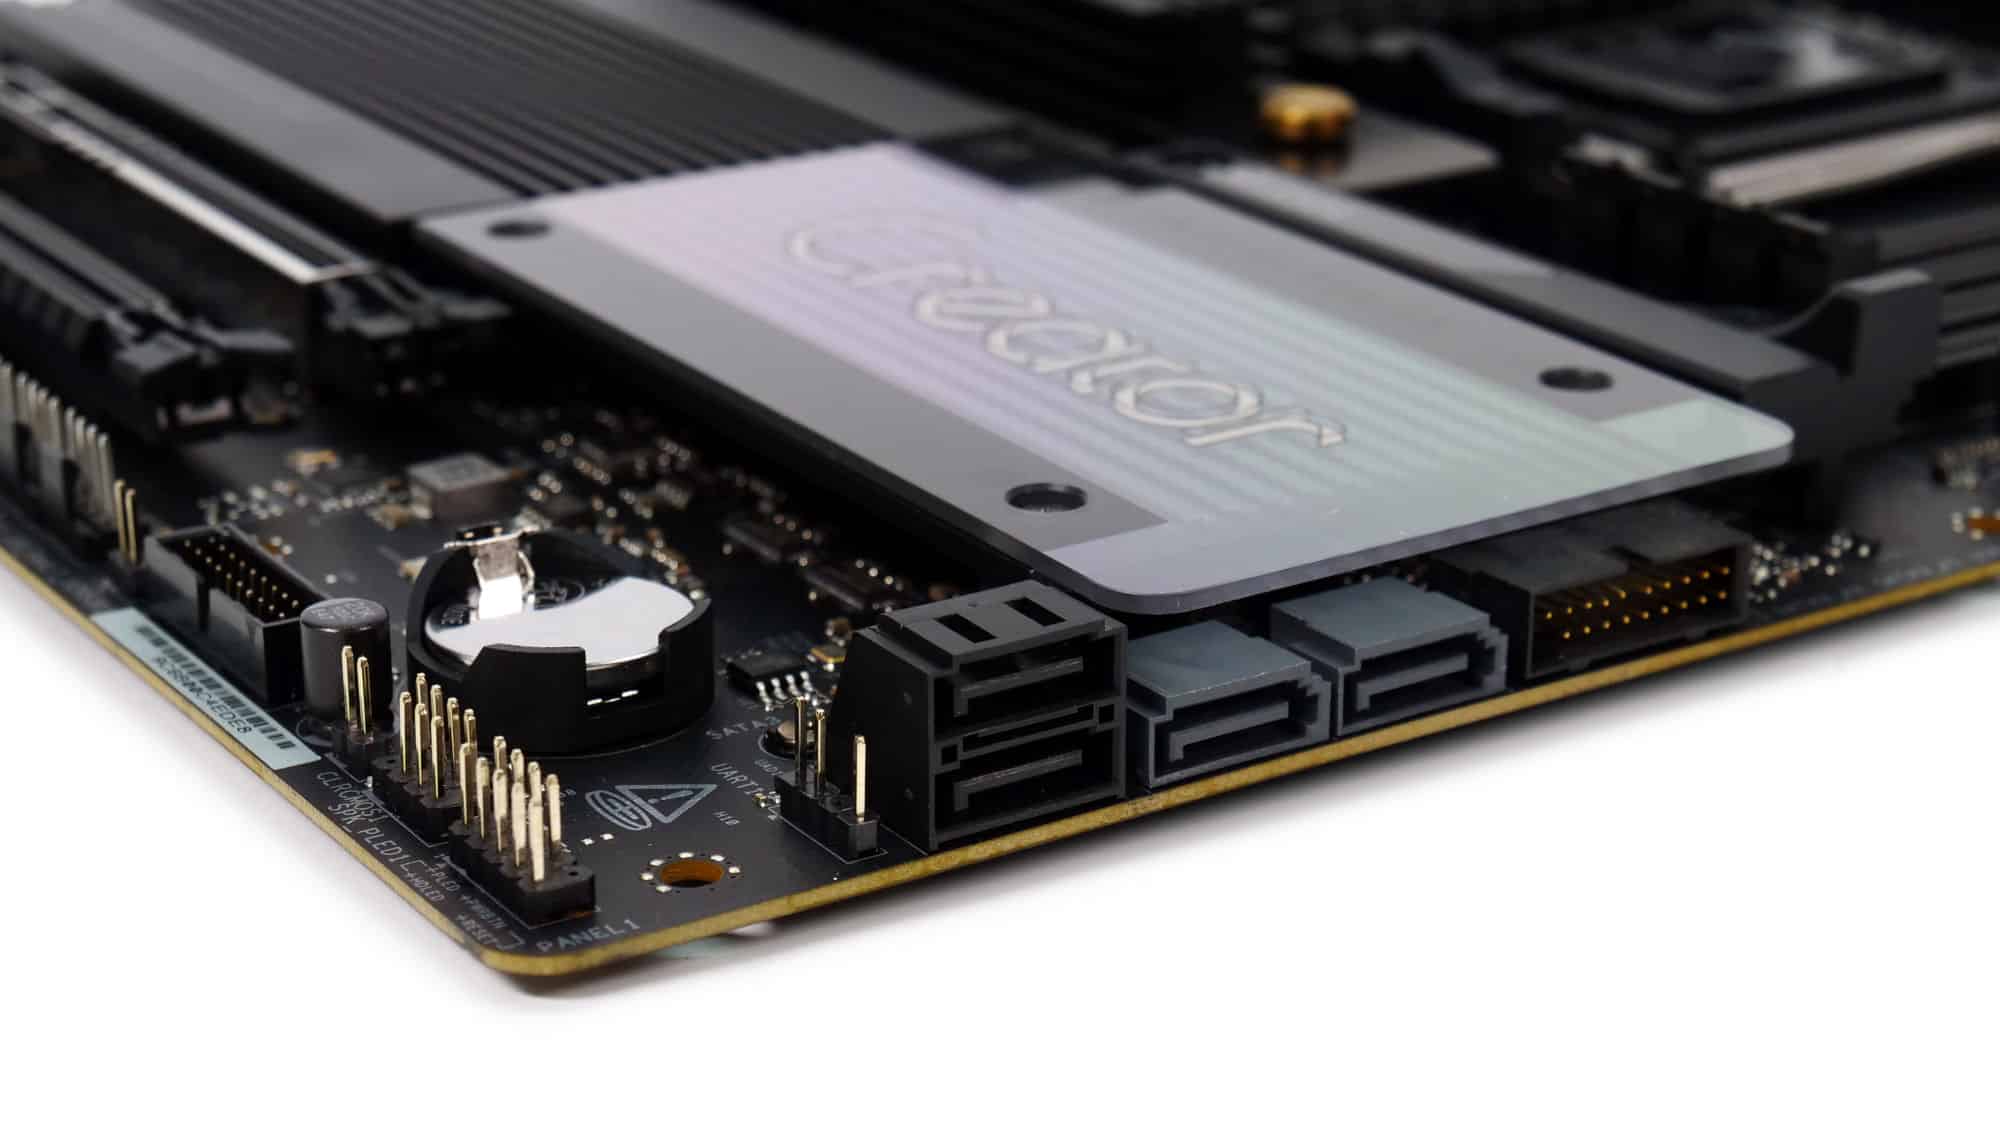
At the bottom of the board, from left to right, you’ll find: an HD audio connector, 12V RGB and 5V ARGB headers, three USB 2.0 9-pin headers, four PWM fan connectors, two additional USB 2.0 headers, a thermistor connector, a 19-pin USB 3.0 connector, a clear CMOS jumper, SATA 3 ports, a Power LED and Speaker header, and the front I/O pins. Next to the SATA 3 ports sits a UART connector that looks like a 5V ARGB header, but it’s not! The only giveaway is the color of the plastic base: 5V ARGB headers are light gray.
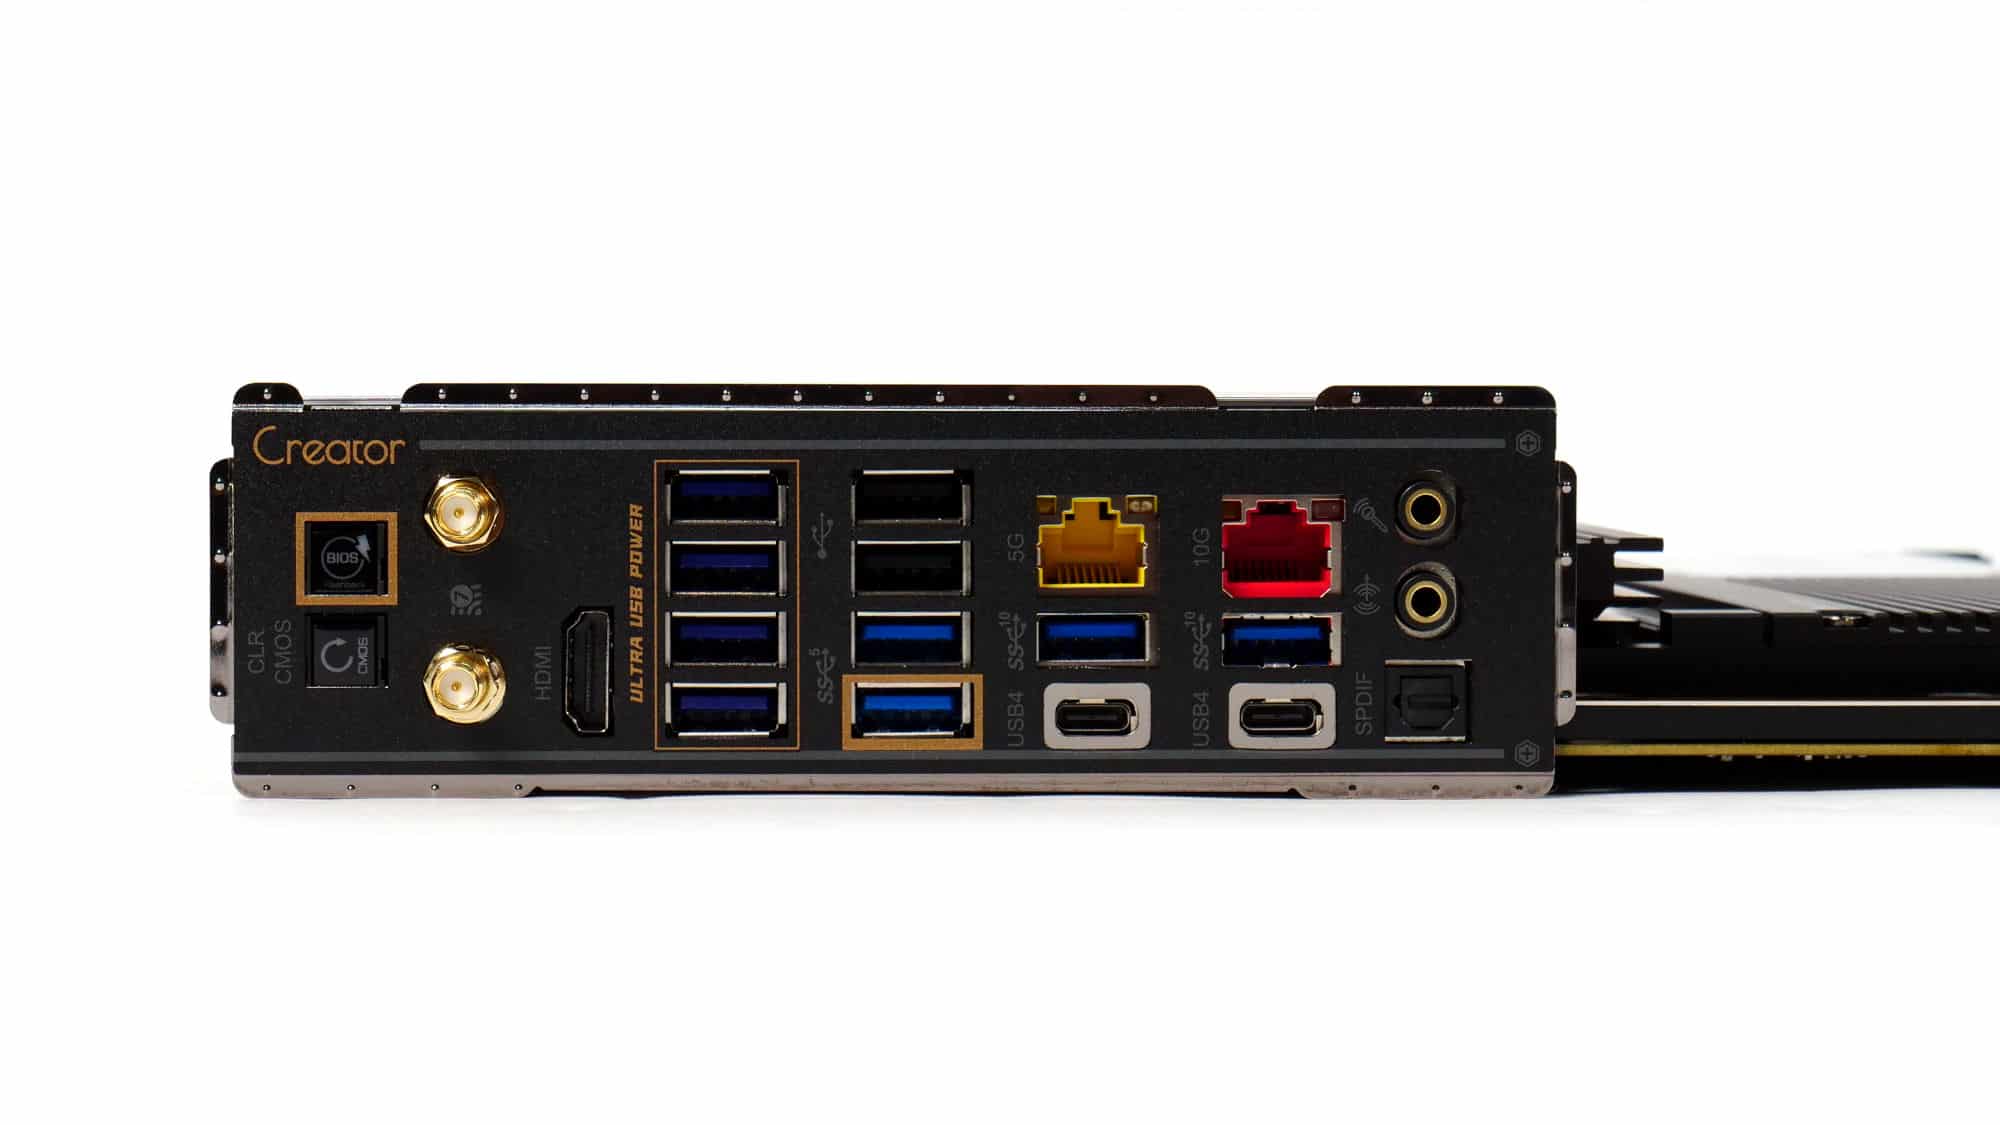
The rear I/O is fully loaded, one of the first boards to include both 10GbE and 5GbE Ethernet ports. Starting from the top, there are two antenna connectors, an HDMI port, six USB 3.2 Gen 1 Type-A ports (5 Gbps, with four supporting USB Ultra Power), two USB 2.0 ports, two USB 3.2 Gen 2 (10 Gbps) ports, two USB4 ports (40 Gbps), the two Ethernet jacks, a line-out, a mic-in, and an SPDIF out port.
To drive a Type-C monitor from the rear USB4 ports, you’ll need an AM5 CPU with integrated graphics (iGPU). Discrete GPUs cannot pass video through these ports. On Ryzen 8000-Series CPUs, note that the USB4 controller link is limited to Gen4×2 rather than the full bandwidth.
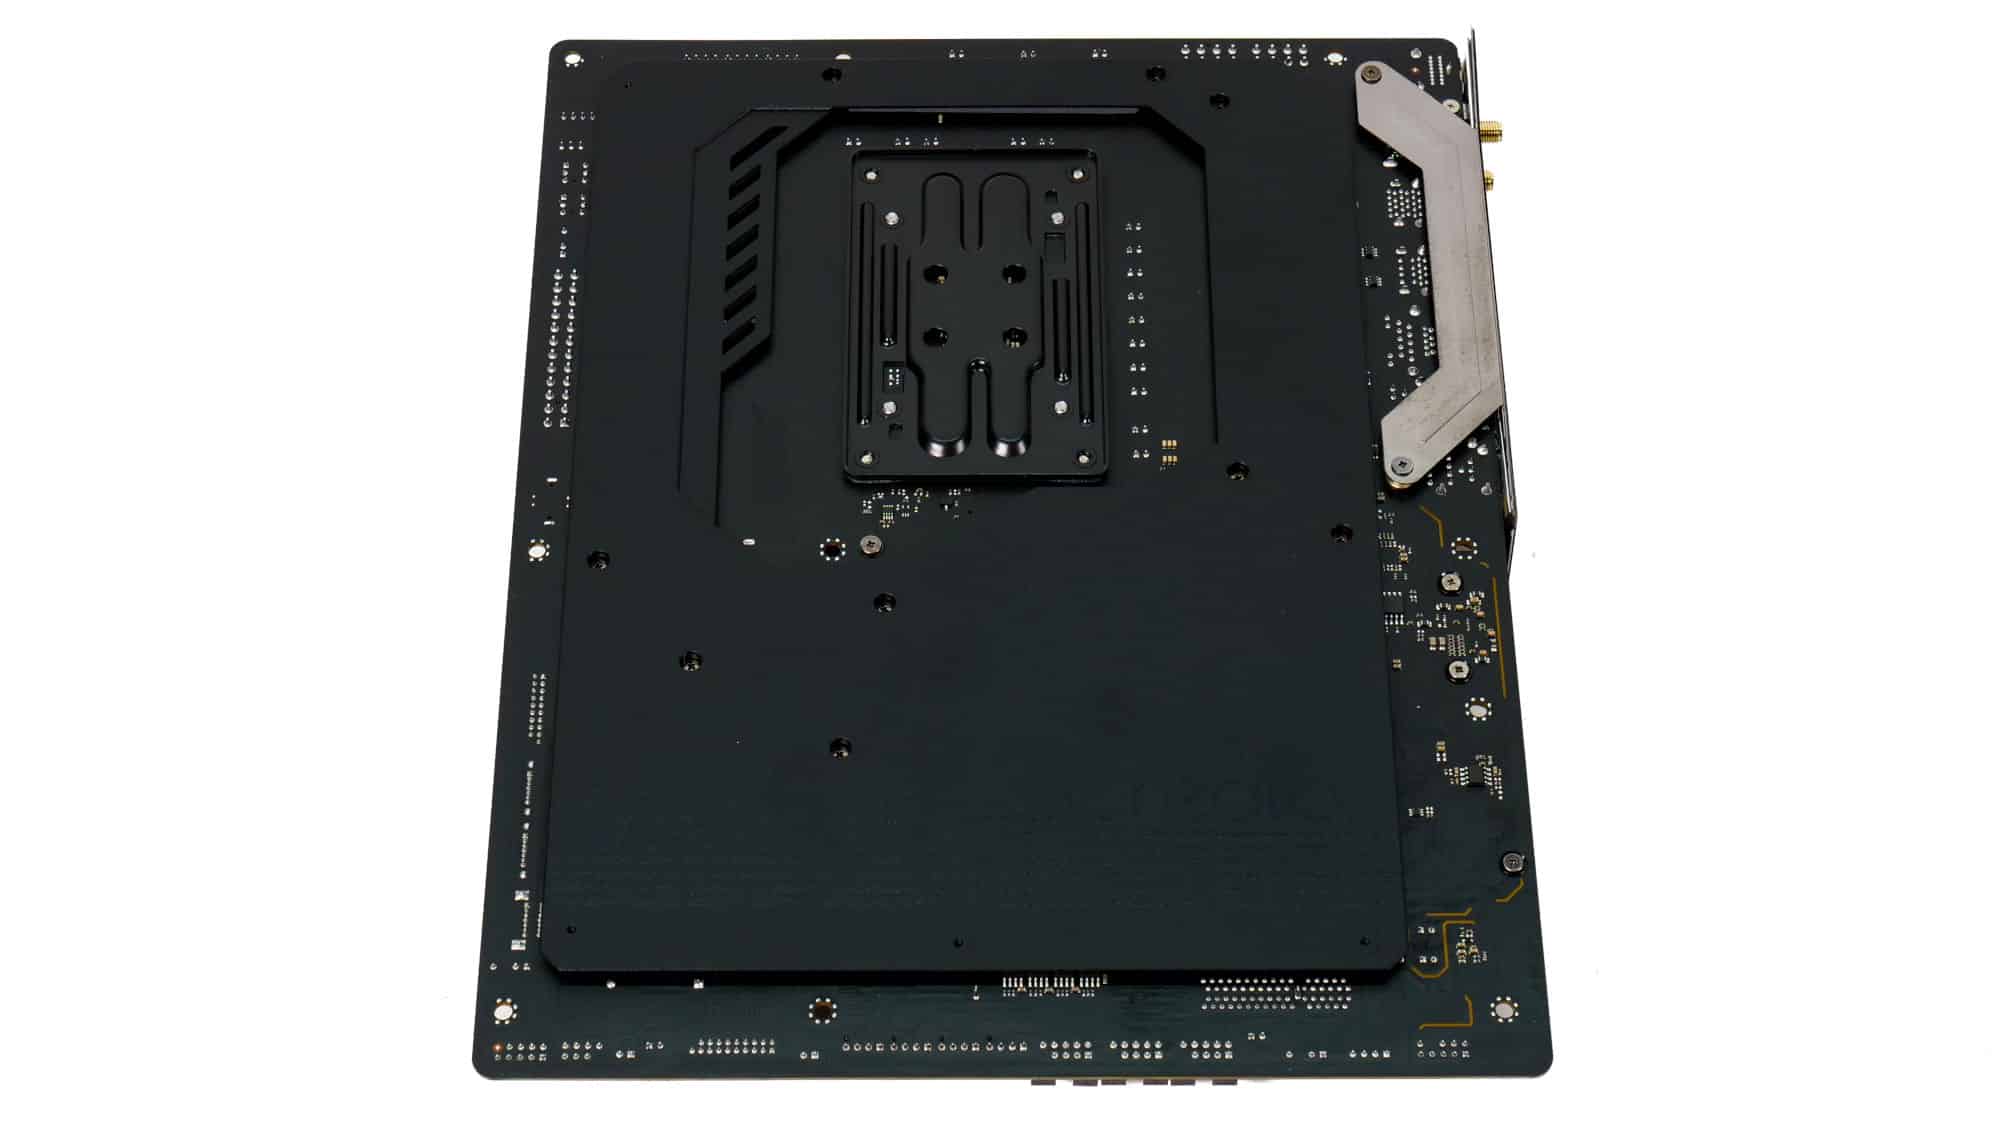
The back of the motherboard features a large metal plate for additional heat dissipation, with thermal pads helping conduct heat away from the M.2 slots and VRMs.
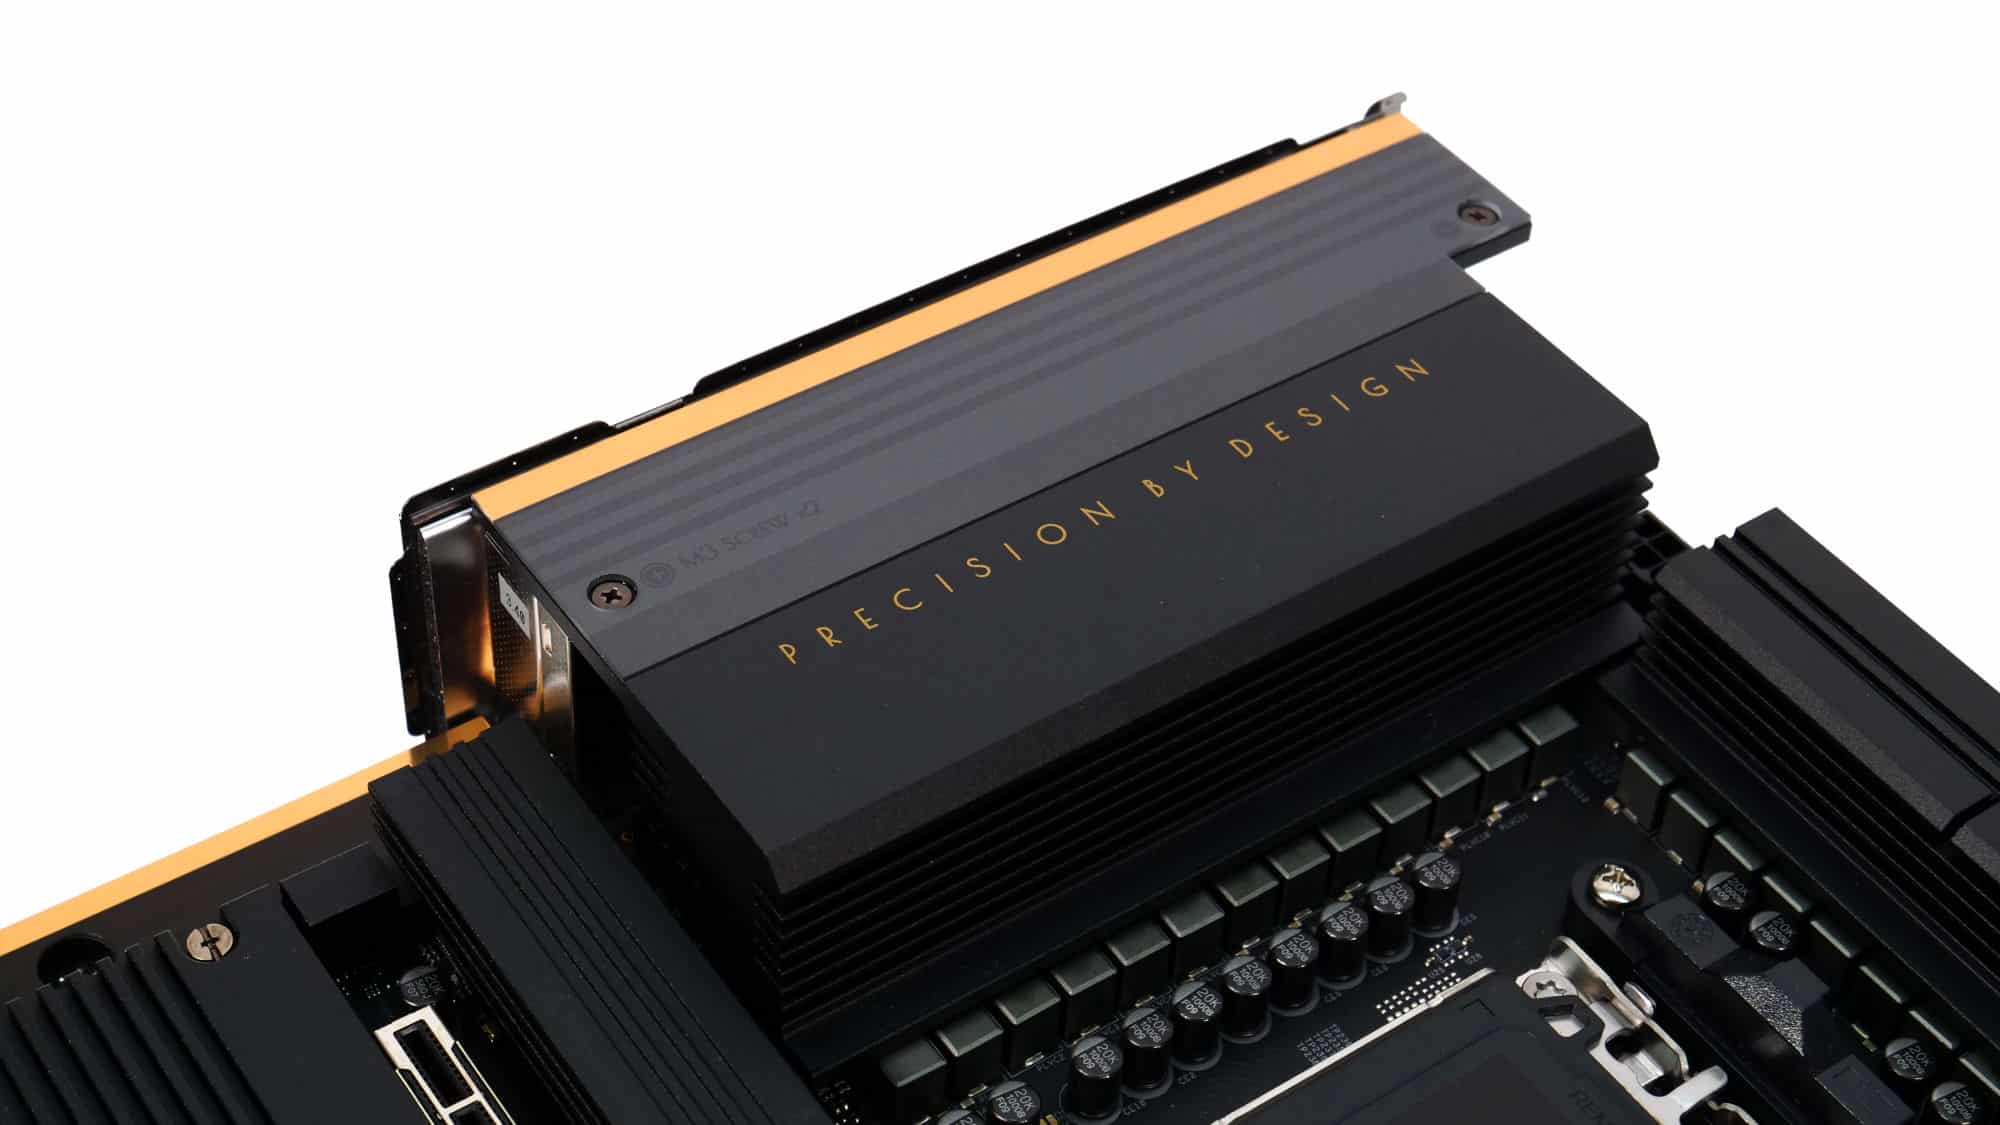
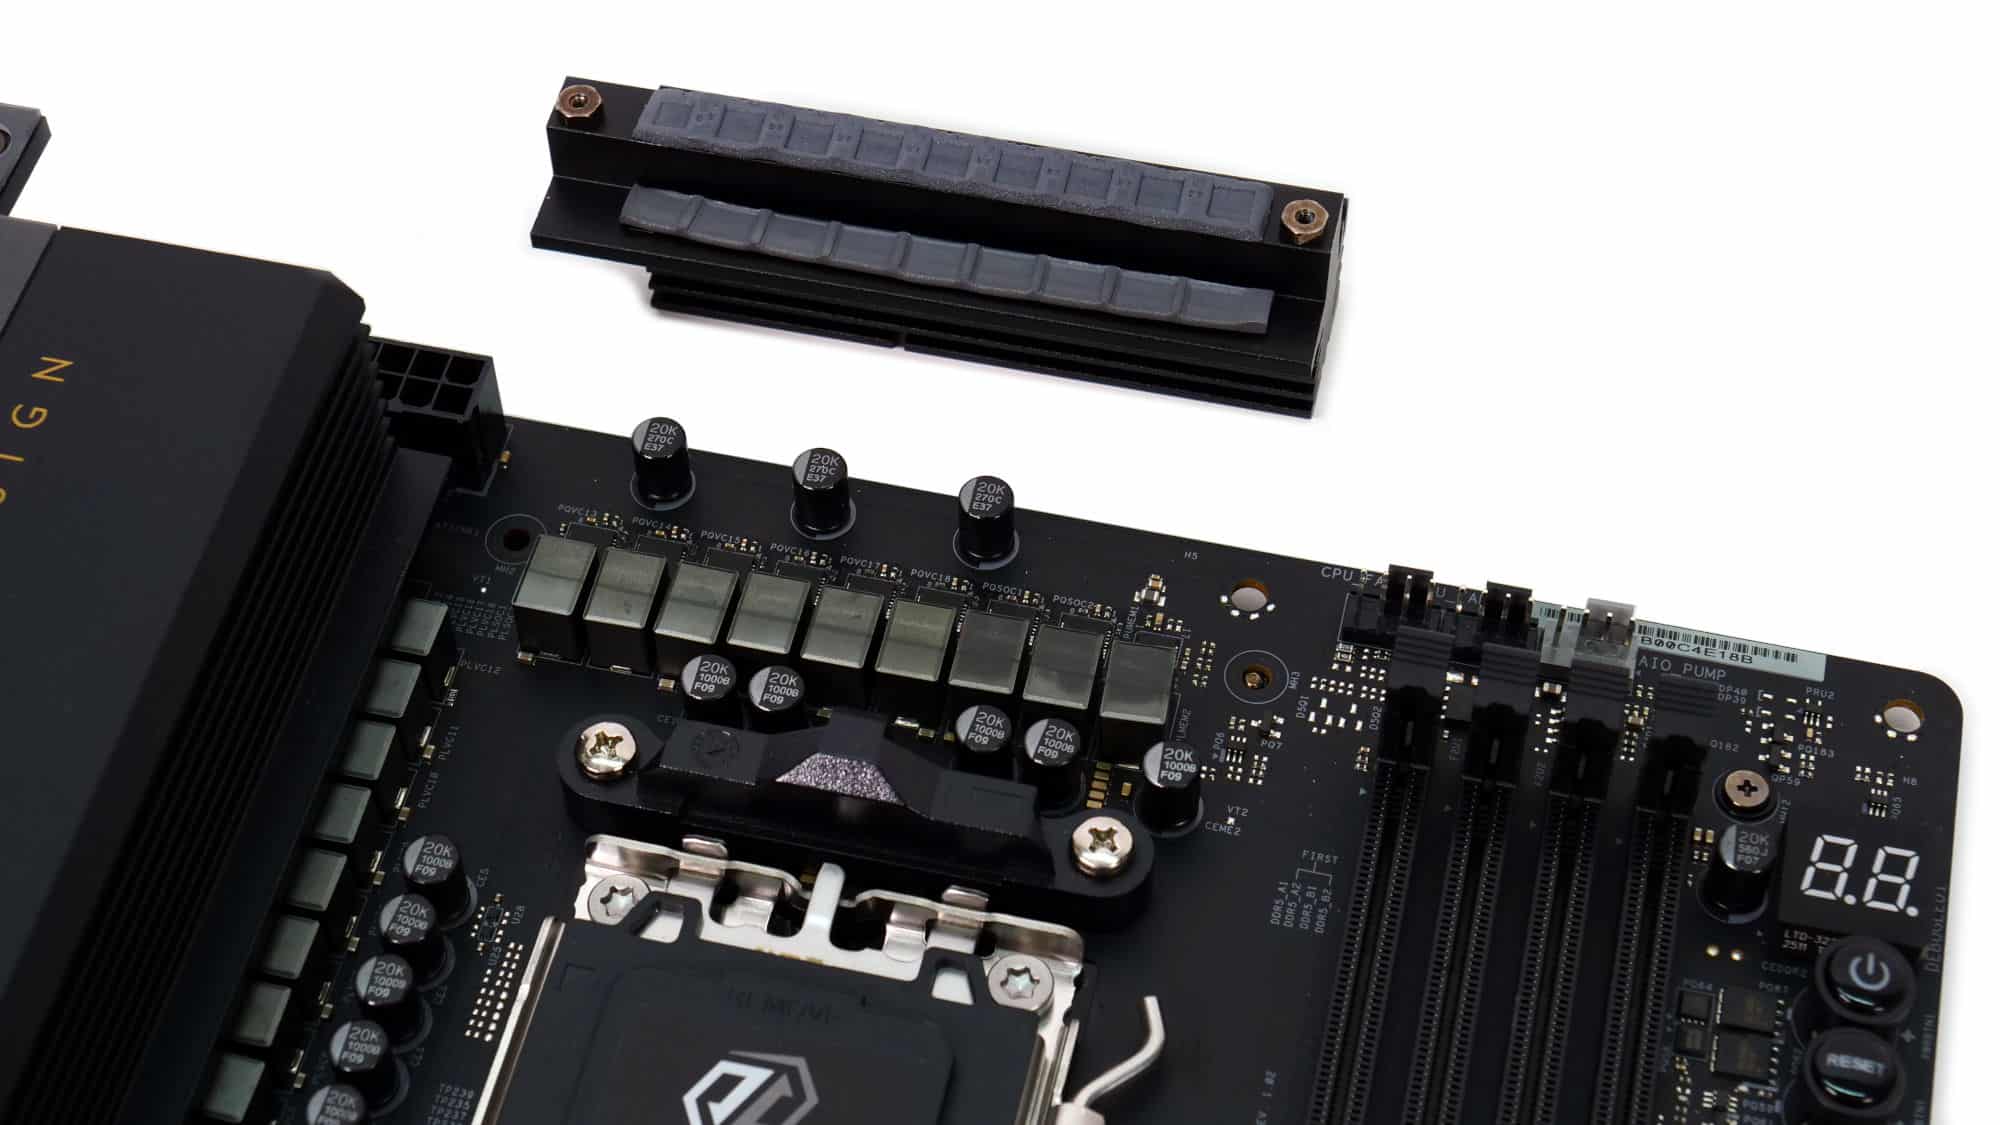
Before moving on, let’s take a quick look at the heatsinks. The main one sits next to the rear I/O, another above the CPU socket, and the last one alongside the three M.2 slots.