Clean Install of Windows is quite an easy process. All you need is a boot medium (USB flash drive, DVD), the right key to enter the BIOS, or any other available way, and you are set for success. While this is the most effective way to a fresh start comes with a caveat. All your files, programs, and games will be lost. Although there is the “Reset this PC” option and keep your files, Clean Install is still the way for many of us. The problem comes when you can’t access your Desktop (explorer). Sometimes Windows won’t boot, black Windows screen, etc. Of course, you should first try Safe Mode (if applicable), sfc/dism commands, System Restore, and “Repair this PC,” even by your boot media.
But what about when these don’t work and you want to access your valuable files? There are ways, like making your drive an external one, Linux Live, etc. Although these might work, they need extra devices, some basic technical skills, etc. So, is there anything else to try before Clean Install? Well, yes. But it doesn’t always work if some requirements don’t apply. You can try Custom Install of Windows. It has the same philosophy as the Reset or Upgrade option but is performed by your boot medium. All you need is a Windows boot medium, and follow this guide.
How to
- First of all, you should already have available a Windows boot medium. There are several ways to obtain it, but the most popular is the Media Creation tool by Microsoft. You download the .exe and follow the procedure.
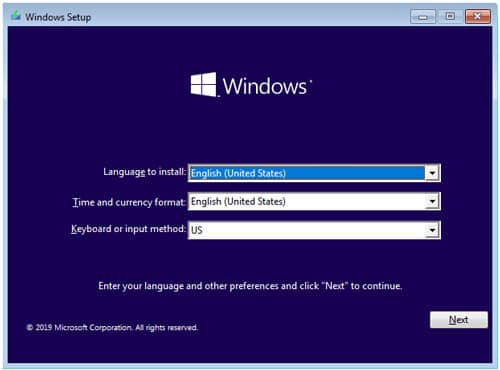
- When ready, you plug in the boot medium and access your BIOS. There are several ways to do it, but the ESC or F10 key is usually used.
- You should choose your medium as the boot device.
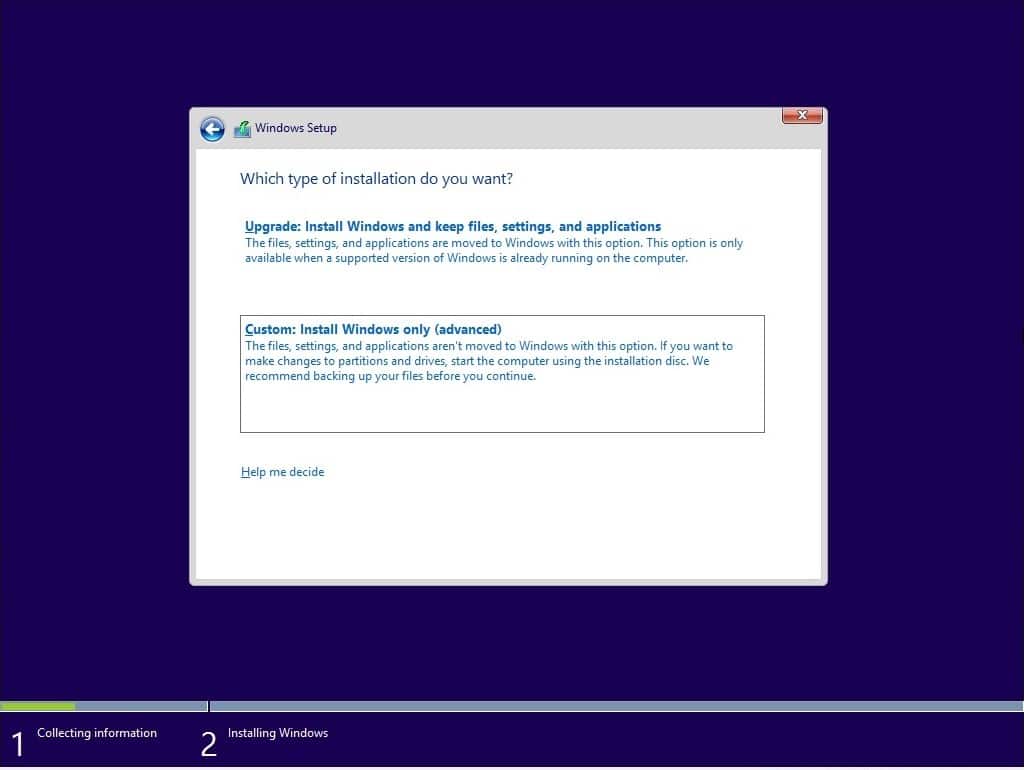
- Then you follow the same procedure as in the Clean Install. You select Custom.
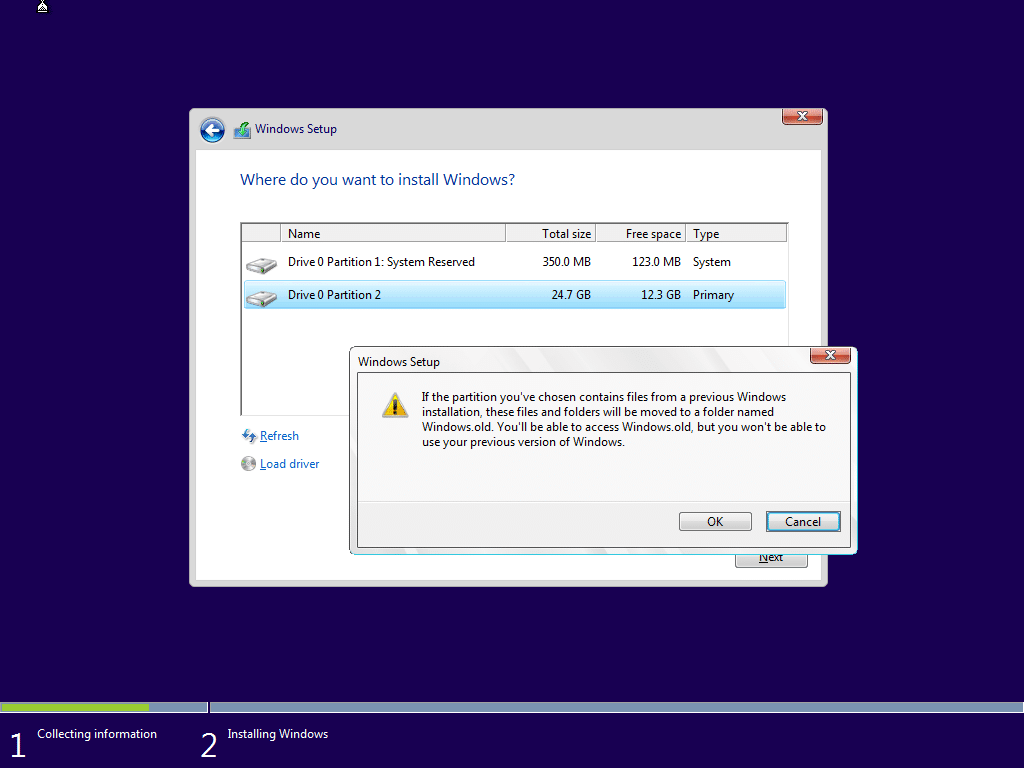
- When you choose where to install Windows, just be careful. You should select only the one you want for Windows Install if you have multiple drives. You choose the correct drive and press “Next,” nothing else. No delete, no format, no new, no the System Reserved partition or any other partition of the drive you chose, etc. Just Next. If everything is OK, the installation wizard will warn you: “If the partition you’ve chosen contains files from a previous Windows Installation, these files and folders will be moved to a folder named Windows.old. You’ll be able to access Windows.old, but you won’t be able to use your previous version of Windows“. You should proceed only if you receive this warning, and don’t delete or format the drive. If you delete or format it, you will lose all your files. You don’t want this. It would be best if you had them so you select only Next. Depending on your settings (e.g., RAID) and several other reasons, this might not be applicable. If the Next is grayed out or the installation wizard doesn’t let you continue, this method doesn’t apply to you. It would be best if you chose other ways, unfortunately.
- If everything is OK, you may continue as you would in a Clean Install.
- After entering the Welcome Screen and your Desktop, find the Windows.old folder, which is usually located in C:\ Local Disk.
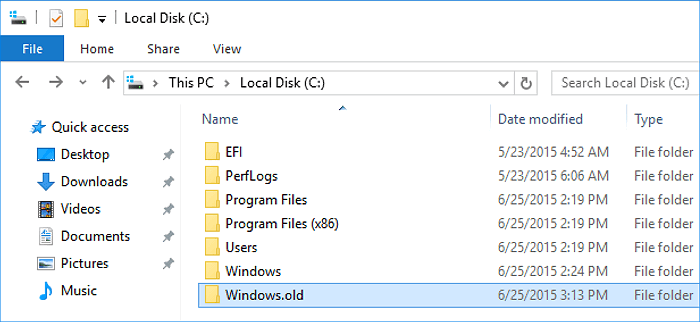
- All your files should be there if everything is OK. Check your files and copy/paste them to the folders you want.
That’s it. You may continue to set up your Windows OS as you would like. Please remember that you should try this method only if you have tried all the other available methods and only if you receive Windows.old warning. It doesn’t always work as expected.