Bootable USBs are mostly used to install operating systems. In this article I will show you how to create one easily and fast, through the Rufus application.
A bootable USB is a USB drive that contains a bootable operating system or recovery software. It can be used to start a computer and run the operating system or software directly from the USB drive rather than from the computer’s hard drive. This can be useful for installing an operating system, troubleshooting a computer, or recovering lost data. To create a bootable USB, you typically need to format the drive and copy the necessary files using a utility such as Rufus.
Rufus is among the most popular programs that allow you to create bootable USB sticks. With the most recent version, you don’t even need to have the Windows ISO file if you need to create a Windows boot stick.
Let’s check on all steps to create a Bootable Windows USB.
You download Rufus from the official site: https://rufus.ie. I advise you to download the portable version, which doesn’t need installation. Since it is an “EXE” file, you will probably get a notification from your browser that it is dangerous, but you can ignore it. The file is totally safe.
Find a USB stick with at least 8GB of storage. Note that you will have to format this stick, so use one that you don’t have a problem formatting.
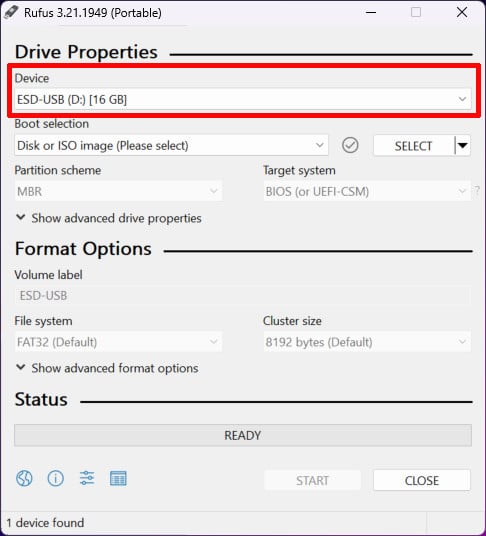
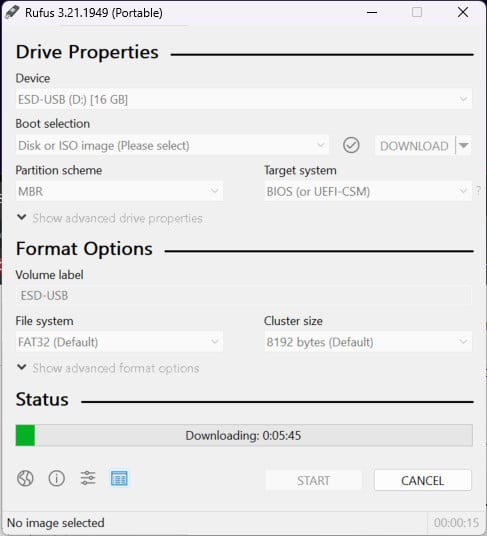
Connect the USB stick to your PC and select it from the Device menu.
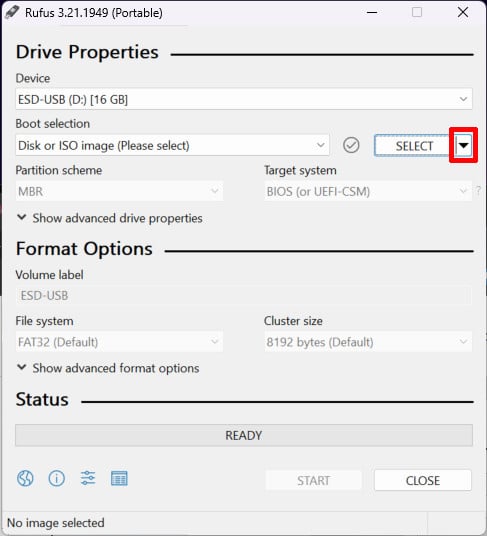

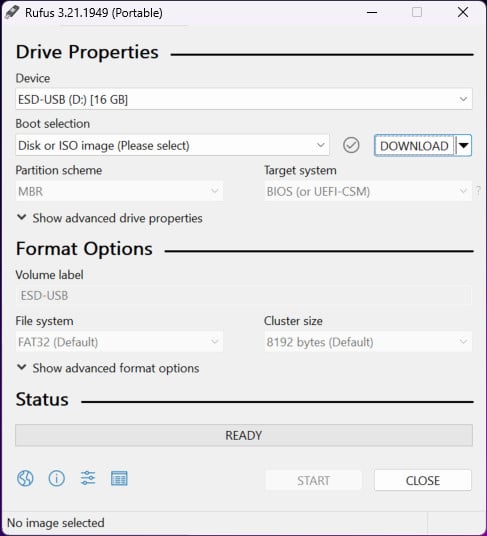
Press the Down arrow next to the Select menu and choose Download.
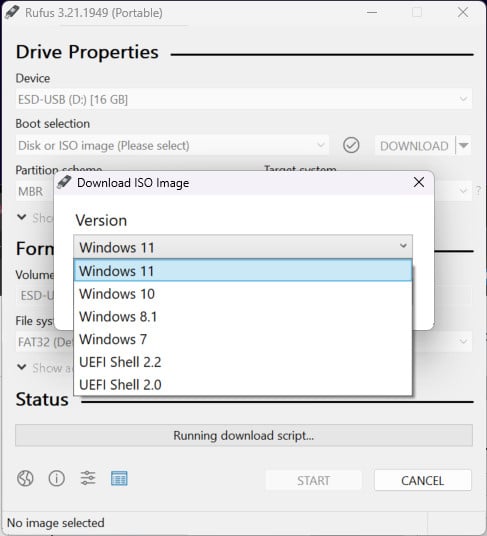
Press the Download button, and a new window will open, showing you the available ISO images to download. That’s right. You don’t need to search for a Windows or UEFI Shell ISO file anymore. Rufus can do it for you!

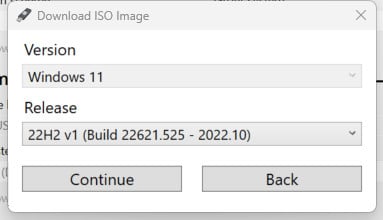

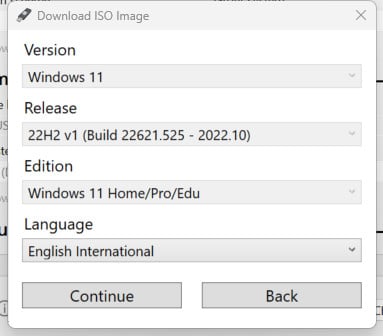
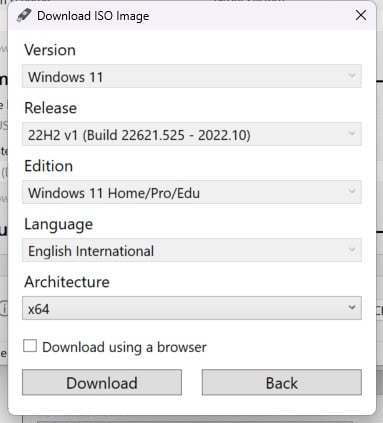
In this tutorial, I will select the Windows 11 ISO file. A Release menu is revealed after you select Windows 11, showing the available releases. I will go with the most recent one. Press Continue, and an Edition menu opens up! There is only a single choice here, so go ahead and select it! One menu before the end, language option! The final menu is Architecture. I will go with x64 and finally, leave the download using a browser tick box untouched.
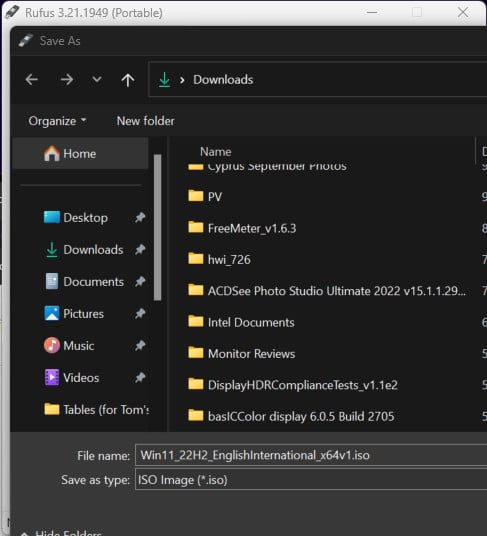
Rufus will ask you where to download the ISO file.
Depending on your internet connection, it might take a while. Read an article, get a coffee or a snack, and wait till downloading is finished.
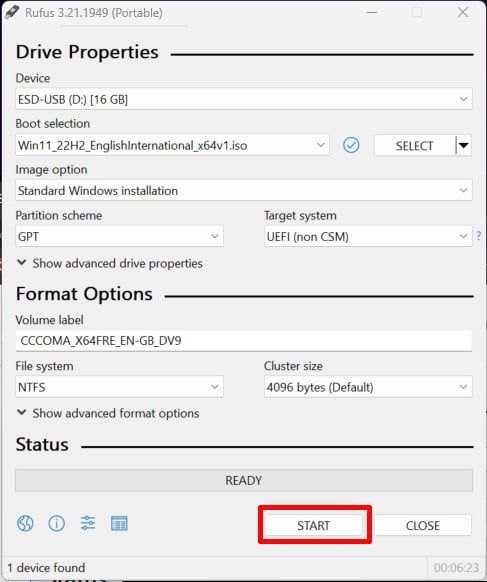
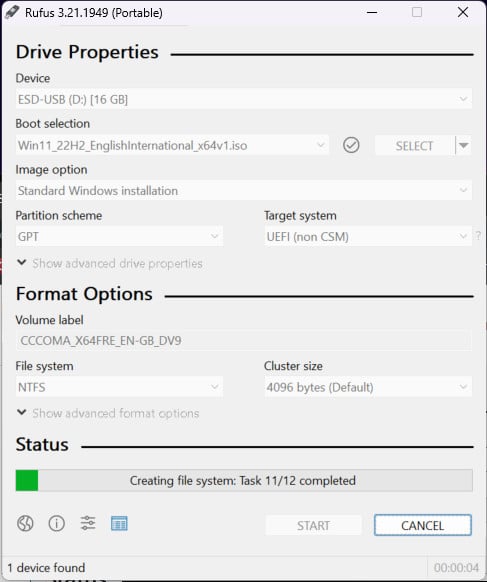
The ISO file’s download is finished, and we have already pre-selected options. You can change the Volume’s label if you wish and then press the Start button.
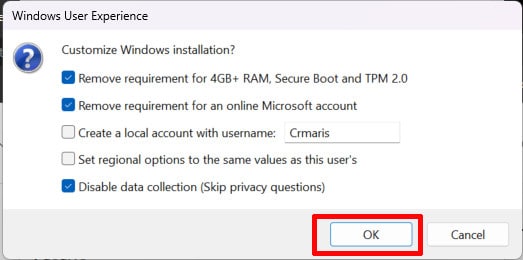
Once you press the Start button, some interesting options show up. The most important ones are already preselected! You can remove the requirements for 4GB+ RAM, secure boot, and TPM 2.0! The online MS account also has to go! You can create a local account with your username if you want, set regional options, and disable data collection! The last should be preselected, too! Press OK to continue!
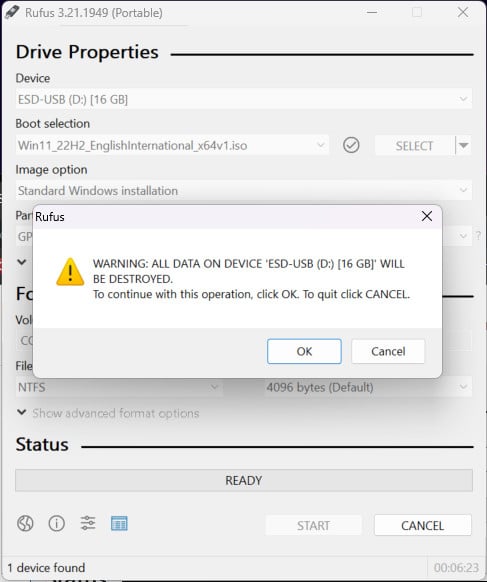
This is your last chance! Else the selected USB stick will be formatted. Proceed if you are OK with this!

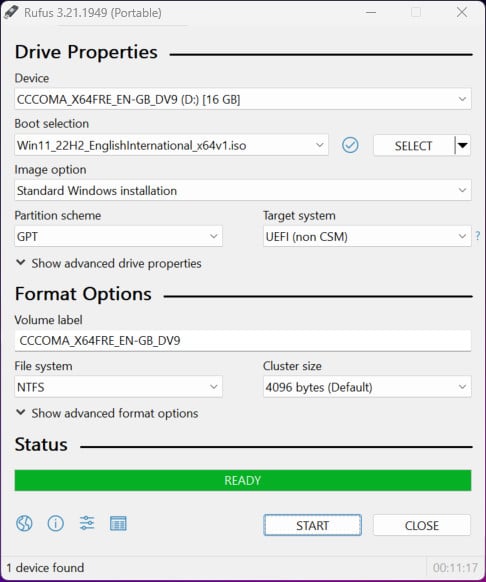
Your shiny new bootable Windows 11 USB stick is ready! Use it wisely. Remember that you will still need a Windows key, which you can get from Keysfan.

I’m still using windows CD for making my PC-formats , so these kind of articles are always welcome for people like me who are somewhat “disconnected” from the new ways … lol !!
Thanks for the detailed article Aris.
Anytime! USB flash drives are a true blessing for this kind of stuff.
Believe me u are not the only one dealing with CDs and DVDs. For some dino-PCs are still useful.