Unboxing & Overview

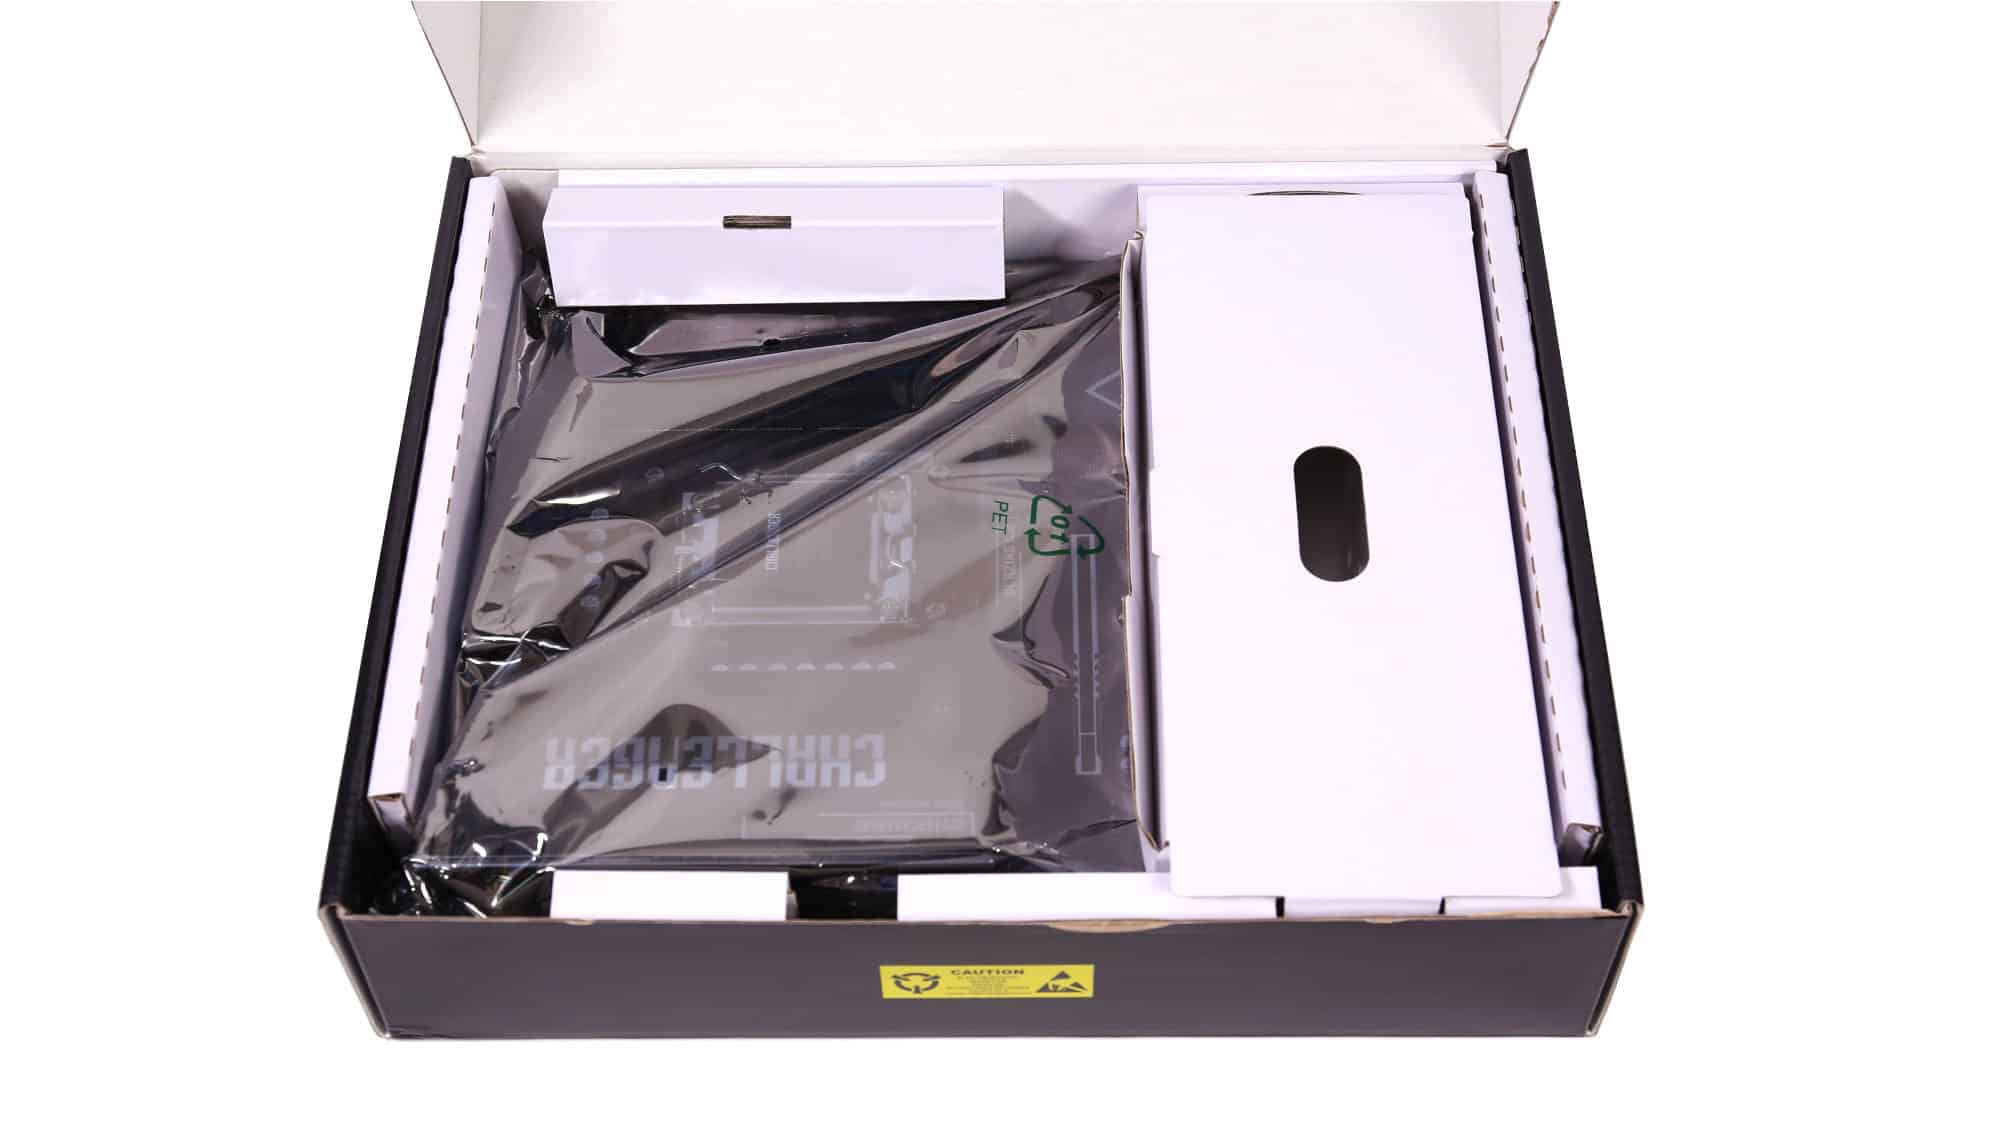
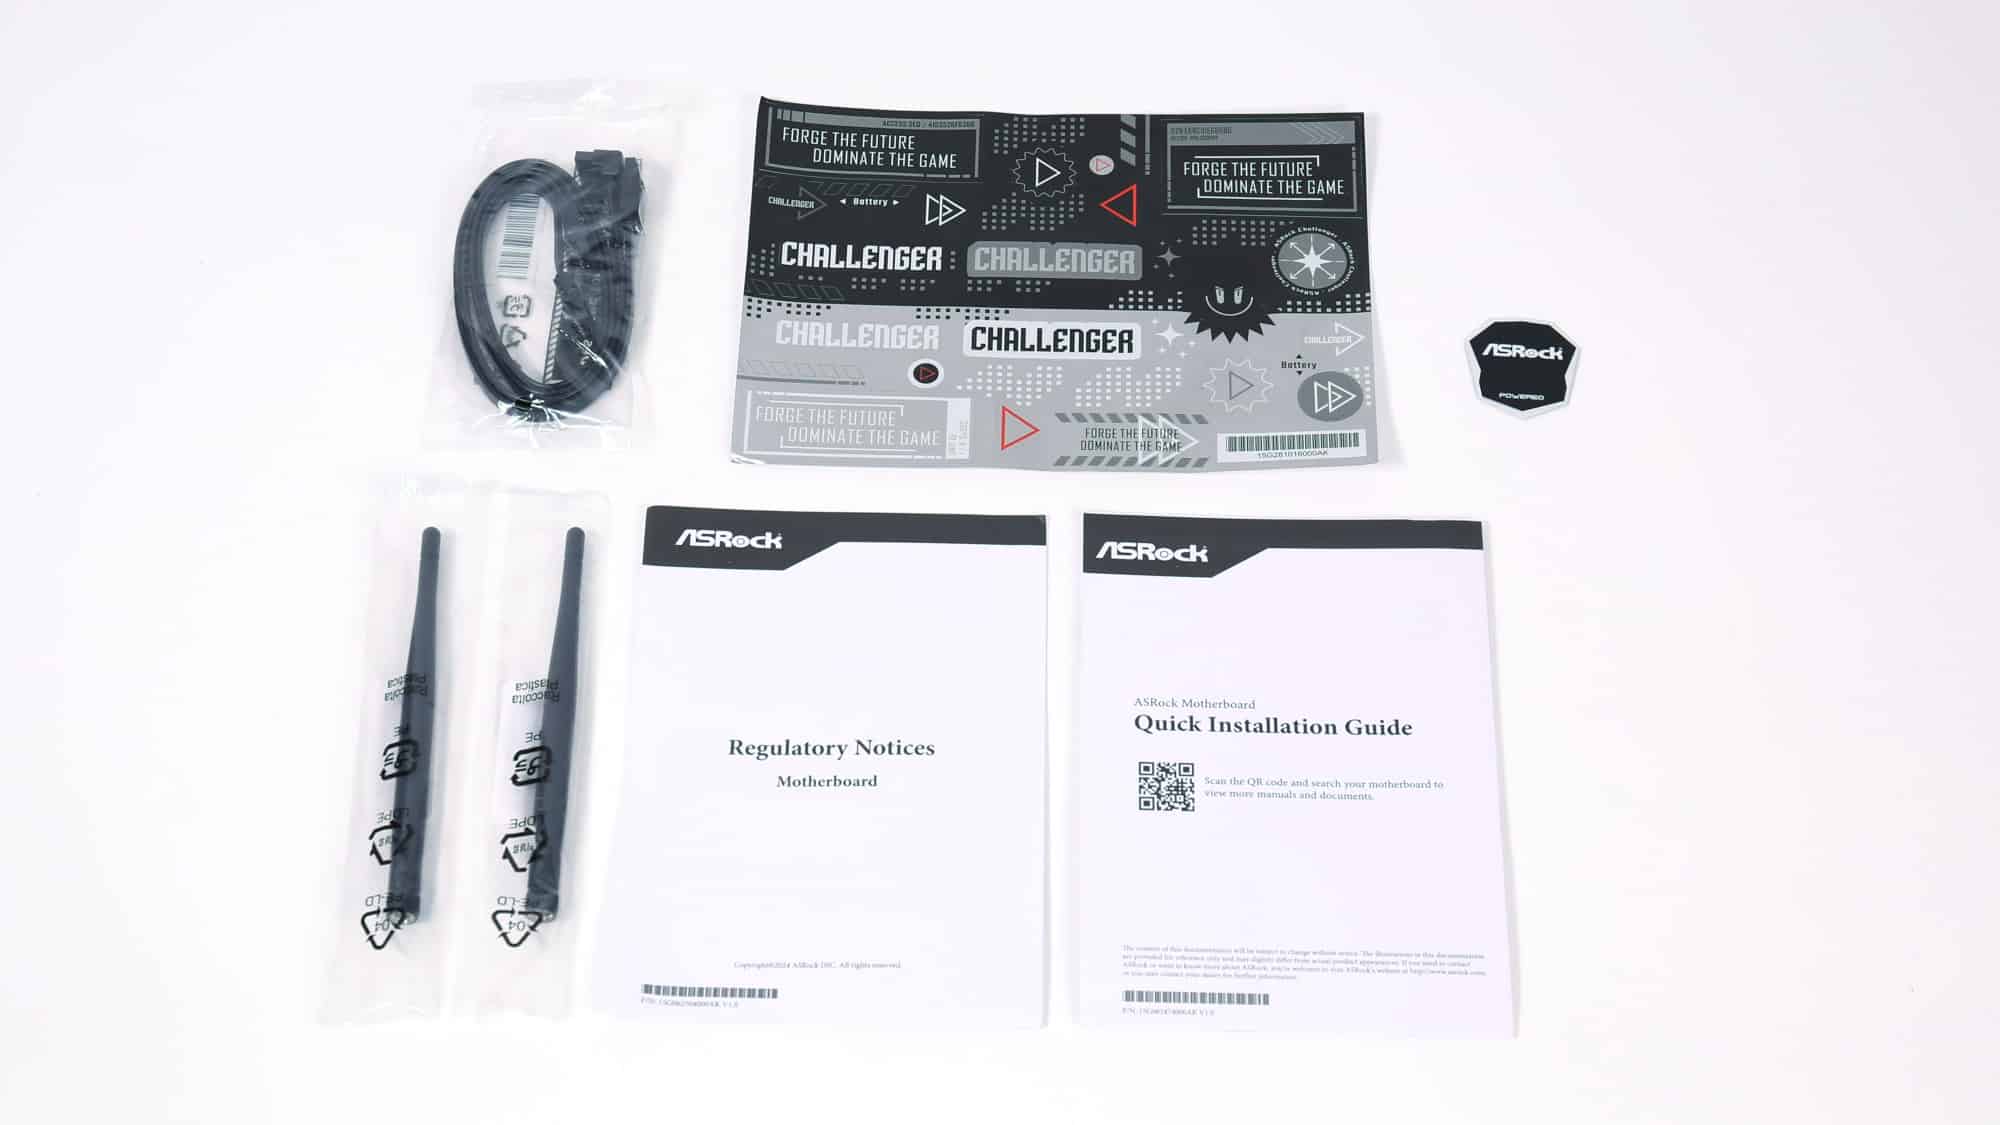
Taking a look around the box, we can see the subtle branding and the good condition of the box. Inside, we have the typical cardboard pieces that keep everything secure. The board is tucked inside an anti-static bag to keep it safe. A cardboard box sits on top, to prevent any movement during transport. Below the motherboard, you will find all the accessories, which are the following:
- 1x ASRock logo sticker
- 1x Sticker pack
- 2x Wi-Fi Antennas
- 2x SATA 3 cables
- Quick installation guide
- Regulatory Notices
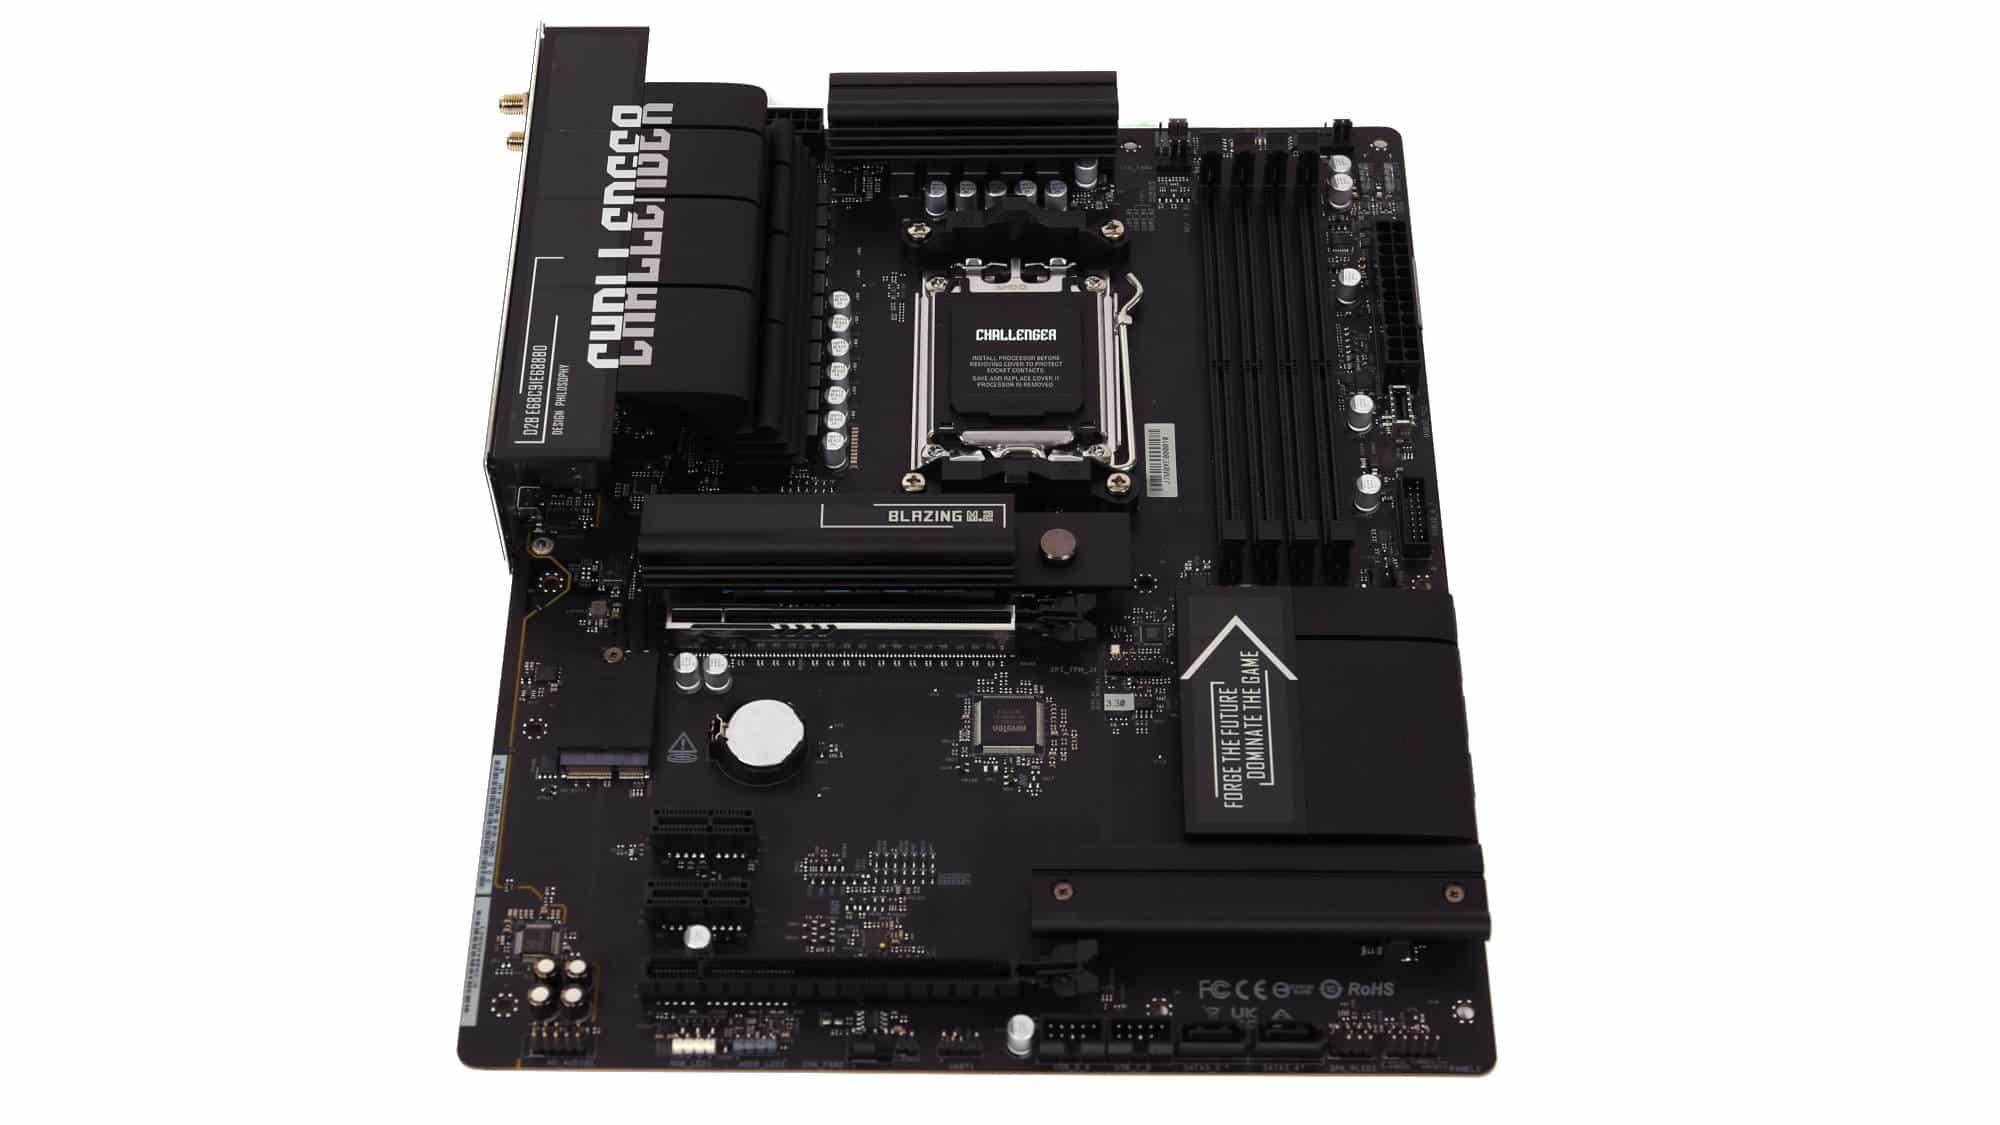
For our review, we received the black unit. The overall design looks sleek and understated, with the CMOS battery being the only element that stands out visually. Fortunately, this is easily hidden behind a GPU or even a small sticker from the included pack, keeping the look cohesive. Beyond that, the aesthetic is very clean, minimal, and purposeful, making it an excellent foundation for a dark-themed build. The subtle styling also leaves room for personalization, whether you want to keep it stealthy or add ARGB accents for contrast.
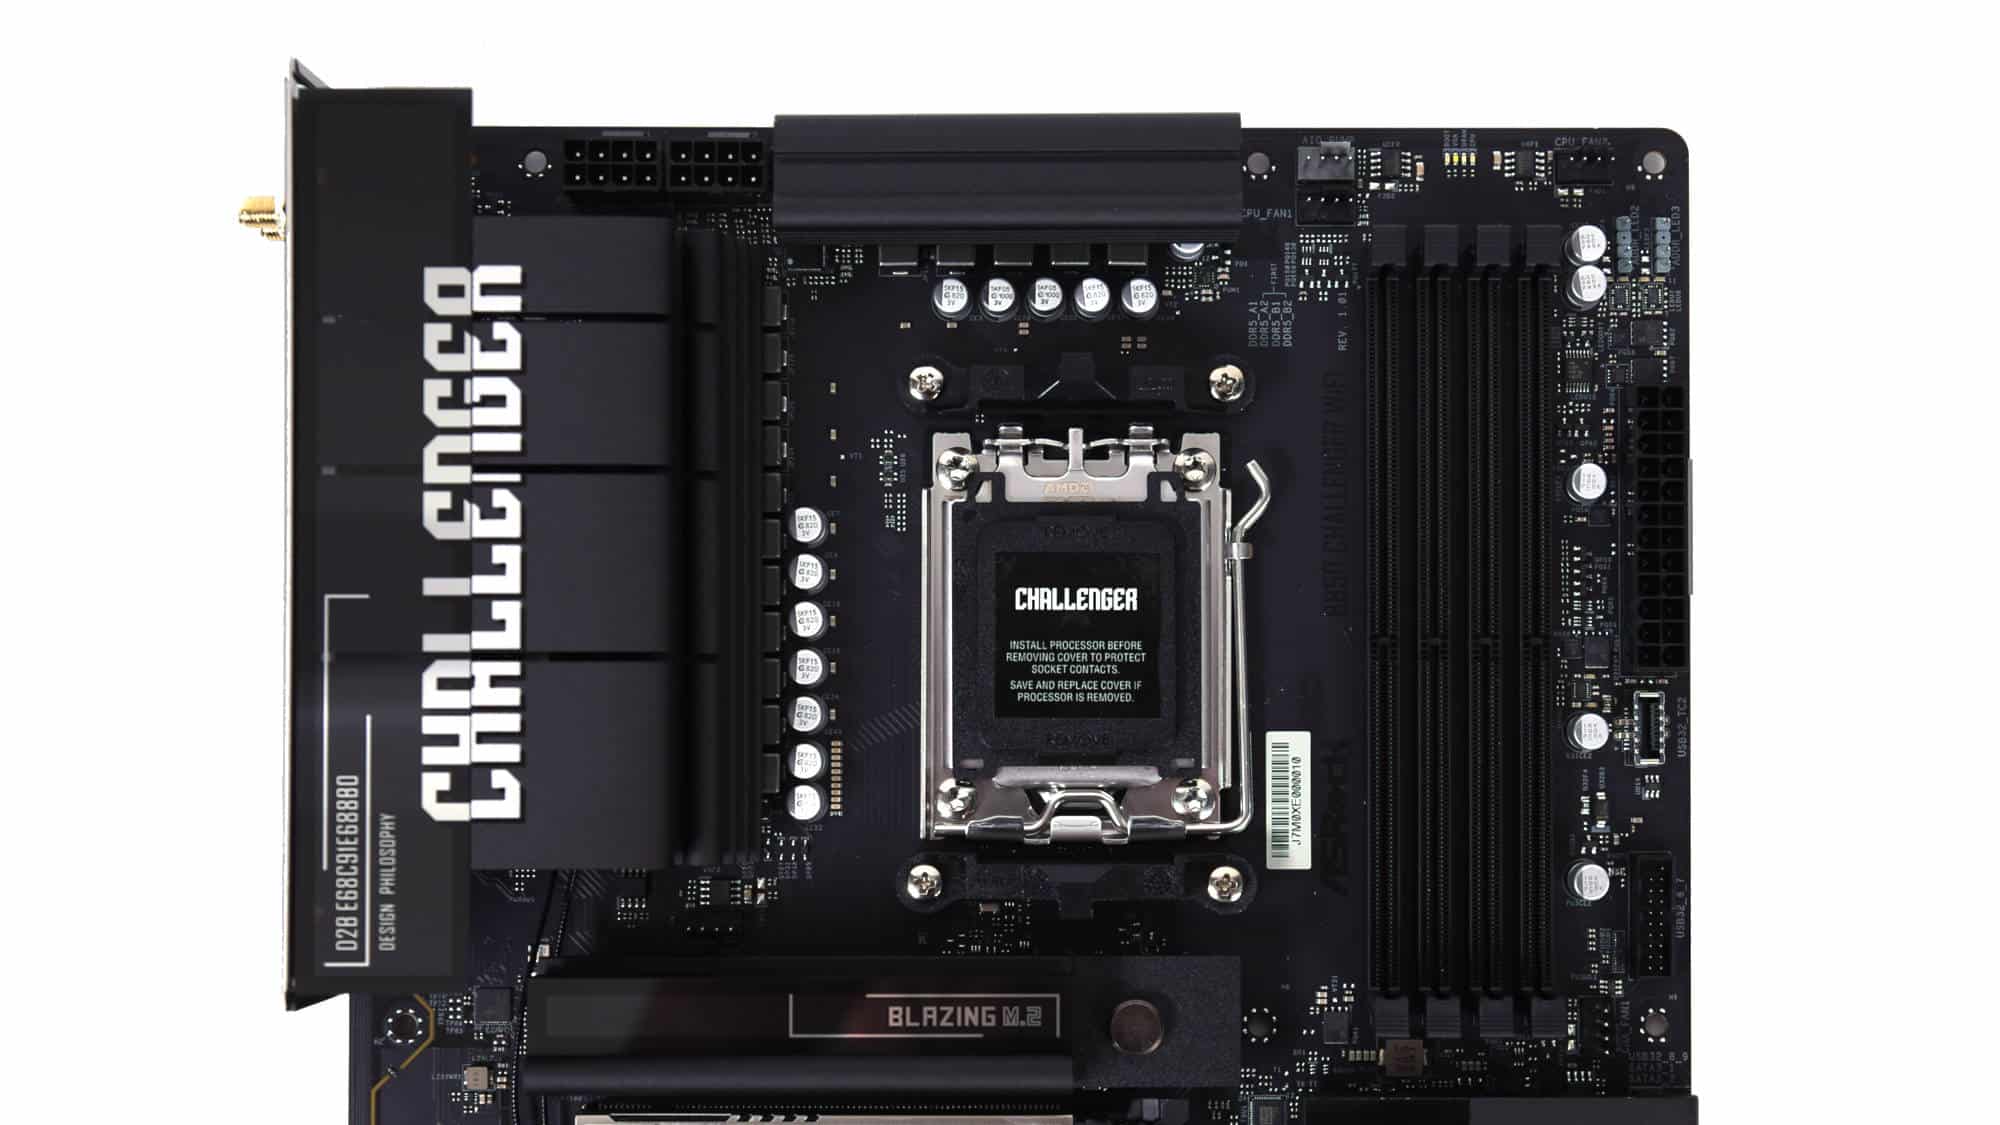
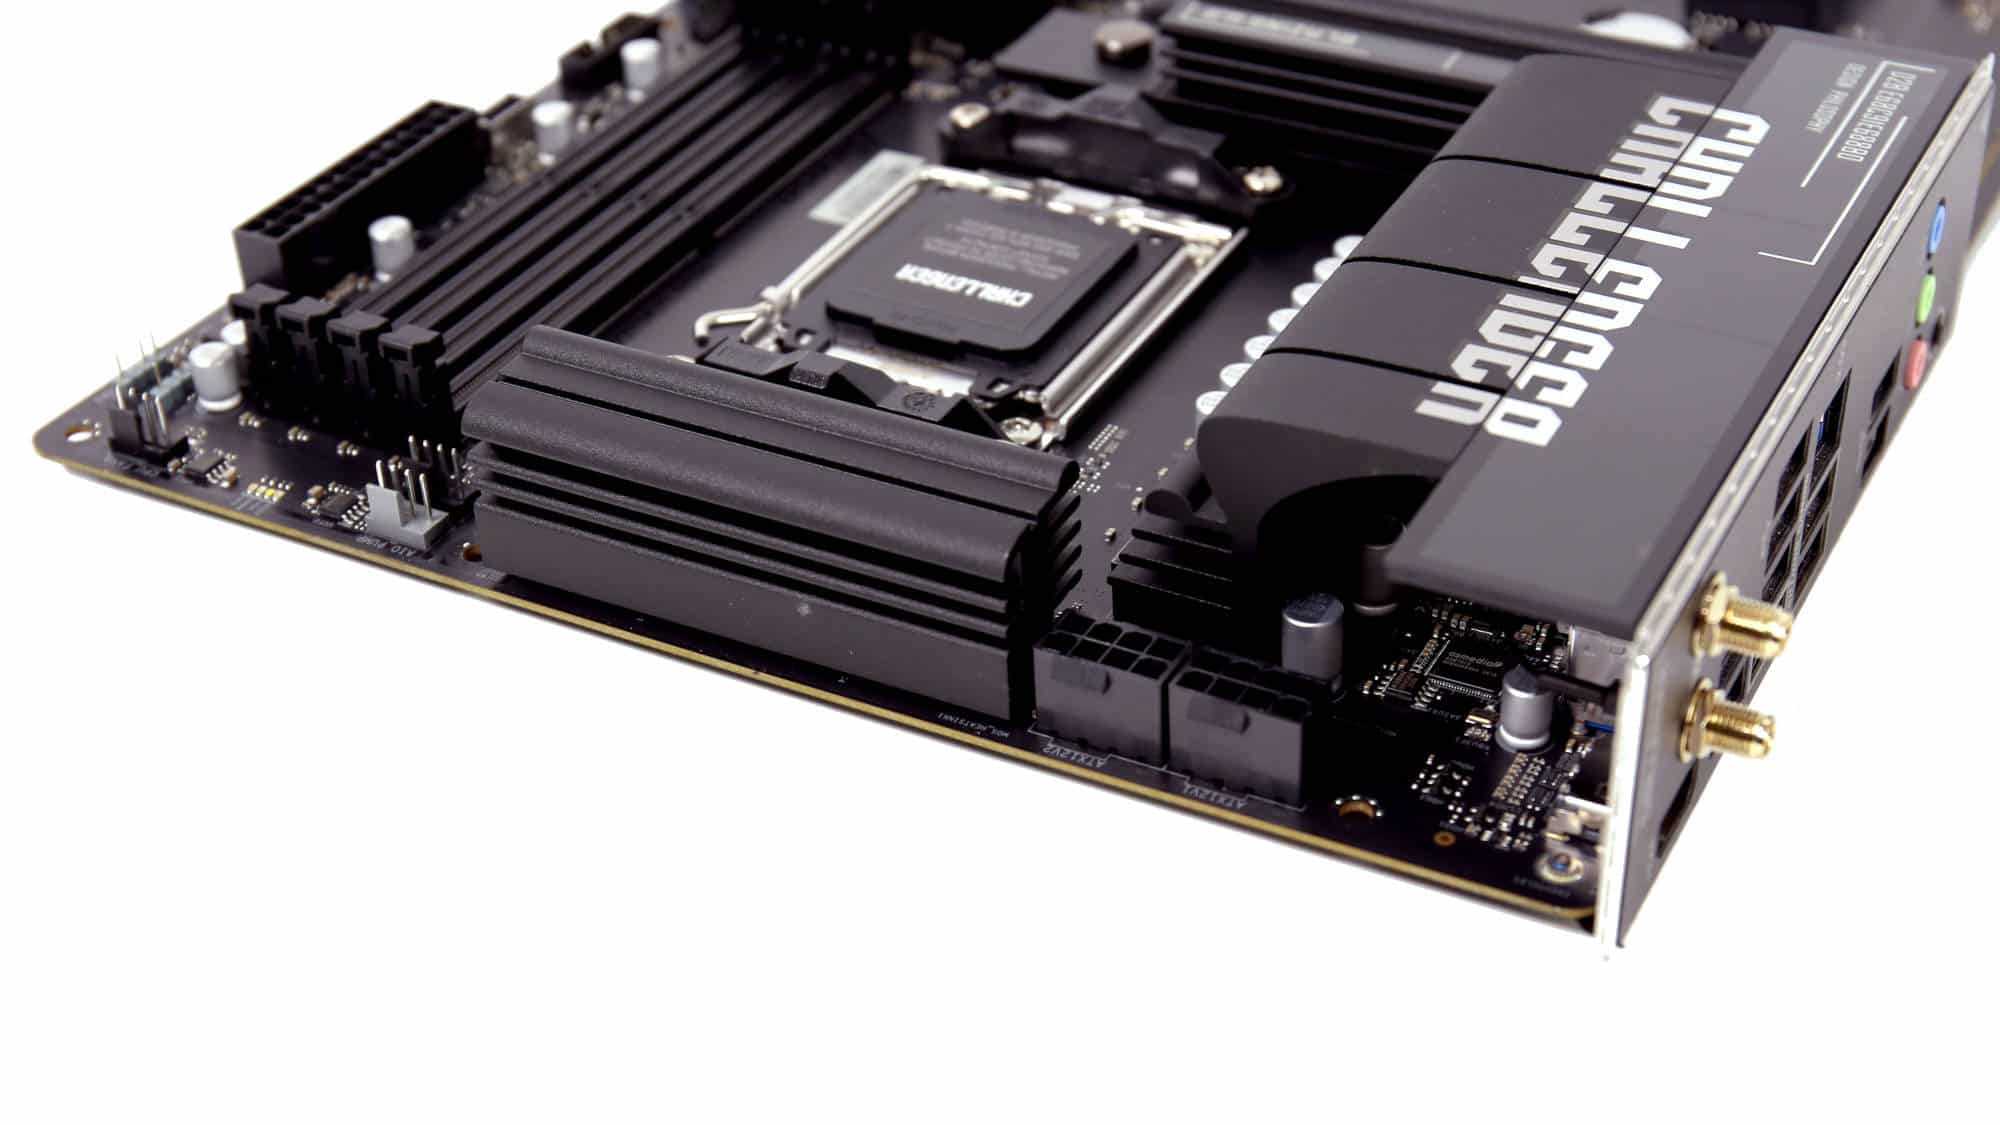
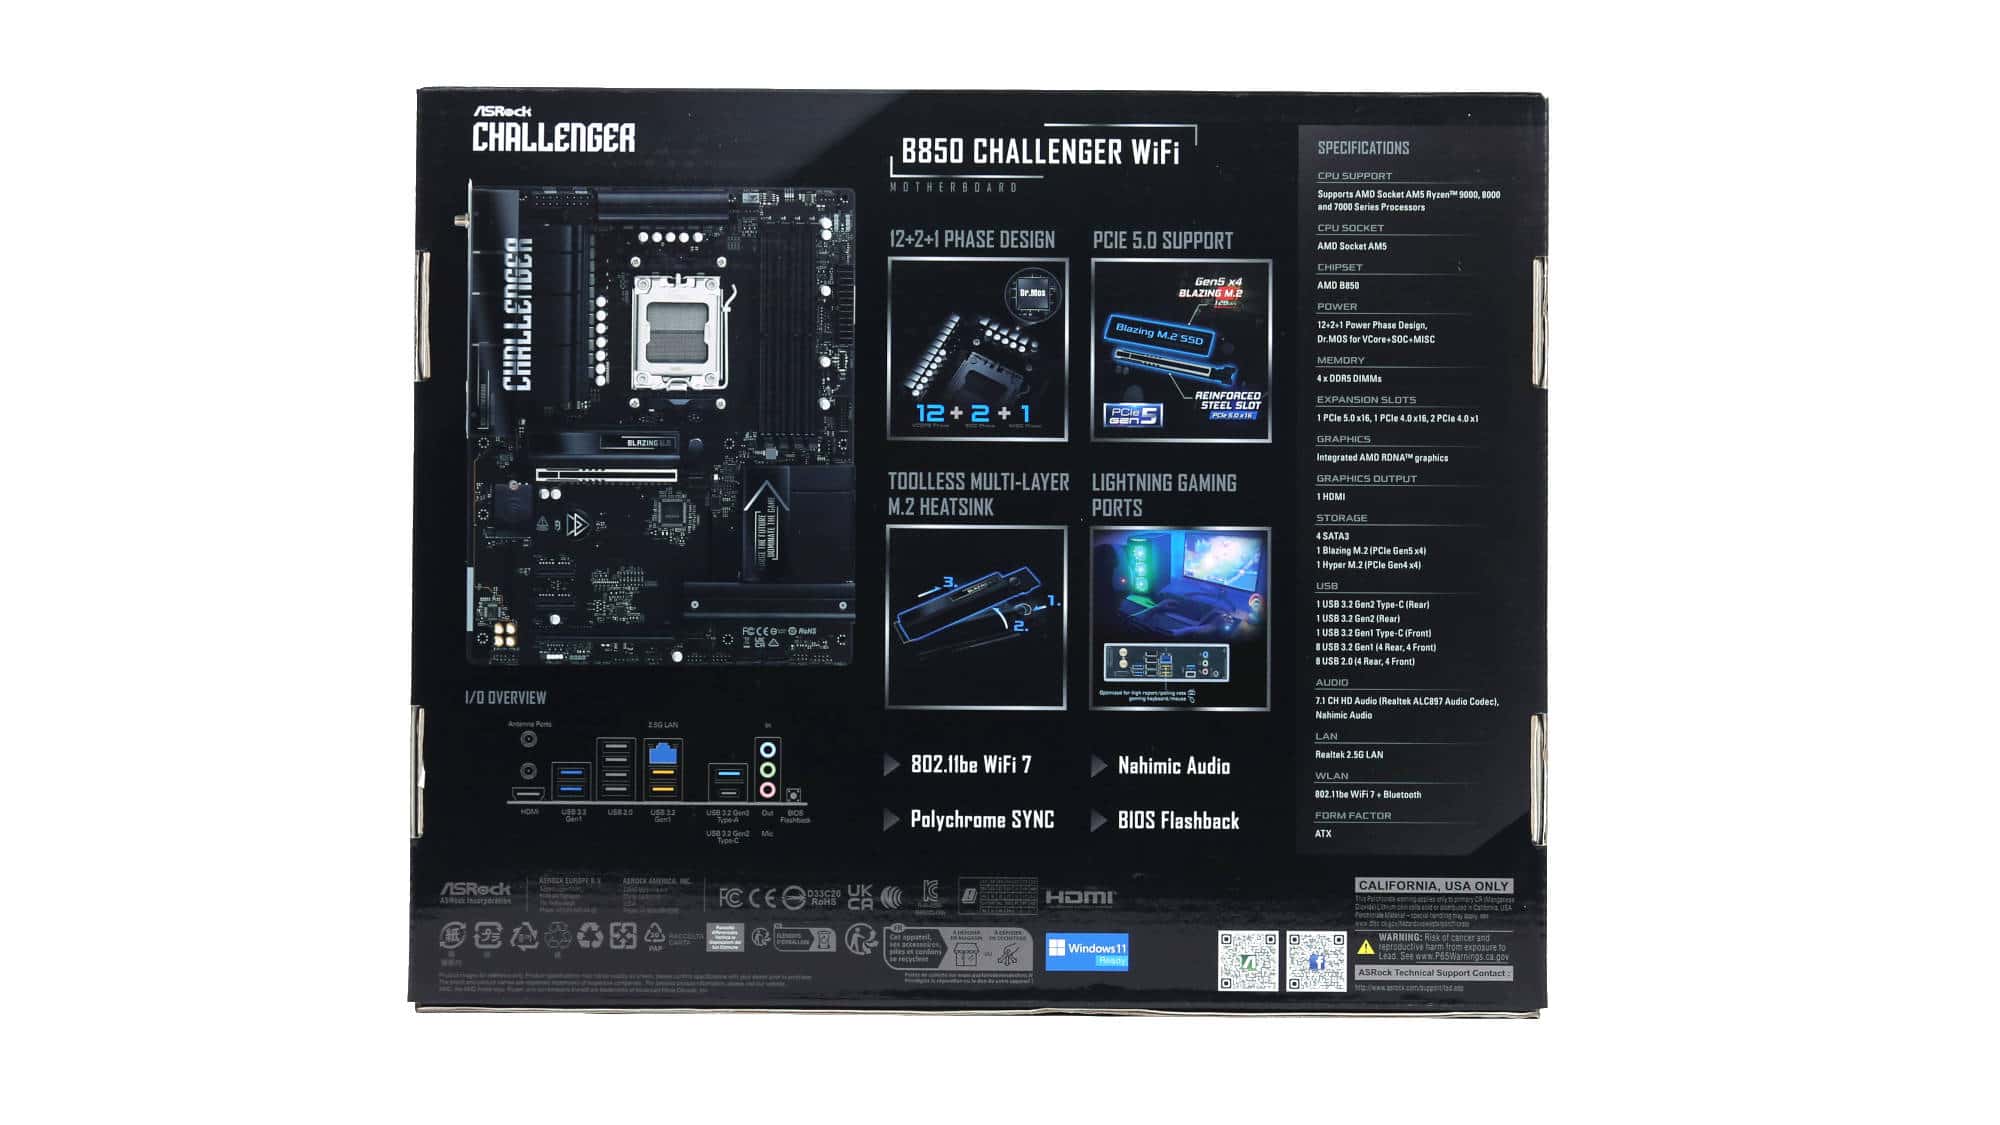
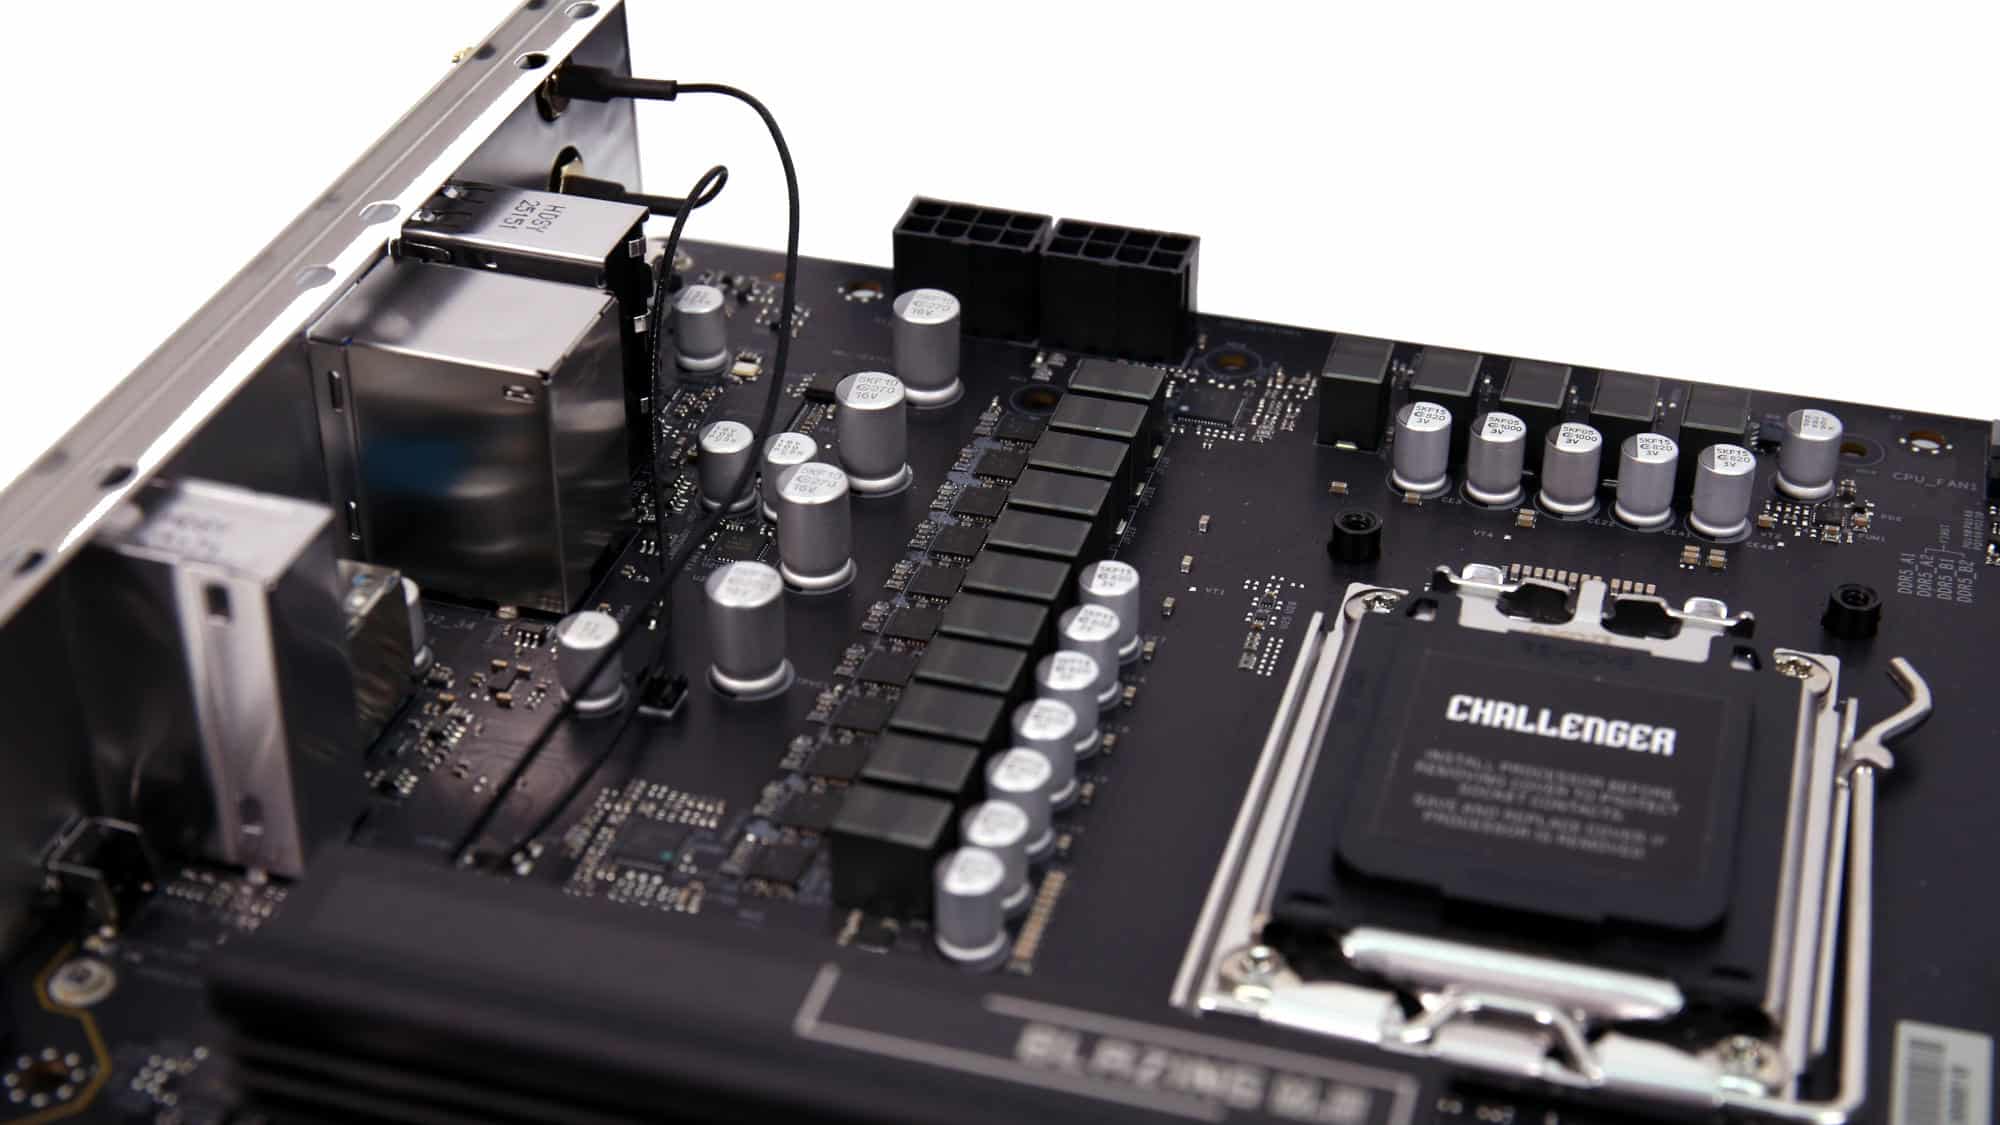
Let’s take a look at the layout of the board. At the top left corner, two 8-pin 12V connectors supply power to the CPU. Both to their right and below, we have the VRM heatsinks, tasked with keeping the 12+2+1 phases cool. They are painted black to be in line with the dark aesthetic of the board, but the color also shaves some of the visual weight. Above and below the CPU socket, we have the two stock cooler mounts, which we will later remove. To the right of the CPU, there are four RAM slots, supporting DDR5 modules up to 8000MT/s.
The VRM heatsinks are substantial, featuring a large surface area and solid build quality.
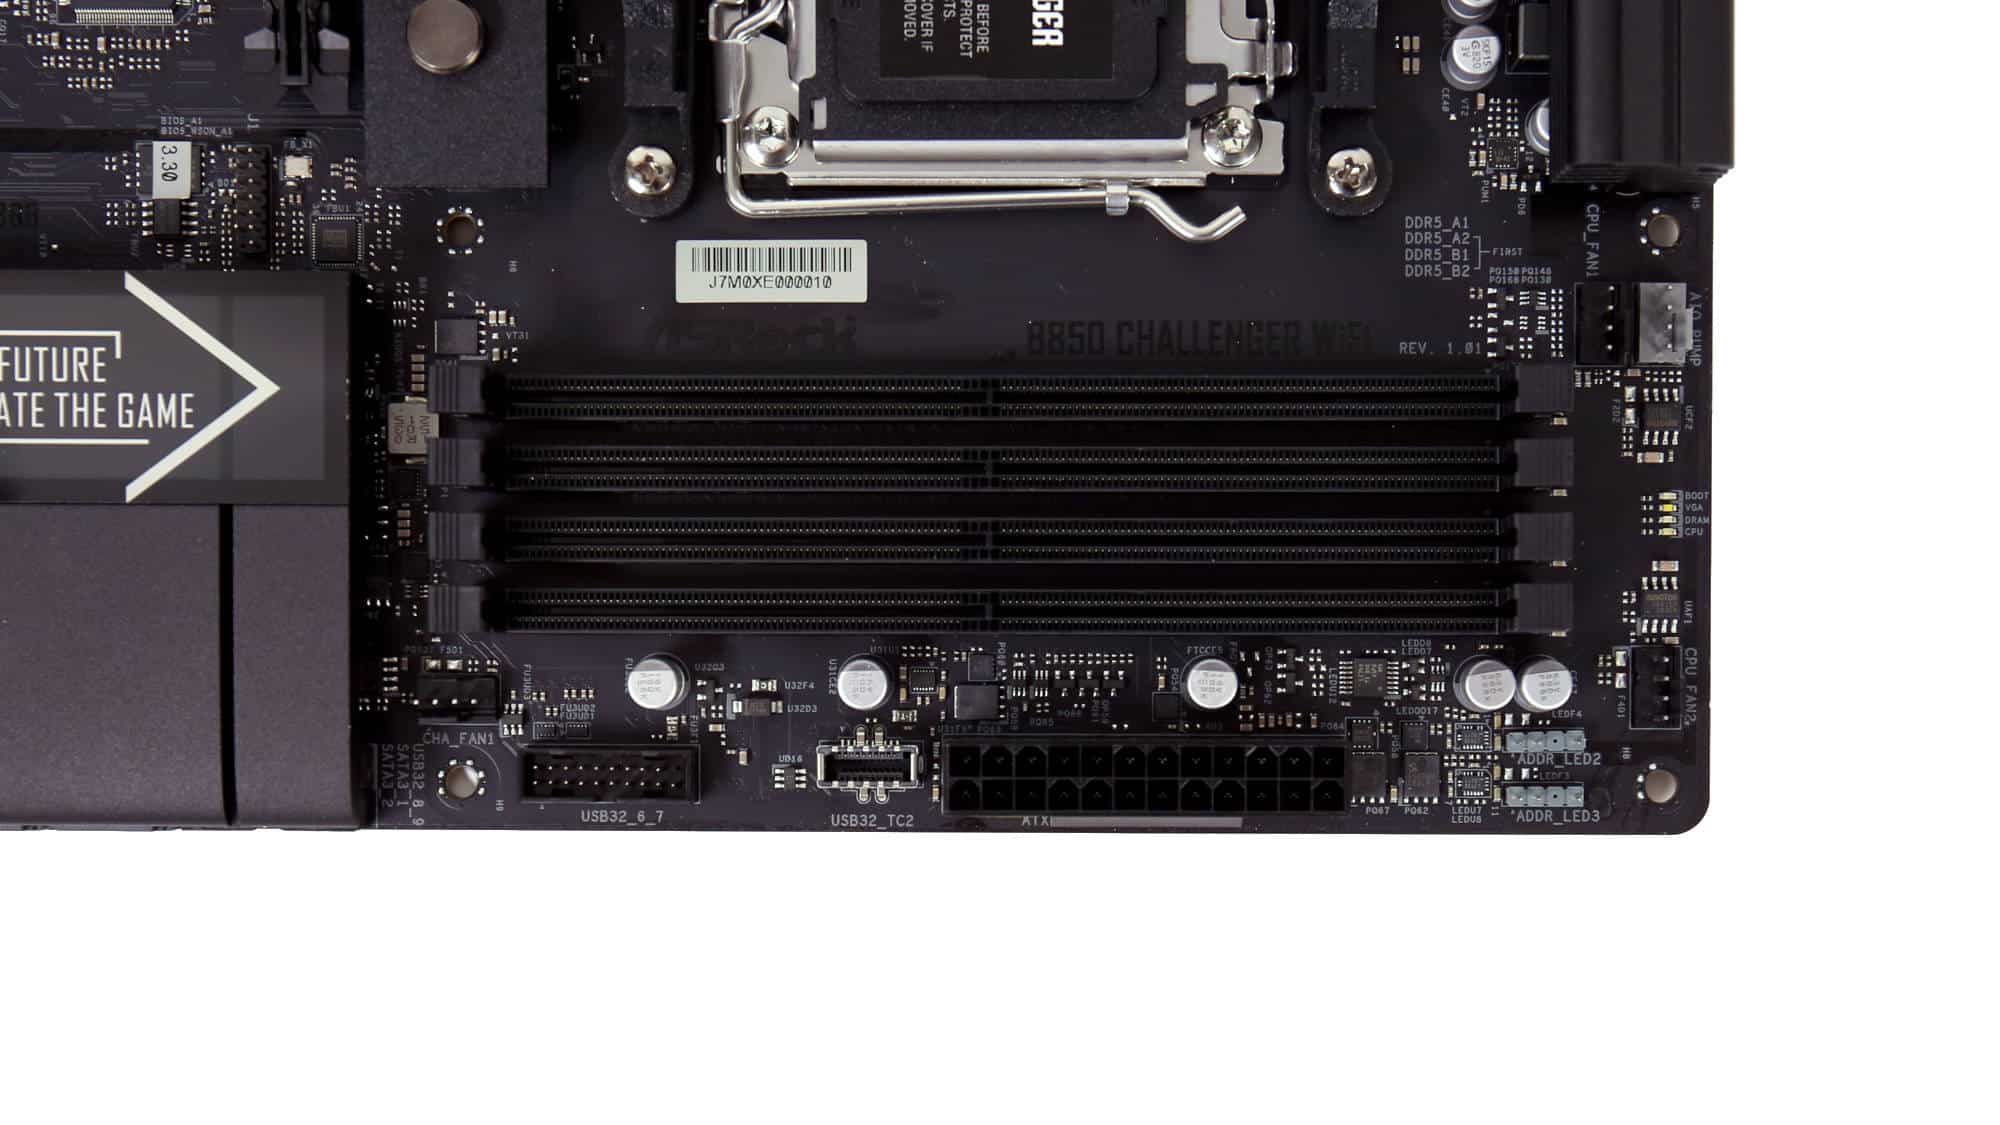
Lean a bit closer to the top right corner, and there are plenty of connections to talk about. Next to the VRM heatsink, we have two stacked PWM connectors. The gray one is for an AIO, while the black one is for a CPU fan (supporting up to 1A). Next in are the four LEDs, to help diagnose any issues, followed by a second CPU PWM header at the far right. Moving down now, you will find two 5V ARGB Gen 2 connectors, the 24-pin ATX connector, the front panel Type-C USB 3.2 Gen 1 header, a 19-pin USB 3.2 Gen 1 header, and an extra PWM connector for a chassis fan.
There is another PWM connector hidden between the vertical VRM heatsink and the M.2 heatsink. It serves well as a rear fan connector.
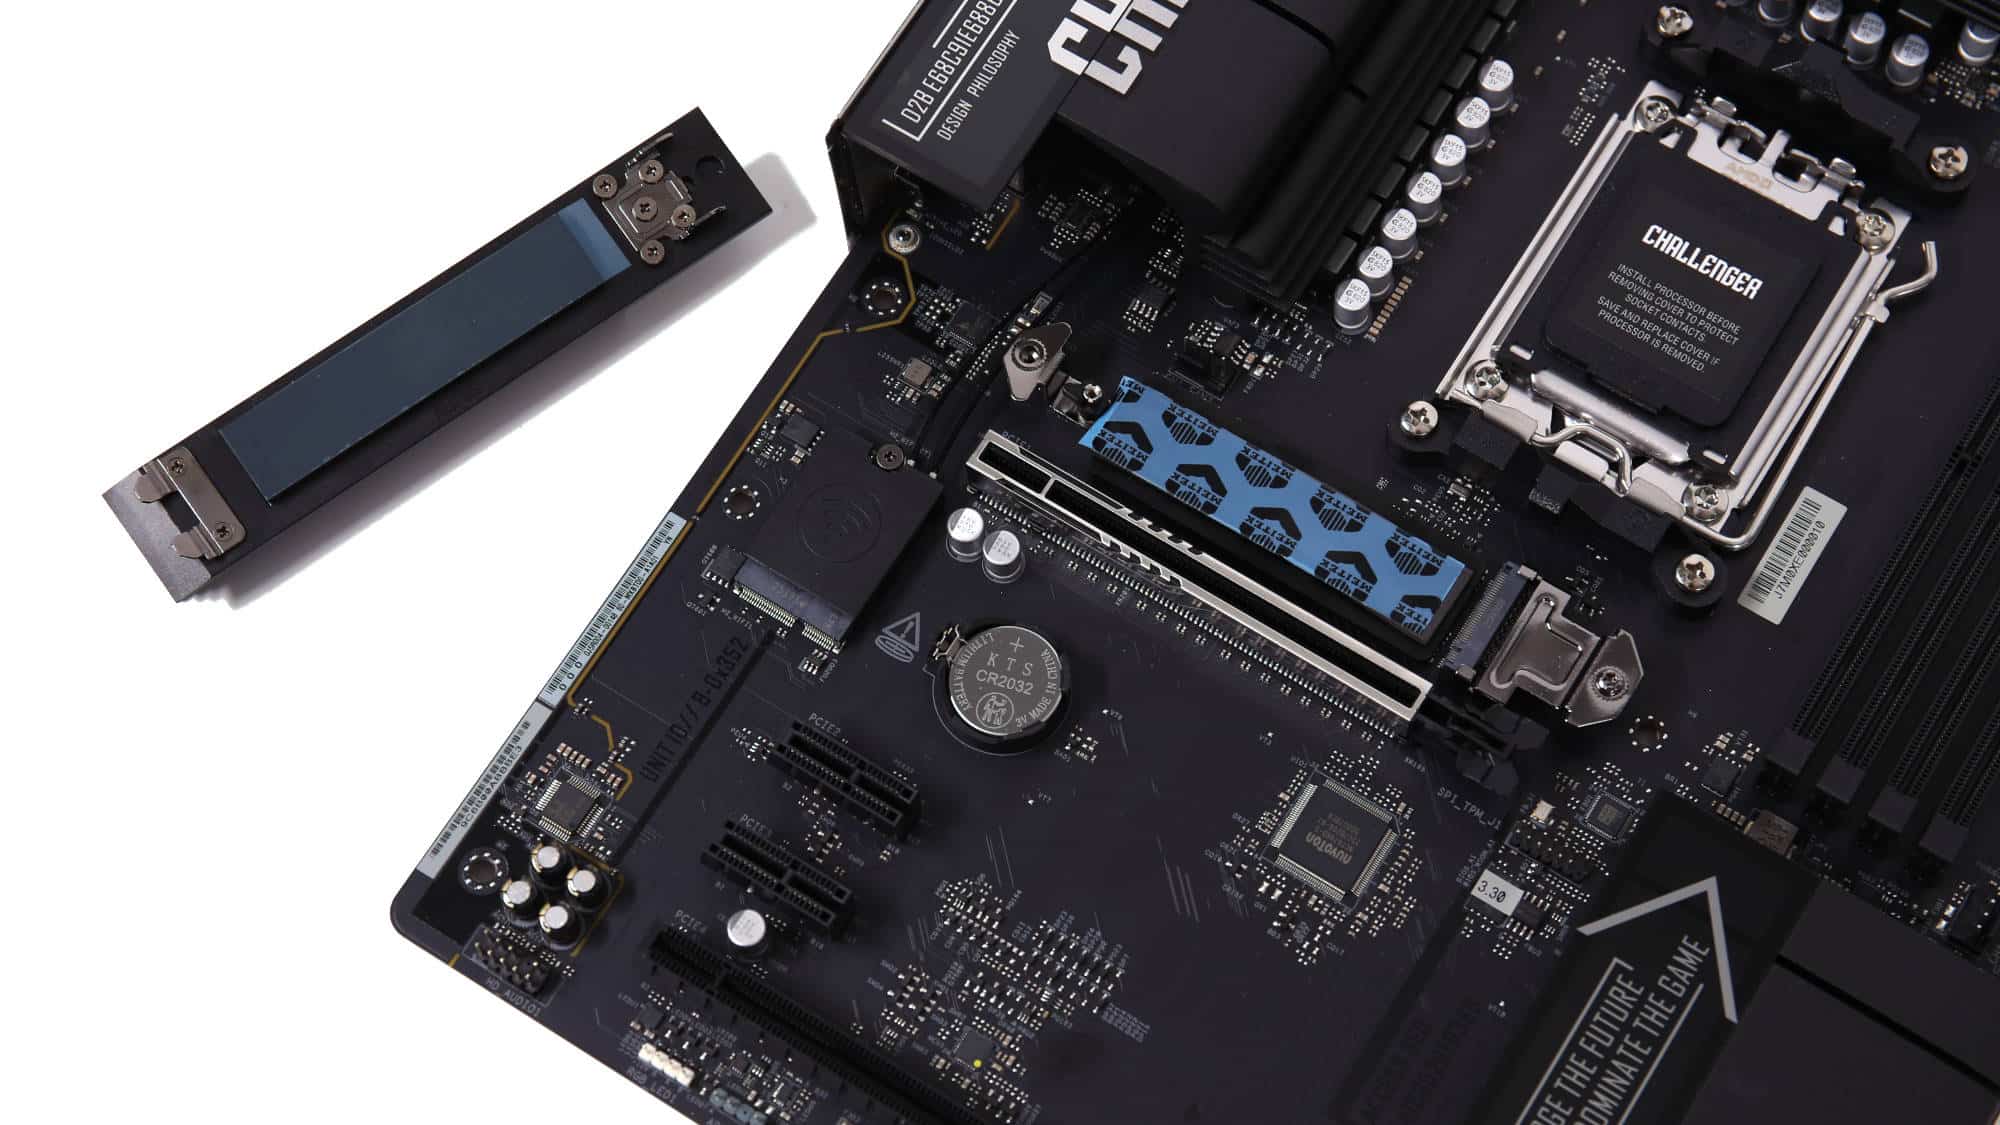
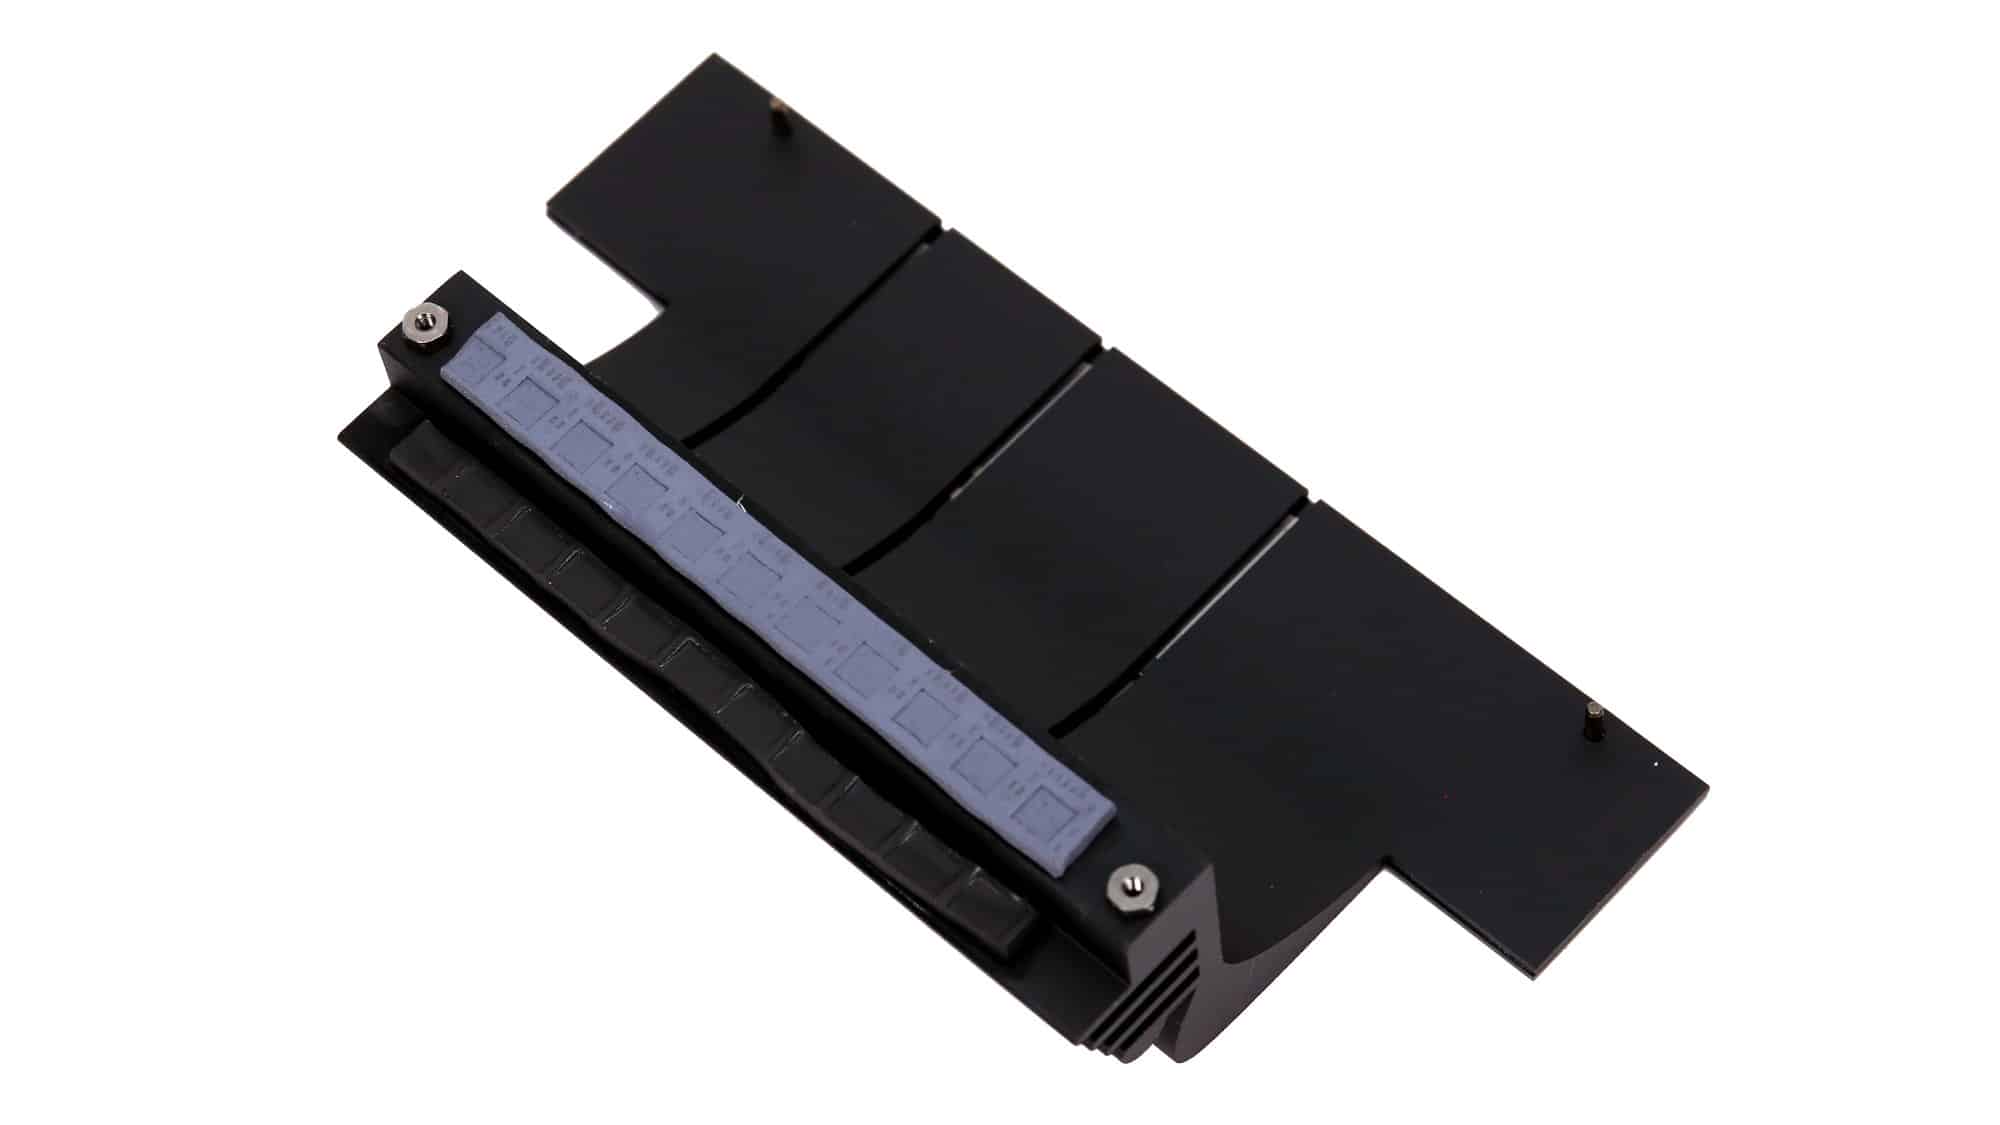
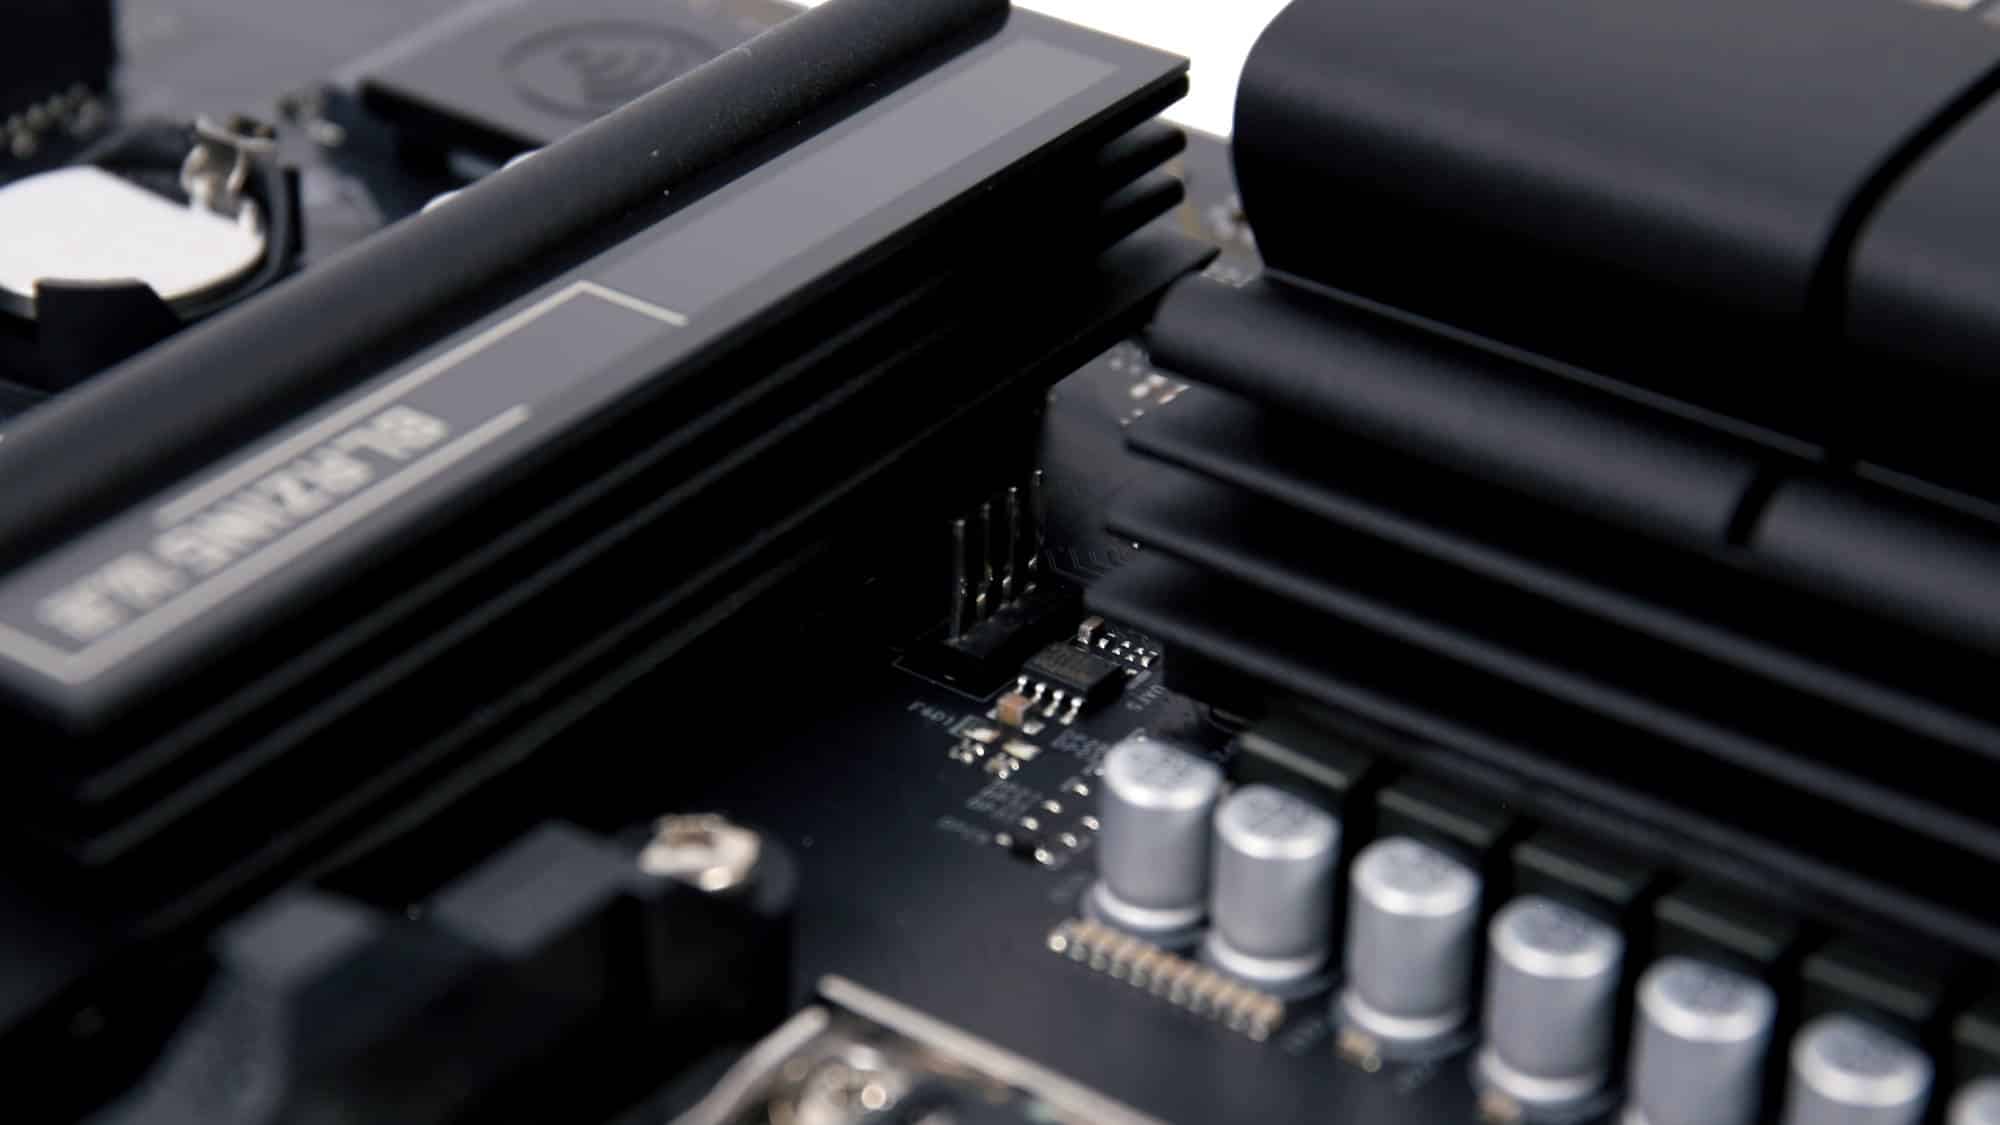
The M.2 sits right below the CPU to minimize the distance. This, being the primary storage slot of the board, supports speeds up to PCIe Gen5x4 (128 Gb/s). A toolless install mechanism helps keep the drive in place. It swings around and forces the drive to stay down. Above the drive, we have a sizeable heatsink which gets slightly warm to the touch with our PCIe 4.0 drive. There is an additional thermal pad sitting on top of the motherboard itself to help dissipate heat from memory modules located on the motherboard side of the drive, if any are present. Only 80mm-long drives are supported.
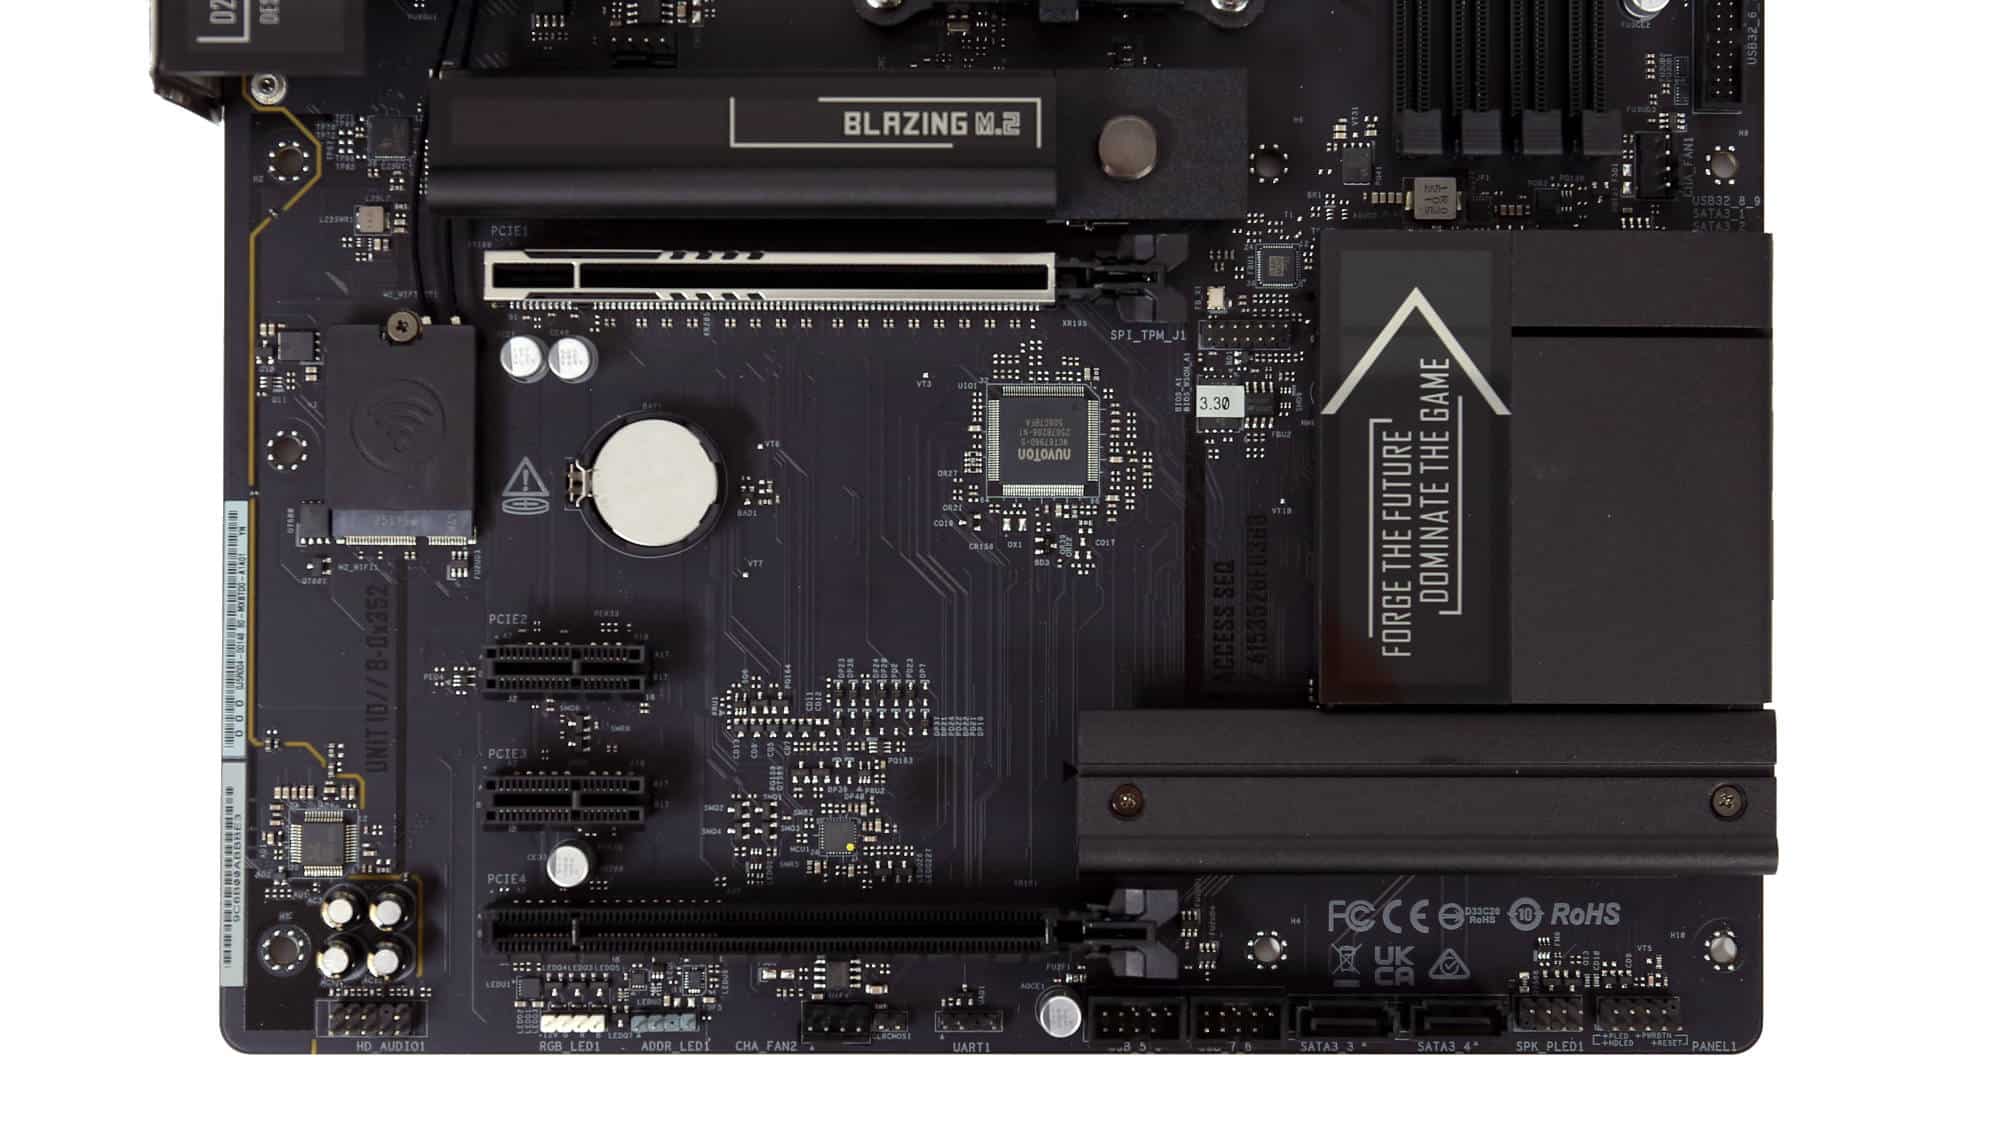
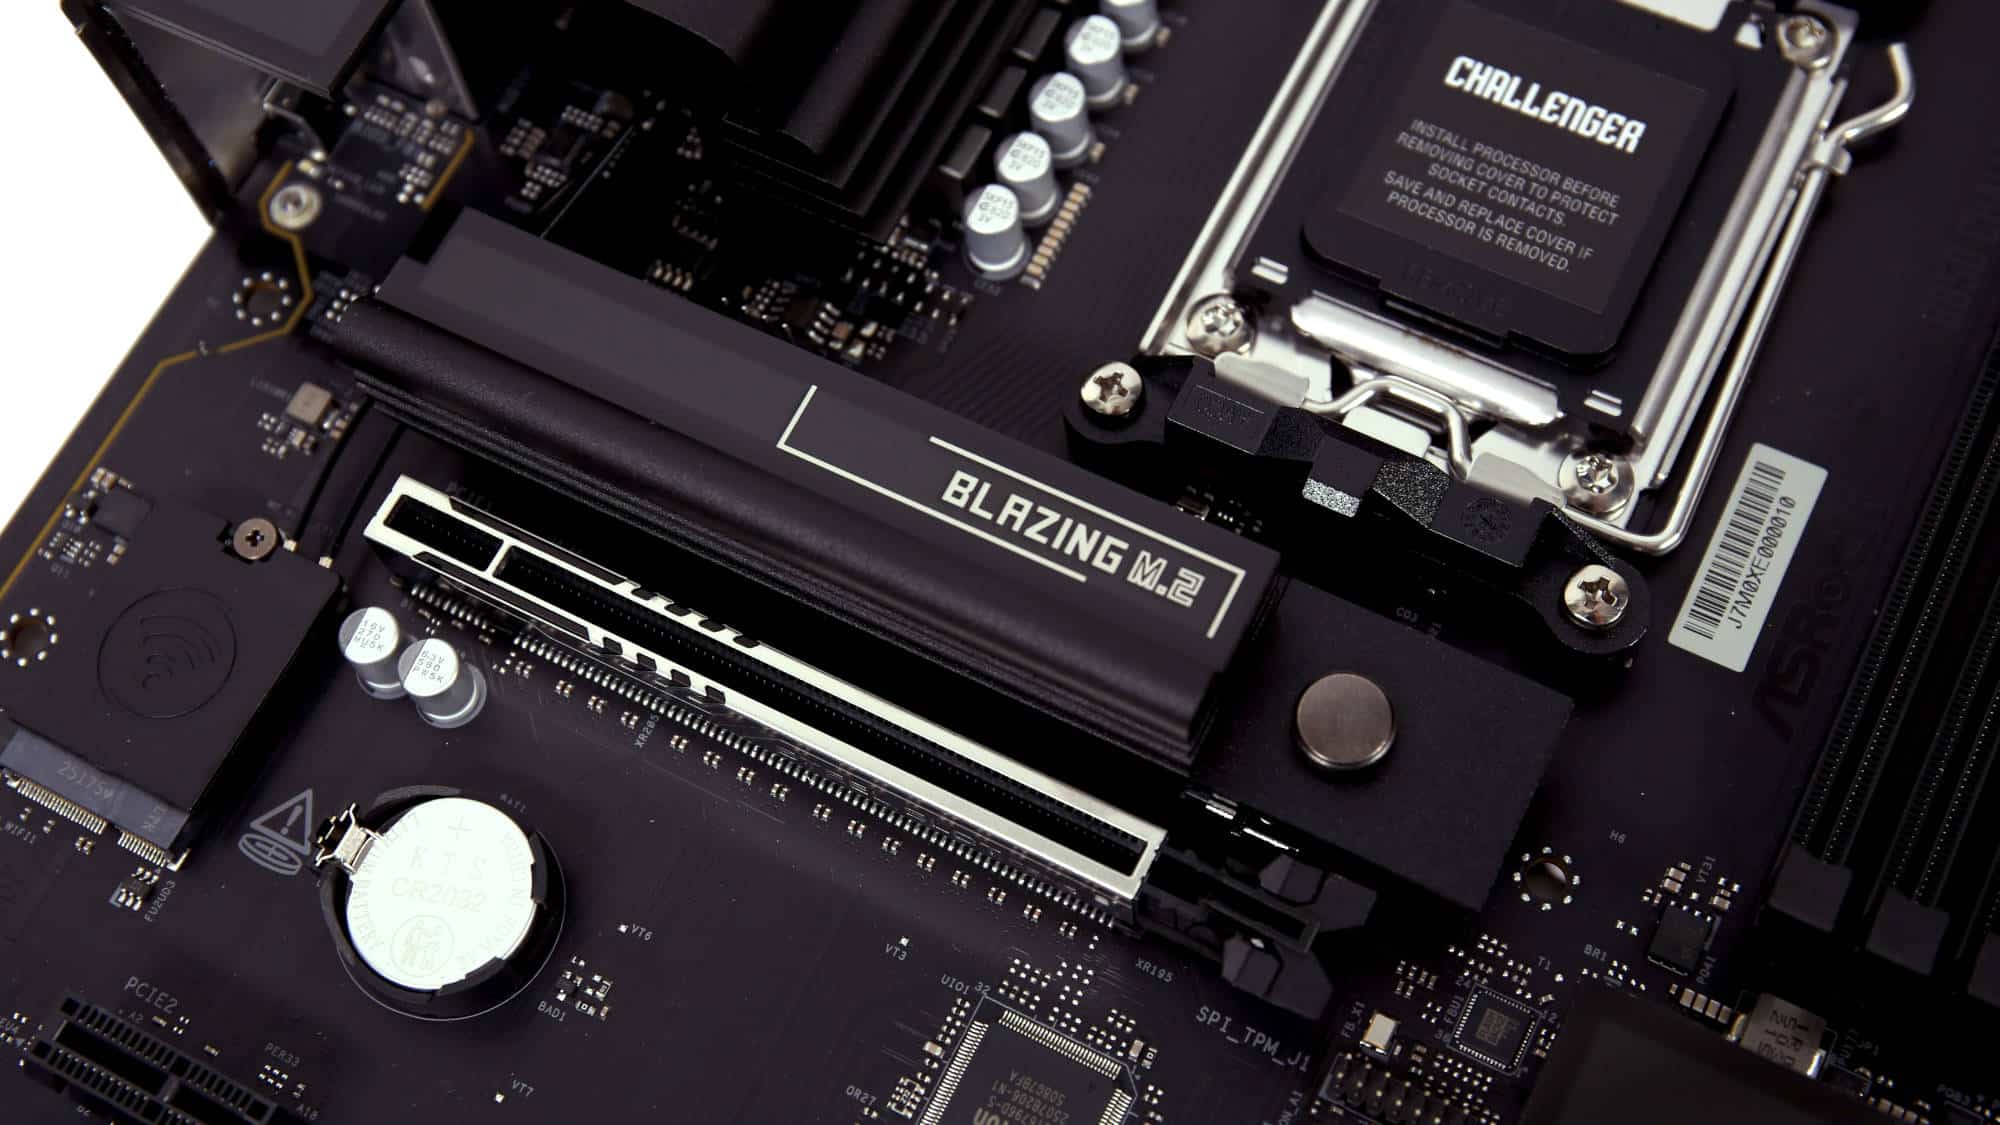
Moving further down, we have the primary PCIe slot for your graphics card. It supports speeds up to PCIe 5.0 x16 with 9000 and 7000 CPUs, but with 8000 CPUs, they run at either PCIe 4.0 x4 or PCIe 4.0 x8. Unfortunately, we didn’t get the EZ Connect mechanism here. We’d really like it to be present on all boards. At least, the connector is reinforced to be able to withstand some abuse. The CMOS battery sits around the middle, but you may use some of the stickers found in the bundle to cover it up. To the left, there are three PCIe slots, two being PCIe 4.0 x1 with an open-end slot controlled by the chipset, and the other one being PCIe 4.0 x4 sitting in a full-size (x16) slot controlled by the CPU.
At the far left, marked with a dark yellow line, we can see the part of the board that is isolated to provide as clean audio as possible, connecting to the bottom HD Audio connector, used for the front panel connectors. At the bottom, we have 12V RGB and 5V ARGB connectors, another PWM fan connector, two USB 2.0 9-pin headers, two SATA 3 ports, and the front I/O pin connectors.
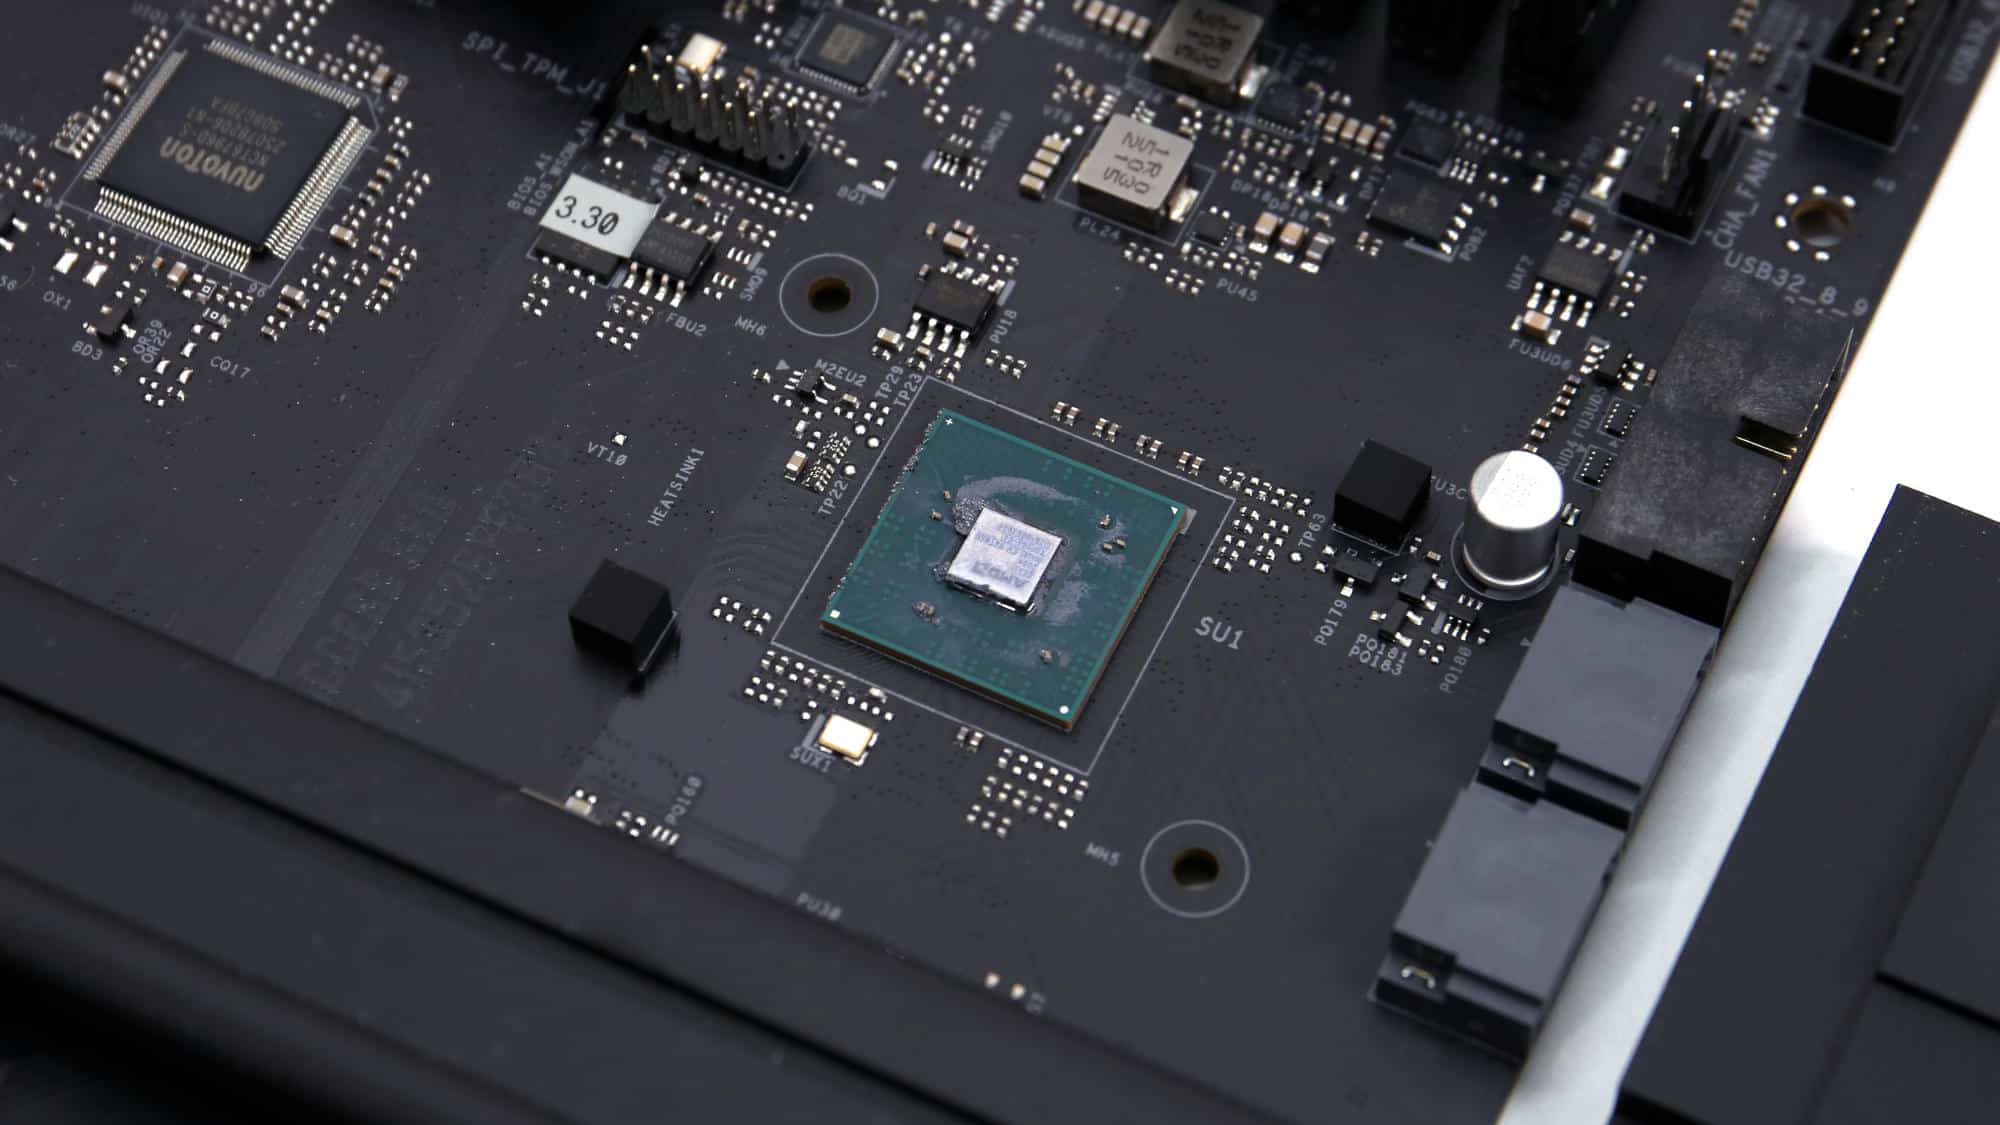
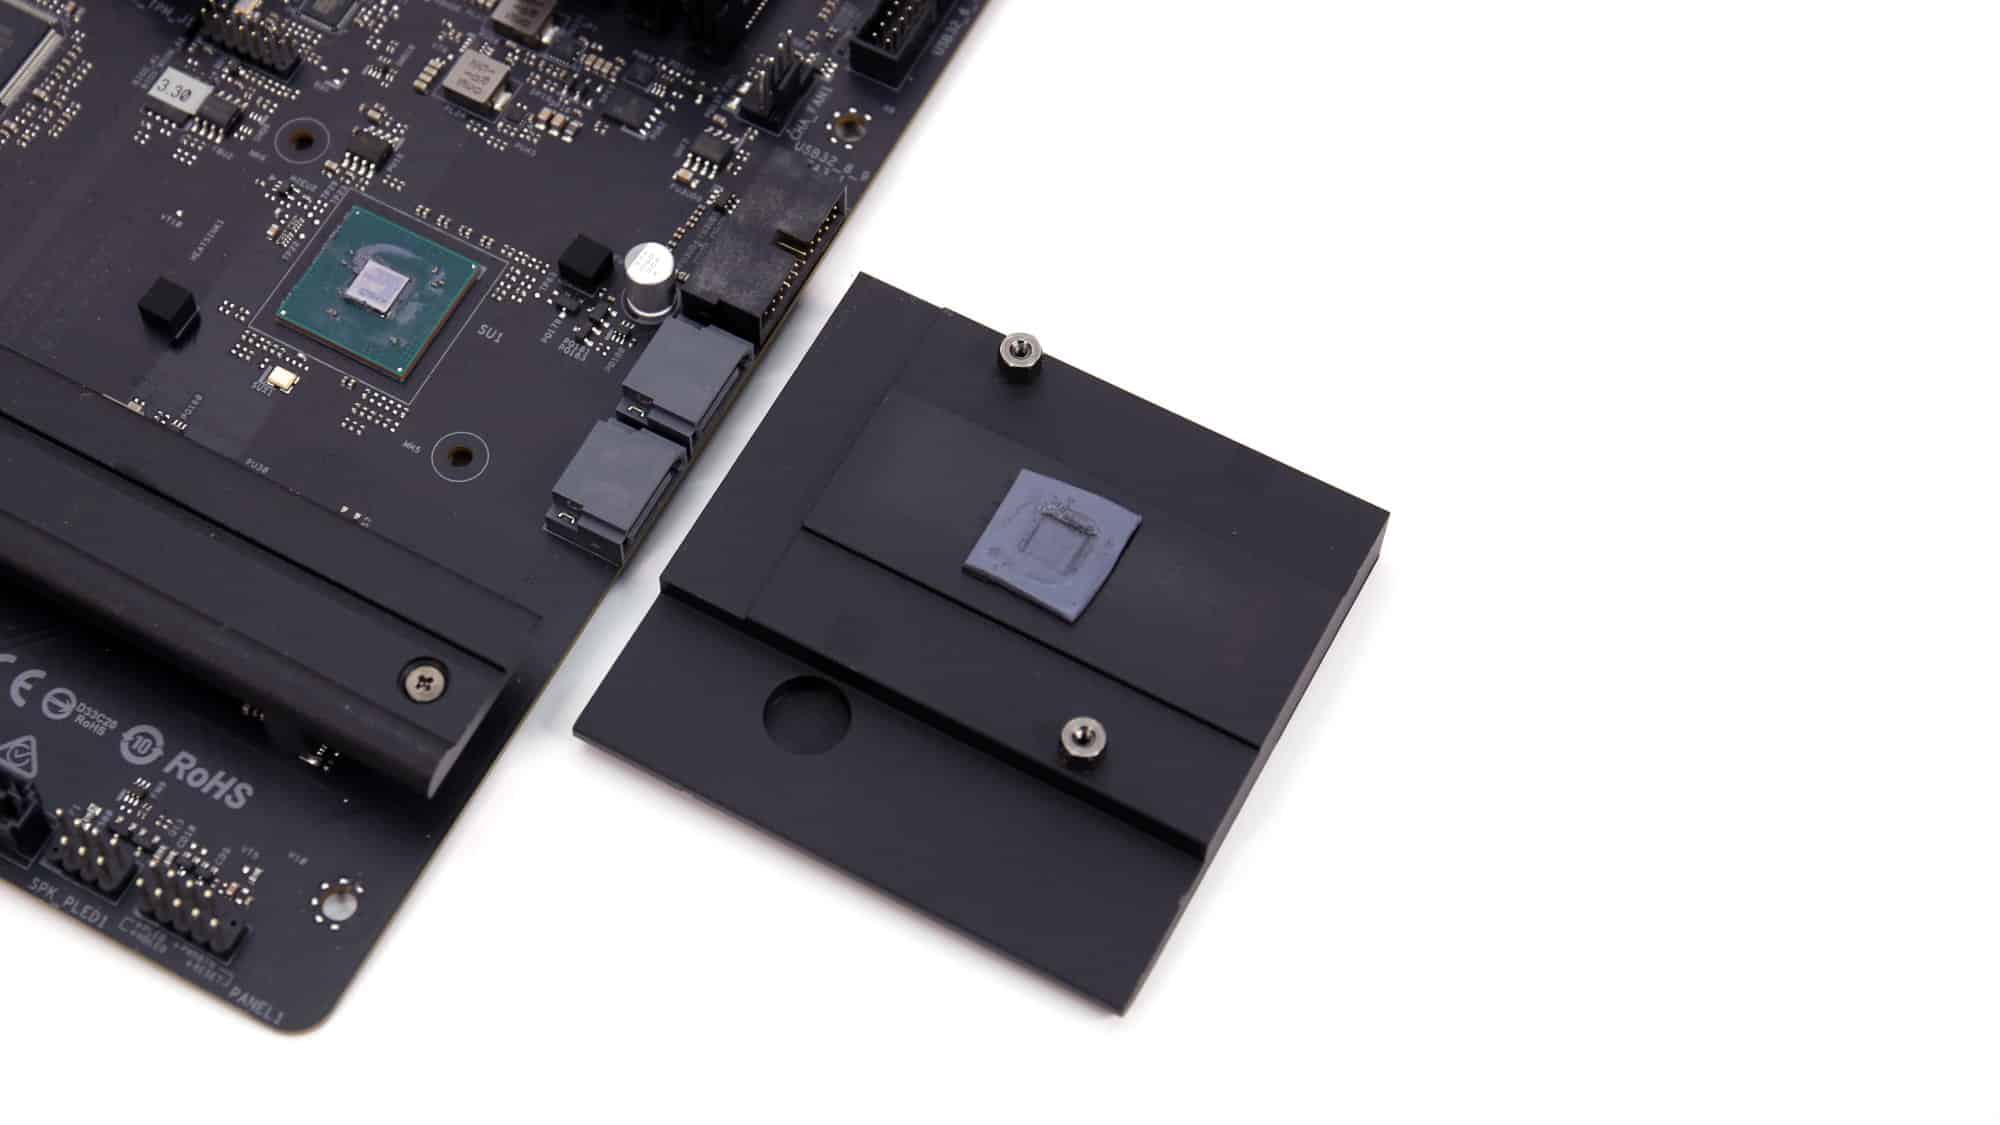
Hidden below the heatsink is the chipset, with a thermal pad acting as a thermal bridge, along with two more SATA ports and a USB 3.2 Gen 1 header.
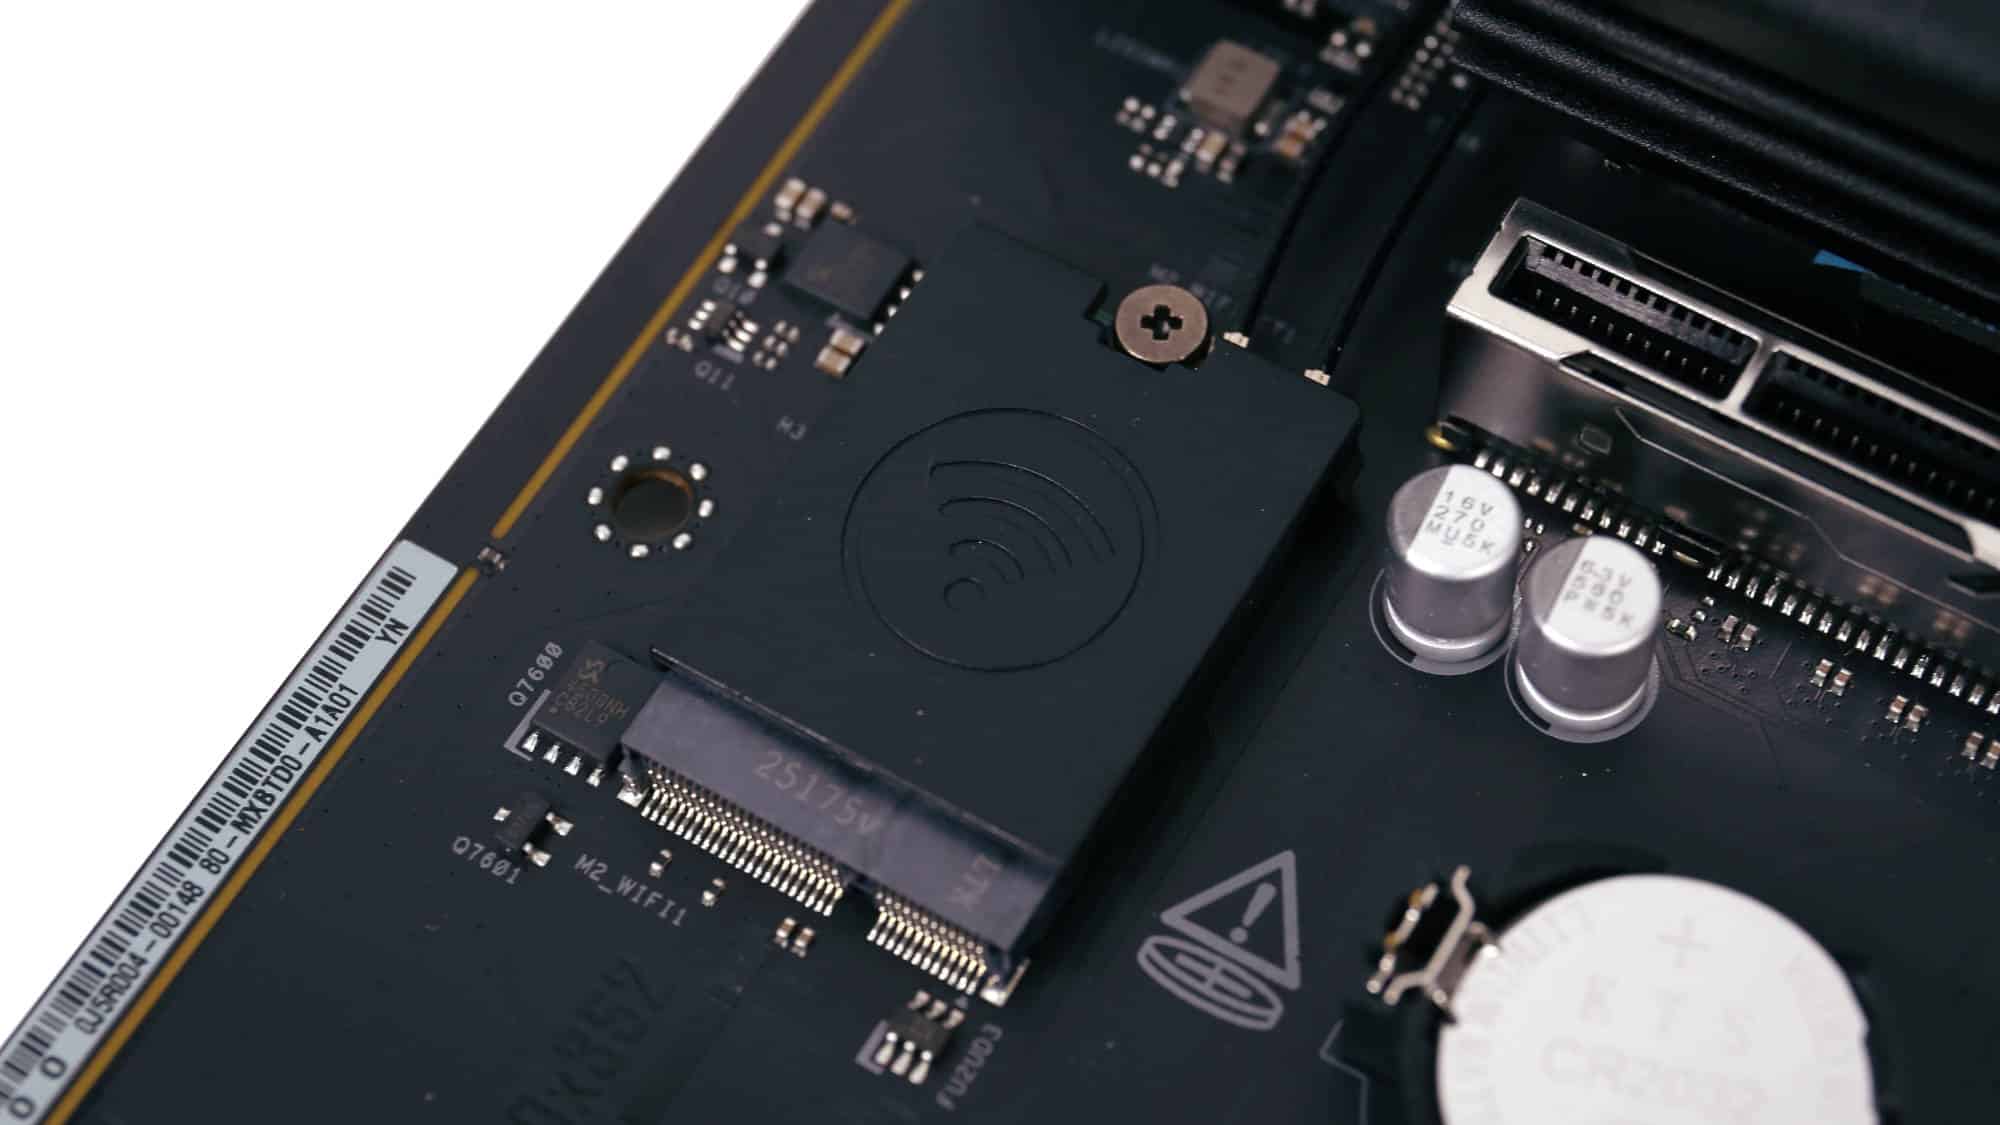
The Wi-Fi card has a blacked-out cover to blend with the aesthetic, found on other ASRock boards too. It’s an 802.11be 2×2 Wi-Fi 7 Module, with Bluetooth 5.4 and MU-MIMO support. It sits in an M.2 Socket (Key E), which means it can be replaced if you wish.
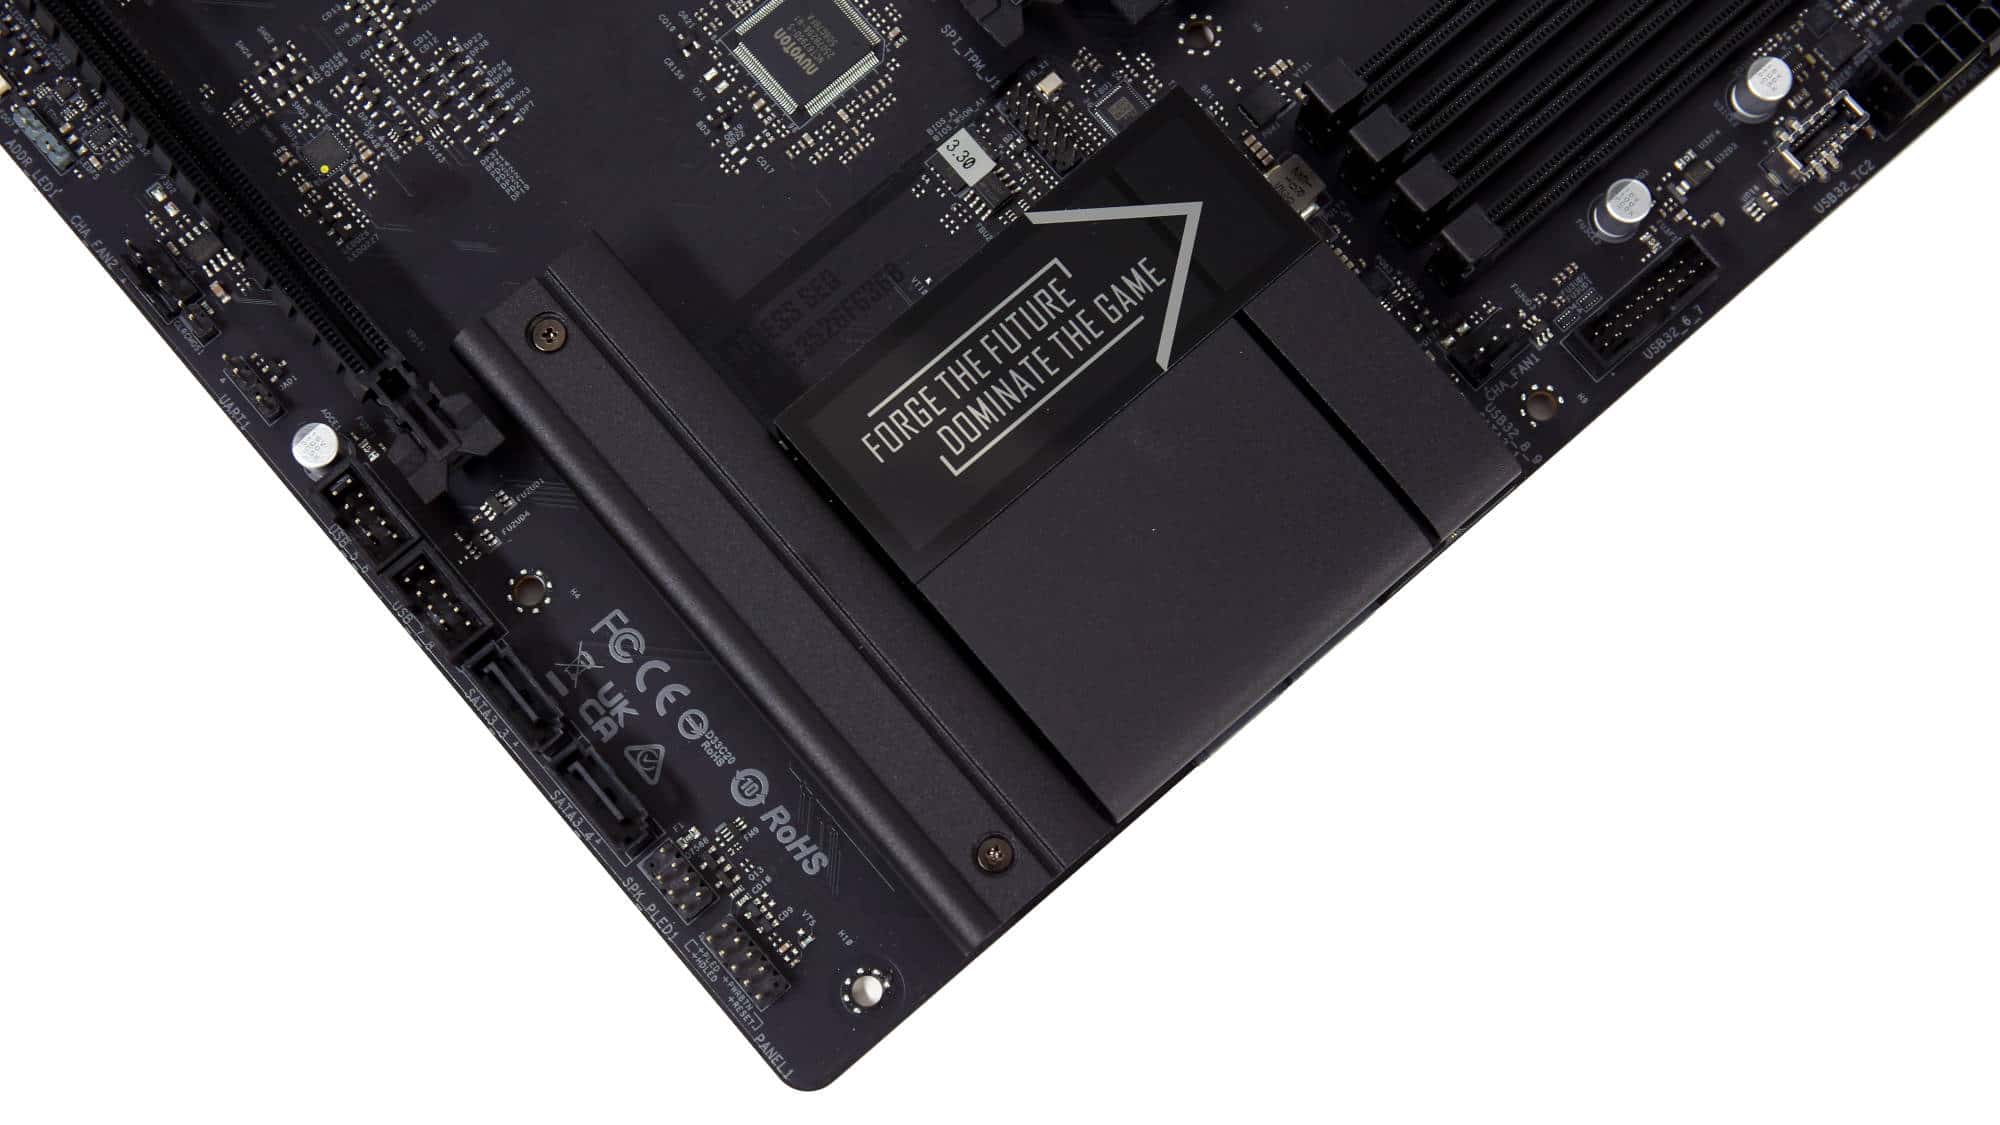
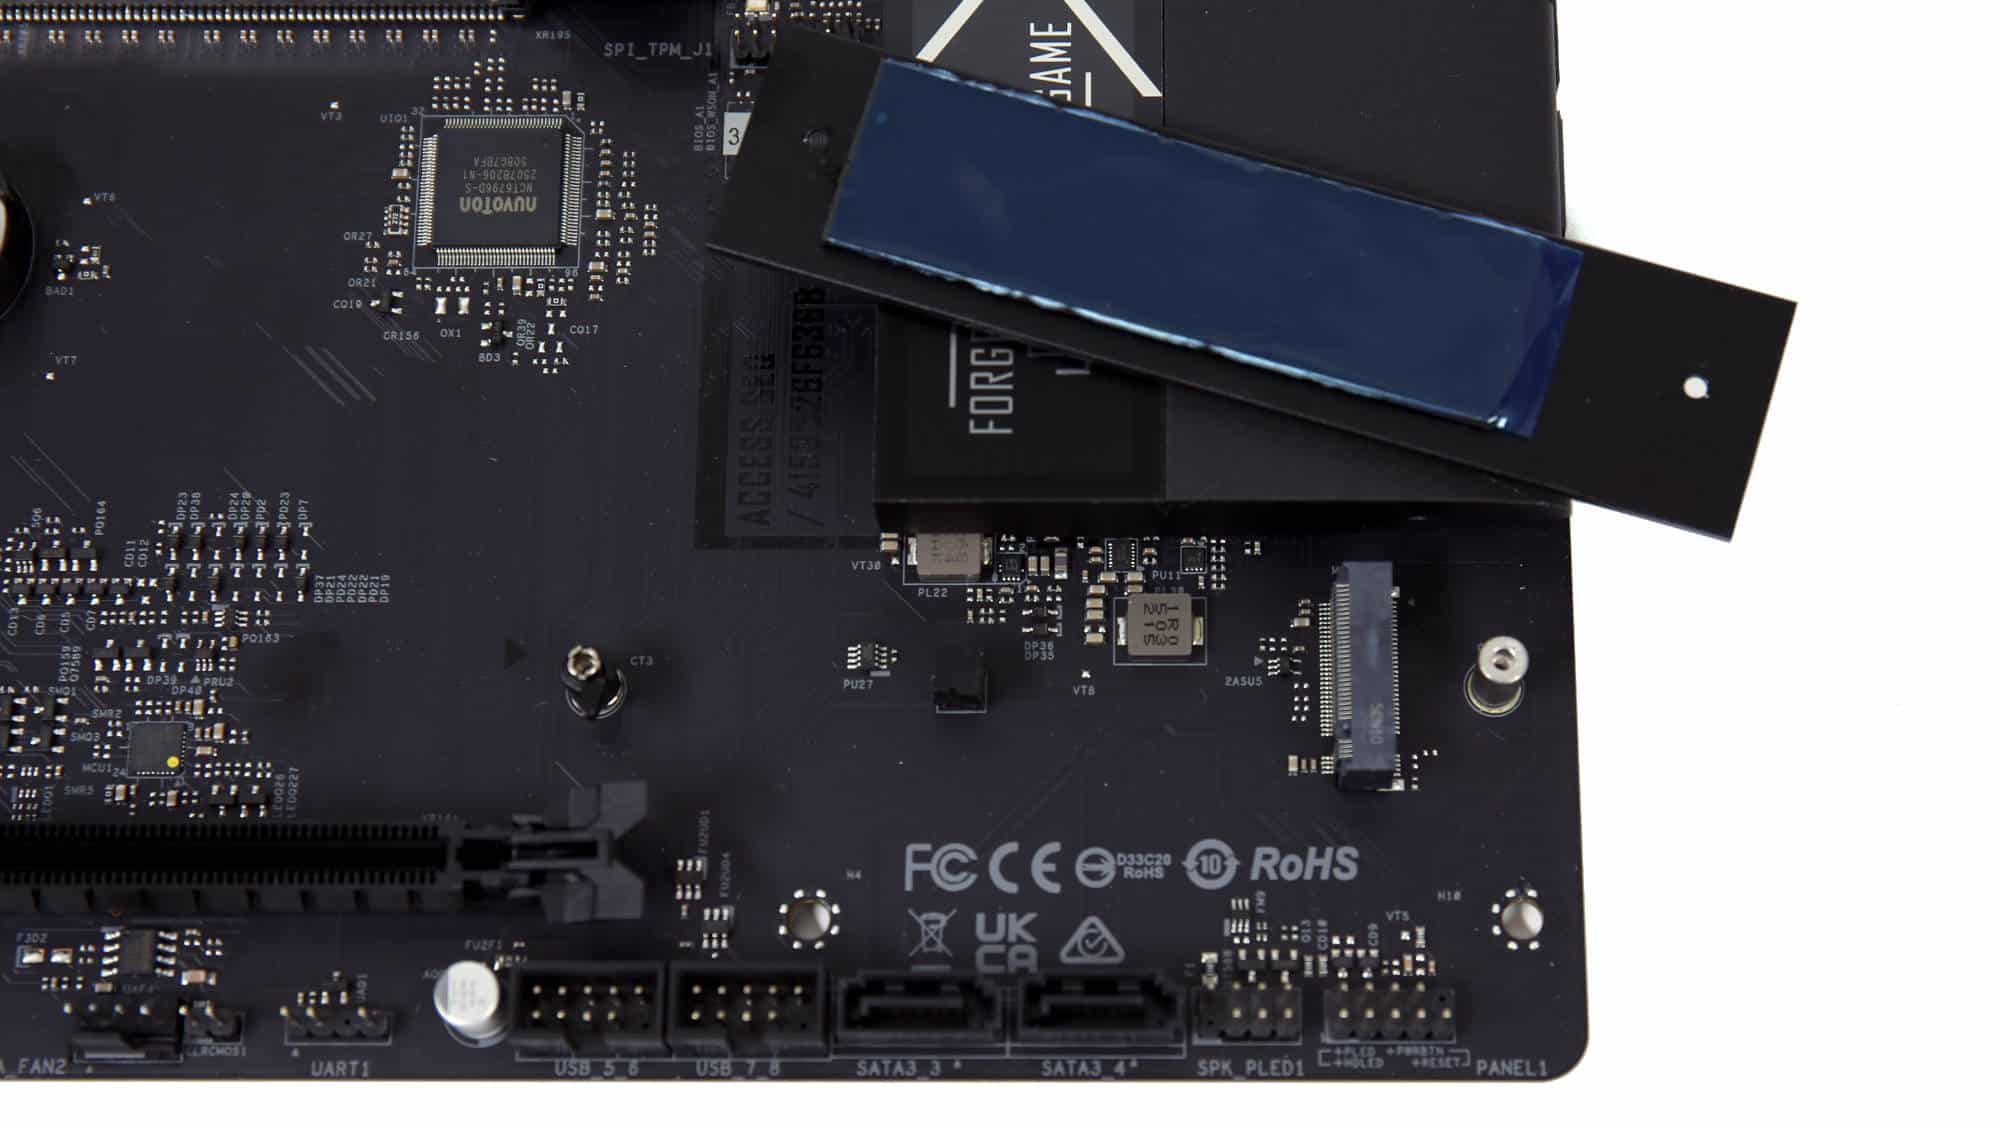
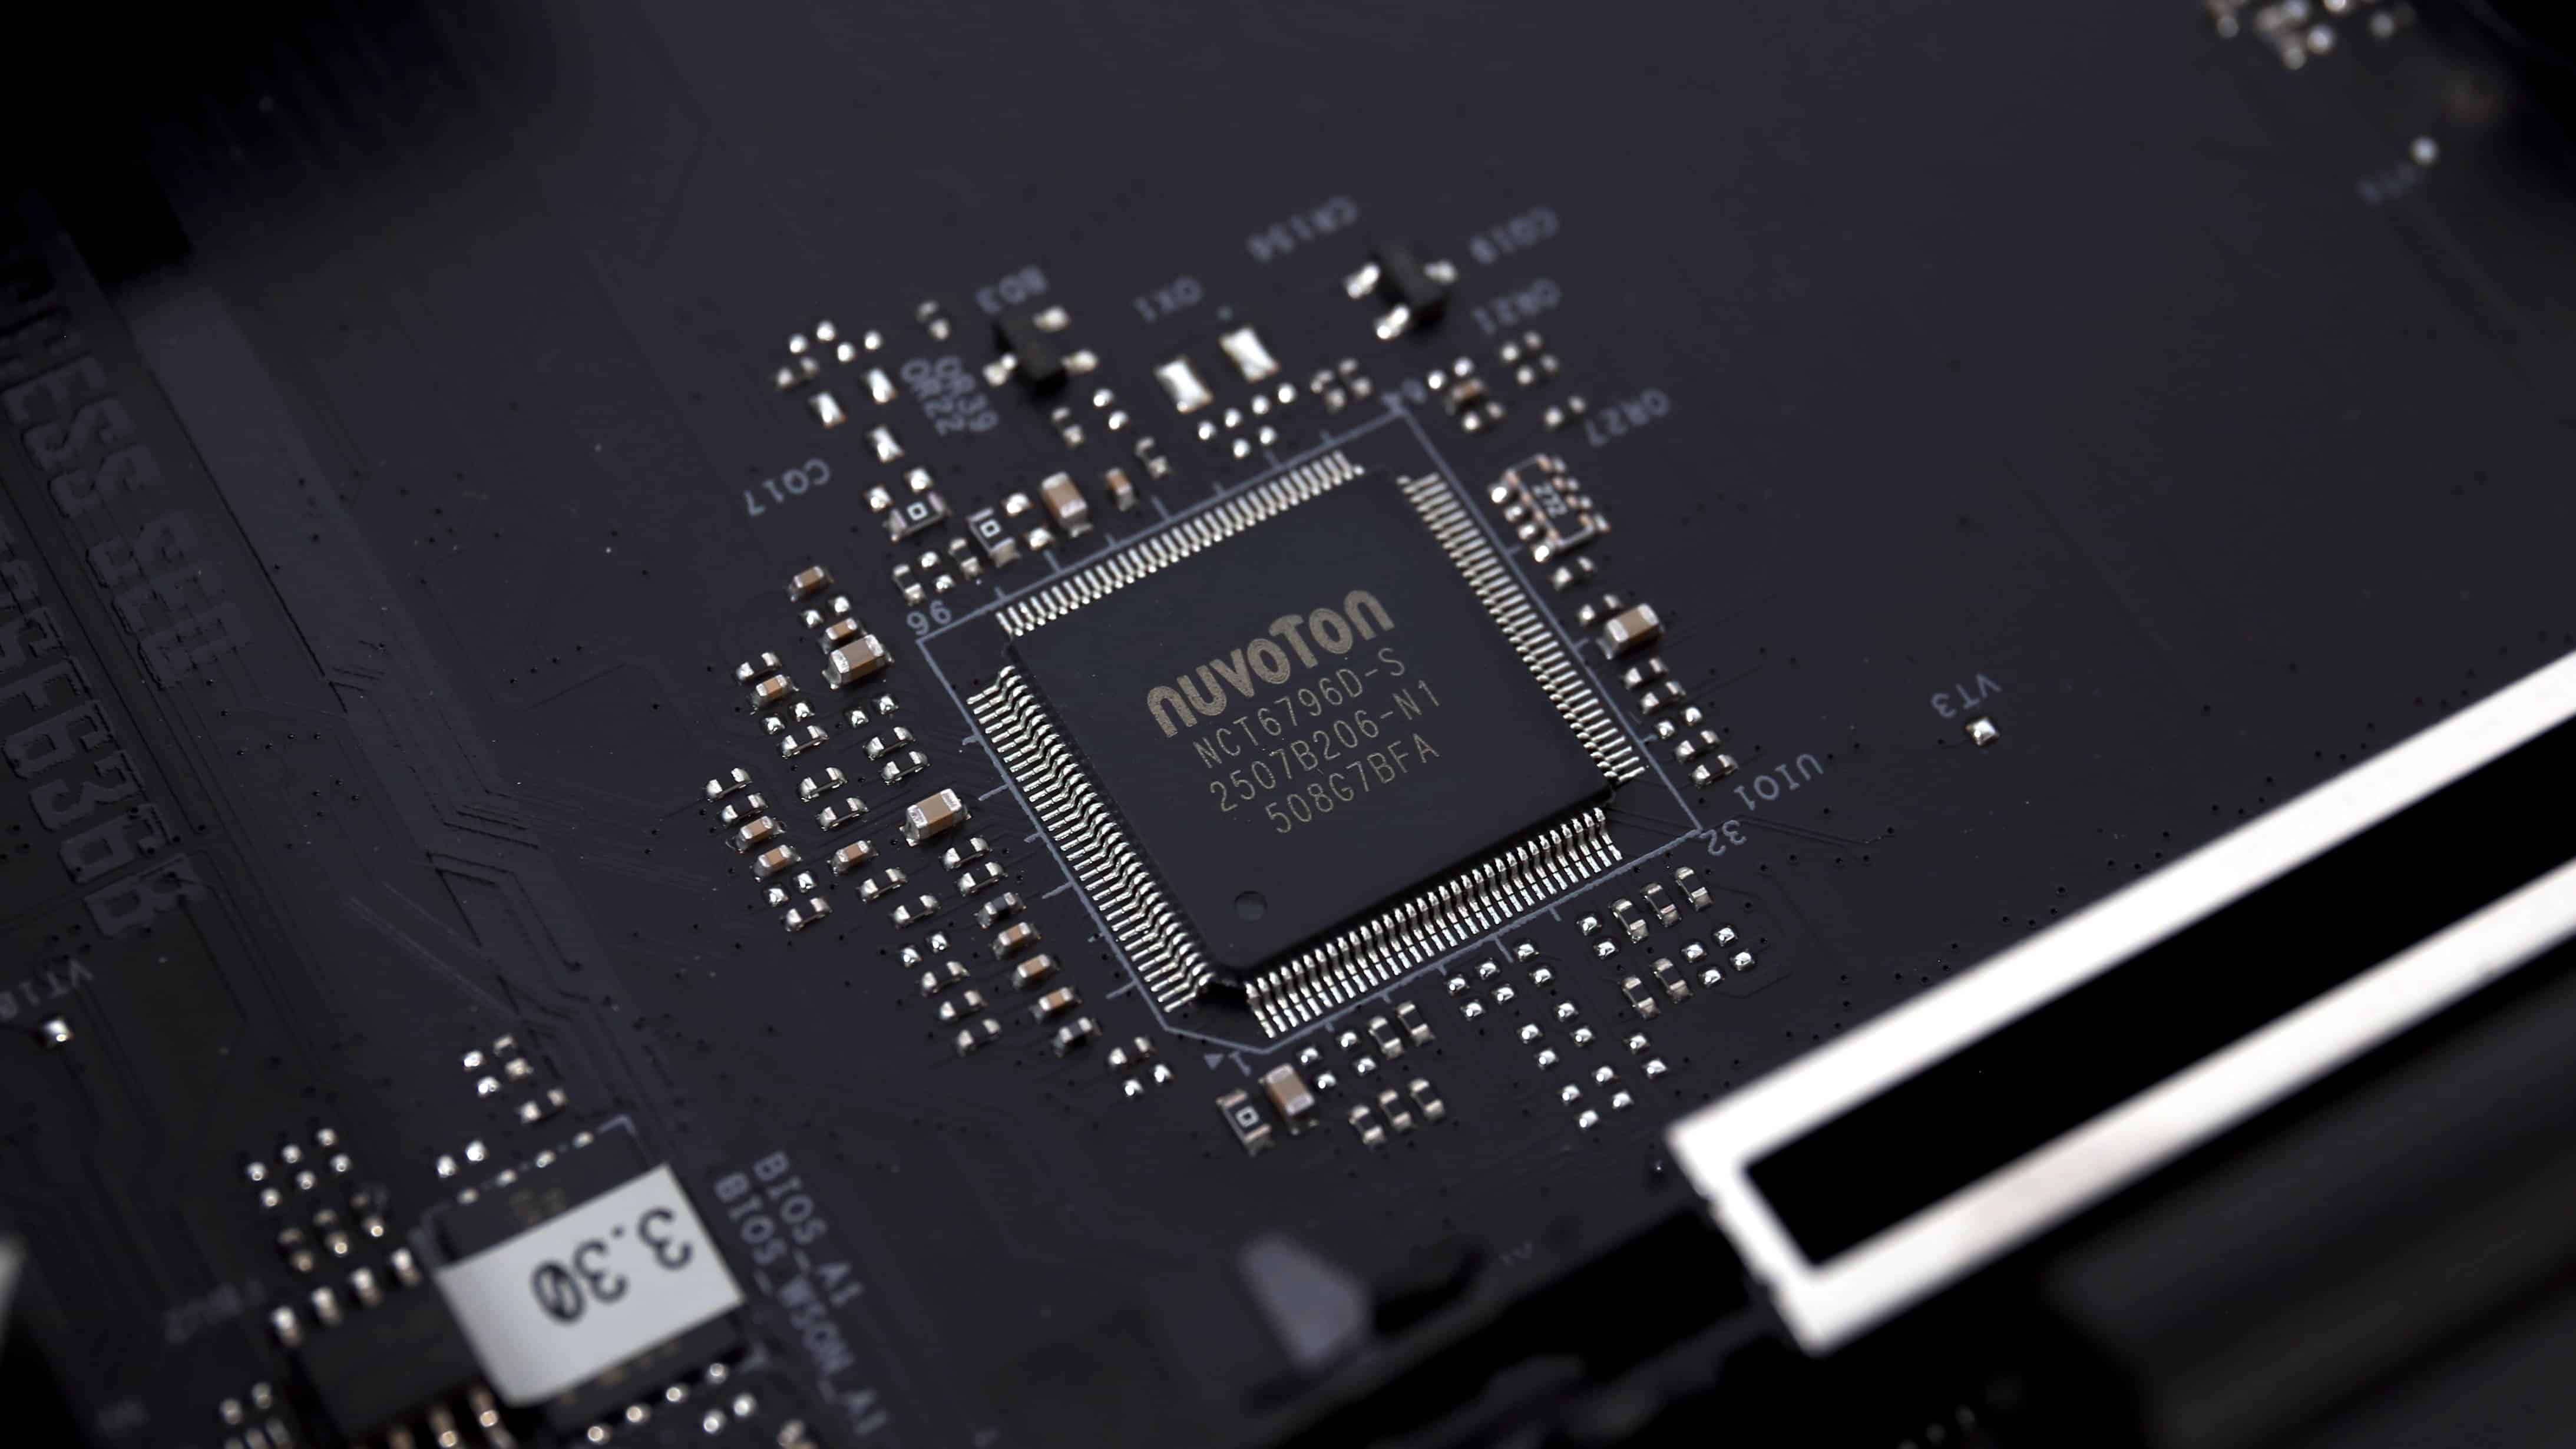
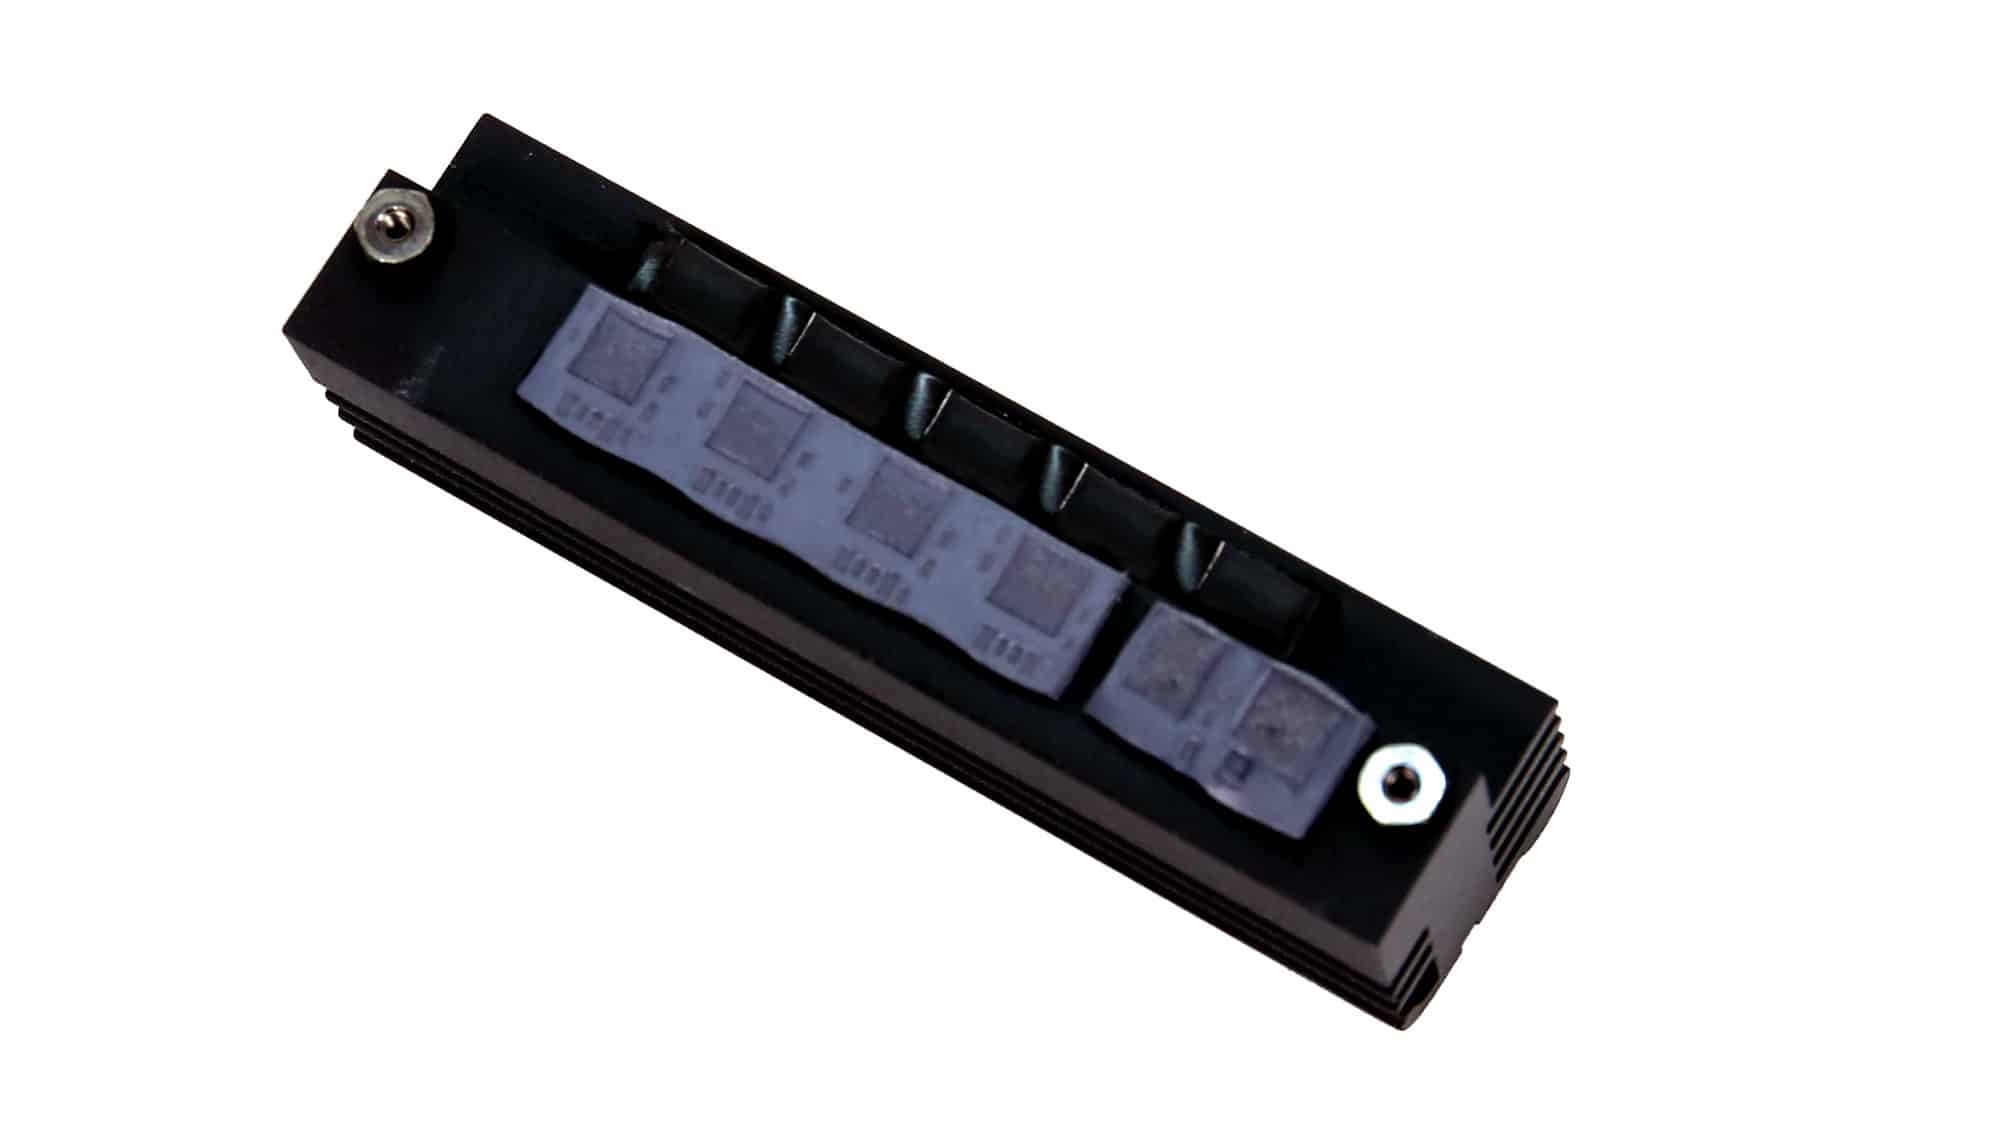
Next, we have the Nuvoton chipset, the heatsink, and the second M.2 slot right below. This M.2 runs at PCIe Gen4x4 (64 Gb/s). The exact toolless mechanism is used here, too, but we have a thermal pad only on the heatsink and not on the board. In addition, this heatsink has significantly less mass, as it won’t generate the same amount of heat as the main drive. Despite being the secondary drive, only 80mm drives are supported here, but it seems to be the norm now, especially for an ATX-size board.
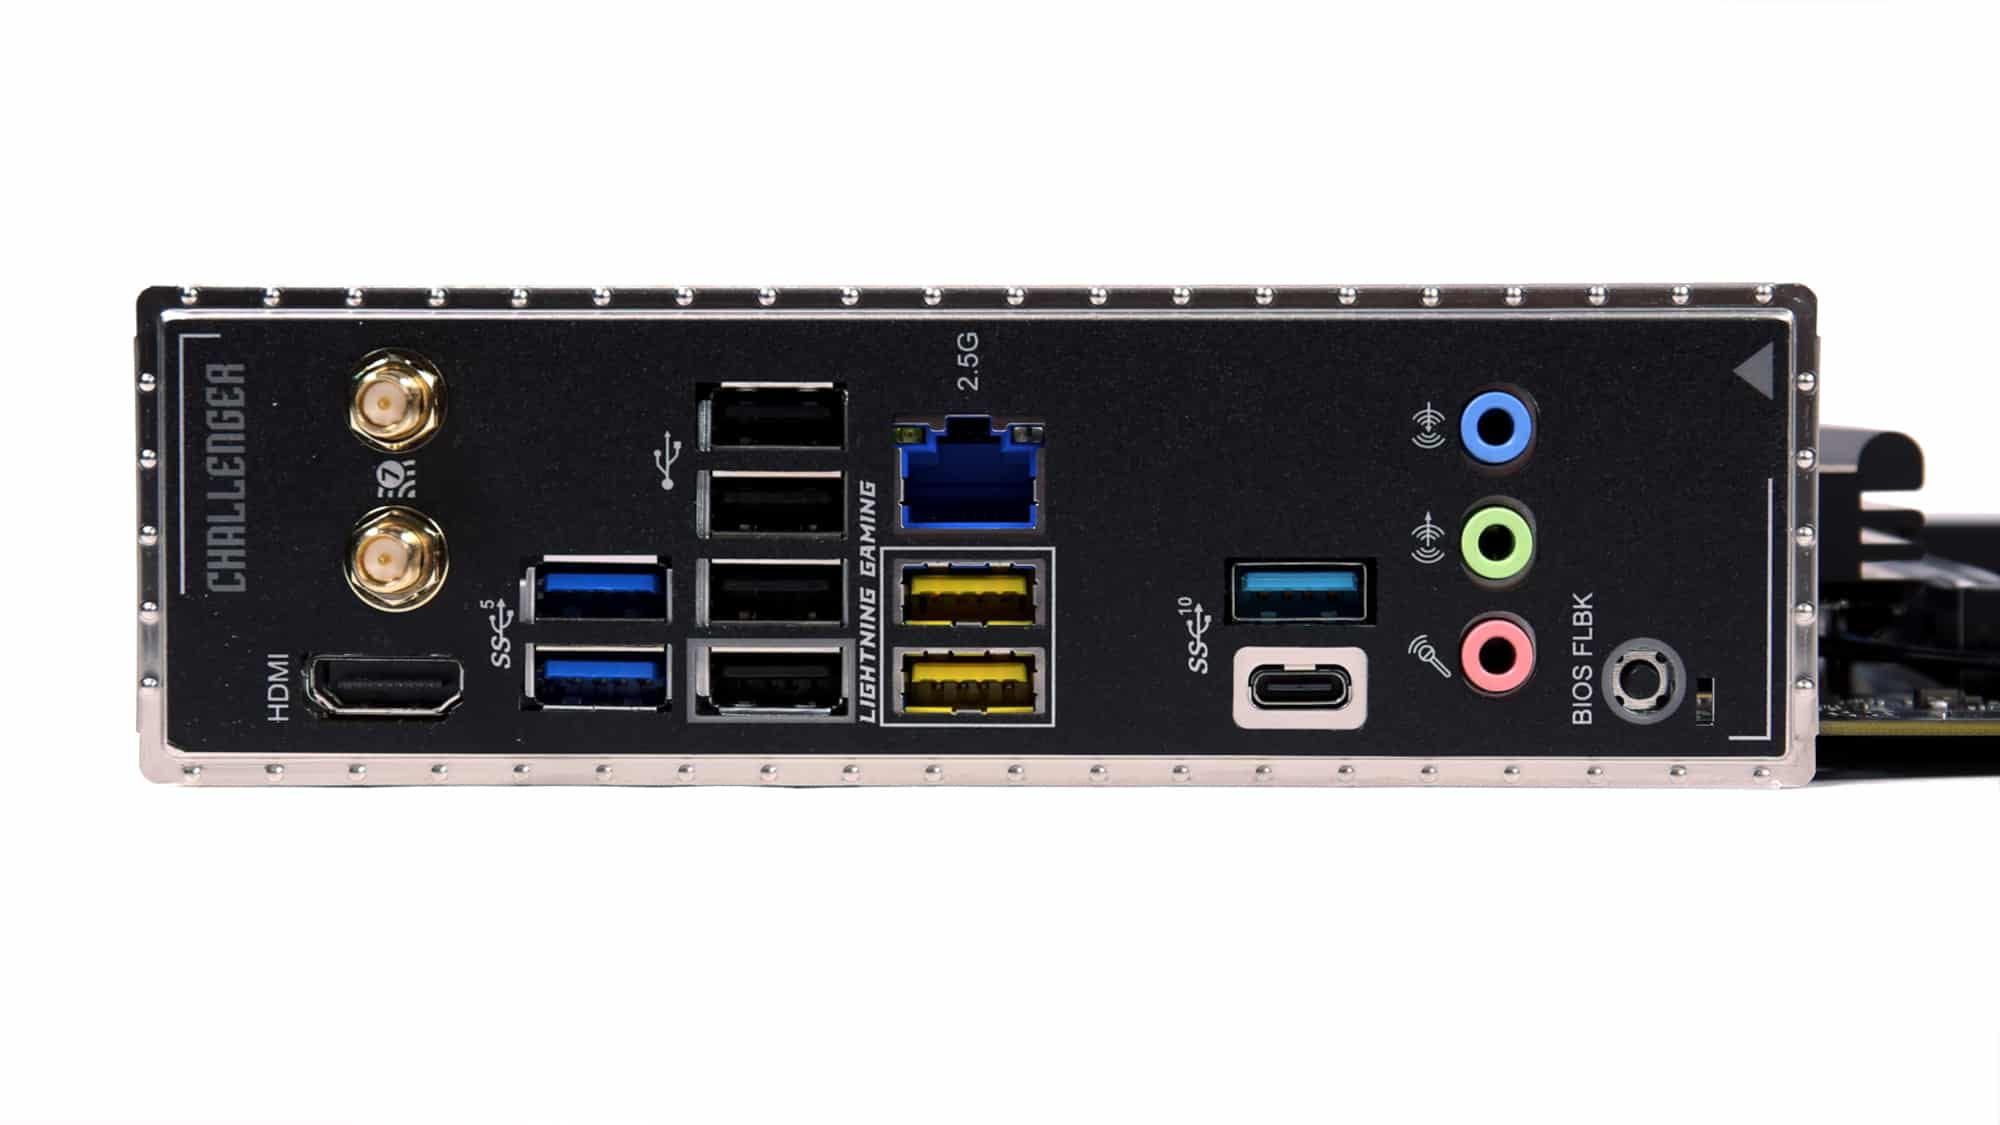
The rear I/O of the board is quite rich in connectors, covering all basic needs. Starting at the top, we have an HDMI, two antenna coaxial connectors, two USB 3.2 Gen 1 USB Type-A ports, and four USB 2.0 Type-A. Two more USB 3.2 Gen 1 Type-A ports with independent controllers for the best performance with your mouse and keyboard connected, a 2.5Gbit RJ-45 connector, two USB 3.2 Gen 2 ports (one Type-A and one Type-C), three HD Audio jacks (line in, front speaker, mic), and lastly, a BIOS flashback button. Let’s not forget to mention that the I/O shield is integrated on the board itself.
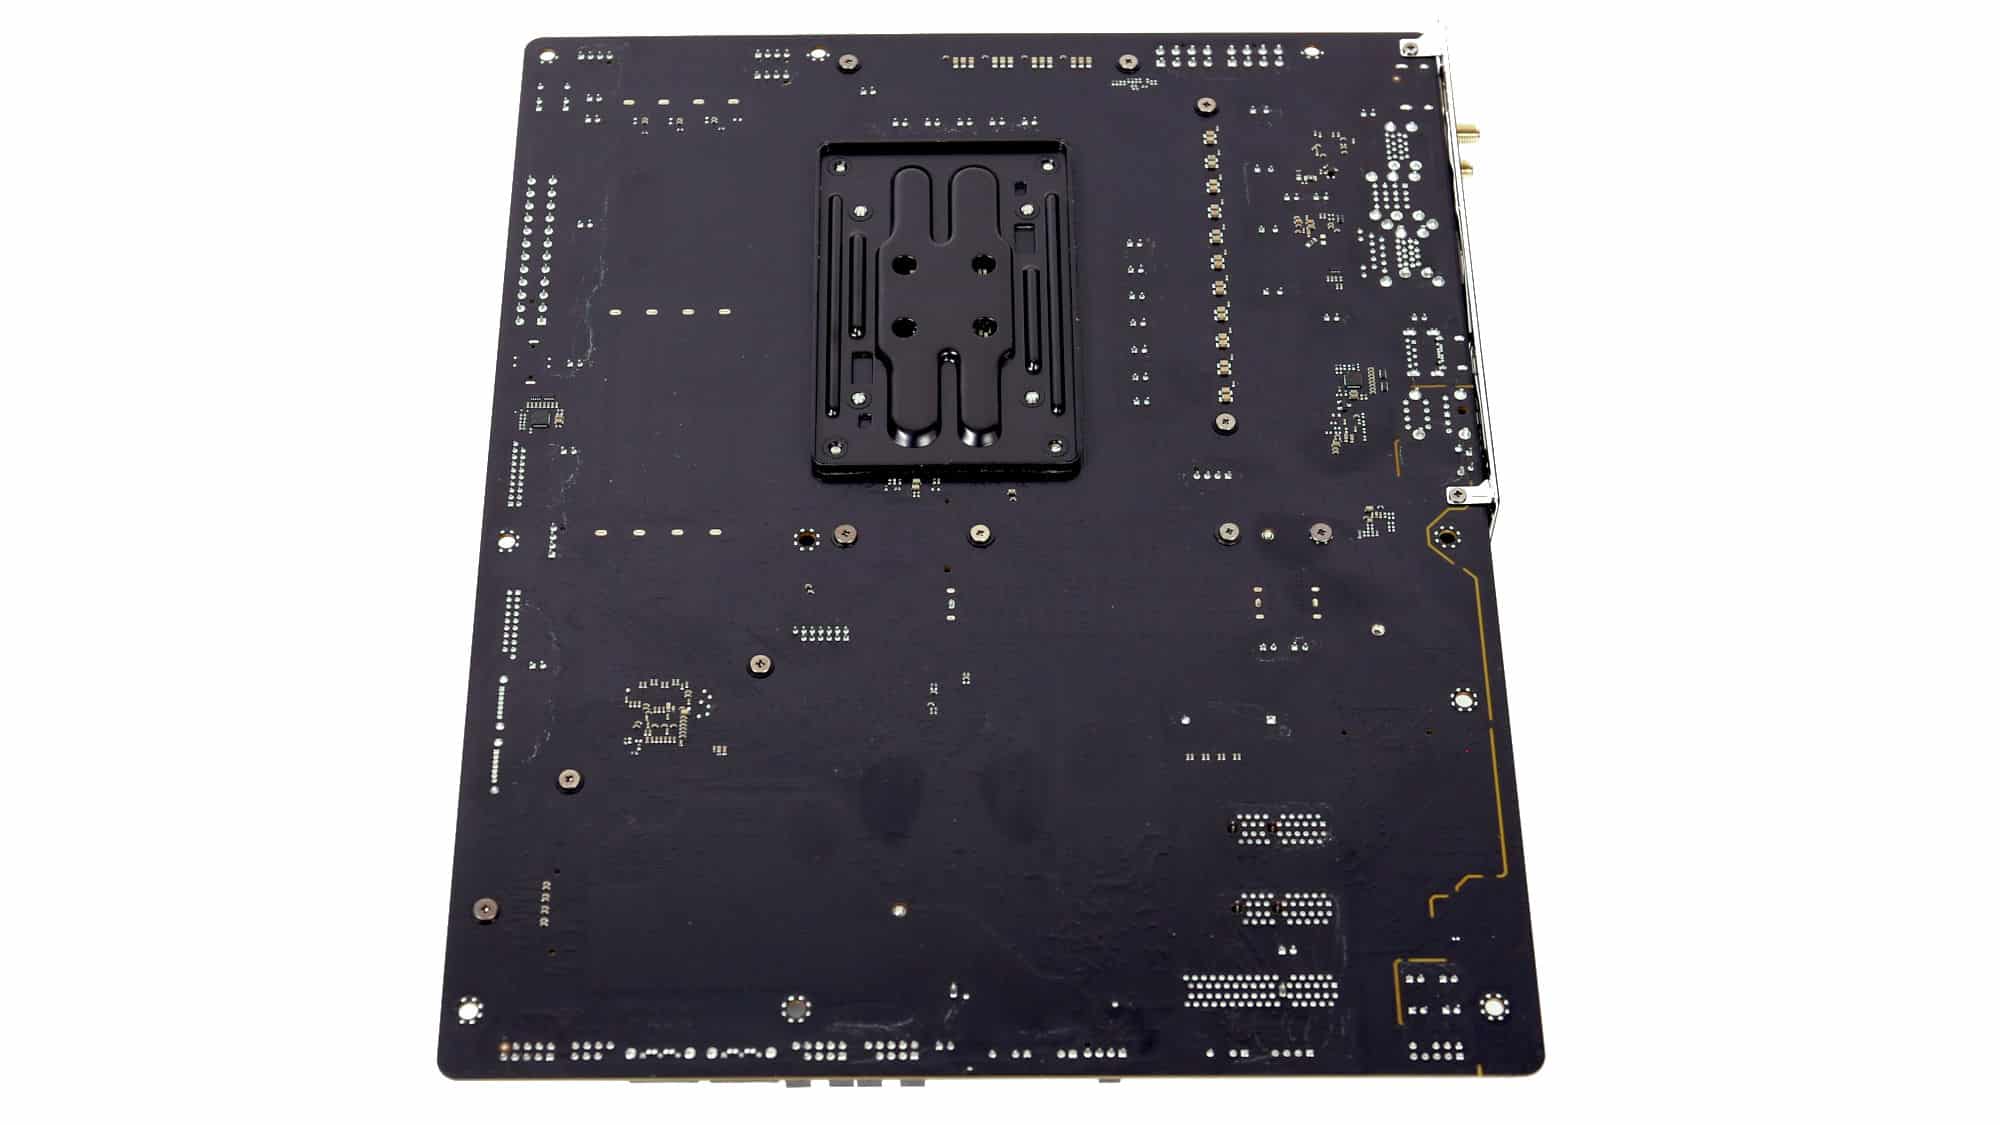
The back of the board has just the cooler backplate.