Formatting a drive of any kind (HDD, SSD, USB drive, etc.) is usually an easy and hassle-free process. All you have to do is select the drive you wish to format, and by right-clicking it choose format. But what to do when a drive refuses to get formatted? One option would be to throw it away, full of anger. But you are here because this is not your option, I suppose. This article will show you how to format an unformattable drive.
Please, keep in mind that you should select only the drive you wish to format and that all of its files would be lost.
How To “Drive” it
You might already know that Quick Tips’ favorite tool is the Windows command prompt (CMD). And as you already guessed, yes, we will use CMD again.
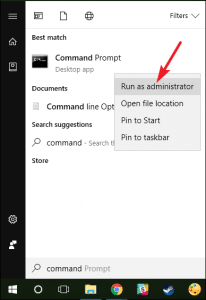
Go to Windows Search bar and type cmd.
Choose “Run as administrator.”
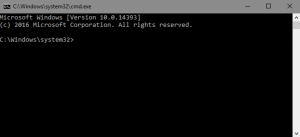
The command prompt will appear ( please remember that Microsoft Powershell or Microsoft Terminal would also work).
Type diskpart and press Enter.
Then type list disk and press Enter. All your available drives will be shown. Choose only the correct number of the drive you wish to format. For example, we assume that the desired drive is Disk 1.
Type select disk 1 and press Enter. As I already stated, we assume the desired drive is Disk 1. If the drive you wish to format is Disk 2, then you should type select disk 2. The same goes if you wish to format Disk 3 (select disk 3), etc. CMD will inform you that “Disk 1 is now the selected drive“.
The next step is to type clean and press Enter. CMD will inform you that “Diskpart succeeded in cleaning the disk.”
After cleaning the disk, we type create partition primary and press Enter. CMD will inform you that “Diskpart succeeded in creating the specified partition.”
We type active and press Enter. CMD will inform you that “Diskpart marked the current partition as active.”
Then we type format fs=ntfs label=Any description and press Enter. In label=Any description, you can add whatever name you wish, e.g., label=Backup or label=JimCKD. You can also, instead of NTFS format, convert it to exFAT. On this occasion, the command would be format fs=exfat label=Any description. E.g. format fs=exfat label=Backup.
At this point, we should wait for the diskpart to complete formatting the drive. When the process is over, CMD will inform us that “100 percent completed“.
When it is 100 percent completed, we should assign a letter. Please ensure that you won’t assign a letter already in use. C, D, and E are usually letters that are already assigned to drives that we use. So, unless they are not already assigned, we should avoid them. For example, if the letter I is not assigned, we can use it. The command now would be to assign letter=I and press Enter. If you have any other letter that is not in use, you can assign it, e.g., G. The command should be assigned letter=G, assign letter=H if you choose H, etc.
Then type Exit and press Enter to exit the diskpart.
Again Exit and press Enter to exit CMD.
A typical HDD
That’s it. Now your drive is ready to use, as it should be. Please, feel free to read the rest of our Quick Tips here.