We have to admit it. Clean Install of Windows might be a hassle-free process these days, but still, it is a procedure. Whether it would be for troubleshooting purposes or any other reason, every one of us has to face it one way or another. But did you know that there are some things that we can check or uncheck for optimal performance and user experience?
In this article, I will try to cover every possible aspect of performing the optimal Clean Install of Windows. It might be useful, mainly if you perform it for troubleshooting purposes. Let’s proceed to the main course.
The optimal way
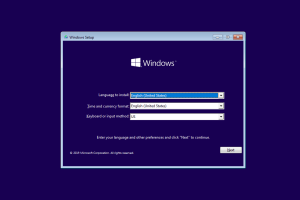
- Download the Windows iso using Microsoft official media creation tool or third-party apps like Rufus. Burn it to a USB device or a DVD. DVDs are not popular these days, but depending on the age of the device or even security reasons (installing it on an unsafe machine, for non-rewritable discs, etc), it might be the preferred method for some of us. USB method is the most popular. Don’t forget that you should know how to enter your BIOS. The most important thing is the iso should be created on a safe and malware-free device.
- Unplug all unnecessary devices and peripherals from your PC, except keyboard, mouse, and main monitor. This is because any device might conflict with the procedure, faulty Windows drivers, etc. Especially for troubleshooting purposes, which is the best practice.
- You can disable XMP/EXPO or any other type of overclocking, etc. Many of us won’t follow this, although it might be useful for various reasons. Still, if you want to, you can follow this rule.
- Pre-activate or de-activate SecureBoot, UEFI, and TPM, depending on your OS of choice or the age of the machine.
- Delete all the partitions of your previous OS installations and format all the drives (HDDs, SSDs, etc.). This is useful, especially if you suspect any malware activity. Always back up your important files, etc.
- Unplug your PC from the ethernet, and don’t connect to WiFi during the process. This is especially useful for Windows 11 if you don’t want a Microsoft Account. Auto-updates, etc., are some more reasons.
- Uncheck any unnecessary privacy settings (e.g., ads, stats to Microsoft, etc.) and choose basic or standard. Basically is an “I don’t agree,” “don’t allow,” “No,” “Basic,” or “Standard” thing.
- When you enter the Windows environment, unplug your boot medium and disable Windows update. Install your drivers (GPU, etc.) if you download them. This is to prevent the default Windows drivers from being downloaded. Of course, you can let Windows download their repo drivers. This is more useful, e.g., if you suspect a faulty Windows driver or want to install your latest GPU driver and don’t want Microsoft to mess things up. Of course, the choice is yours.
- Perform all Windows Updates.
- After installing all the necessary updates, you can install any other peripherals you want, files, etc. It might be best to install them after a while if you notice any issues with the previous installation.
- If you choose to disable XMP/EXPO don’t forget to enable it through your BIOS. Proceed cautiously with any Overclock settings you used before to ensure system stability.
- Create “Restore Points”. It is a safe practice, especially before updates or program installations. Better safe than sorry.
Epilogue
Clean Installation of Windows will always be something we have to deal with. This article covers things you might not know, especially if you faced any issues with your previous installation. Some things might be considered unnecessary, but they are still options.
I hope this guide is useful if you face any tough “Format” situation. As always, stay safe and stay in the know.