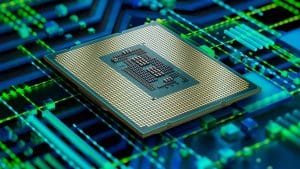
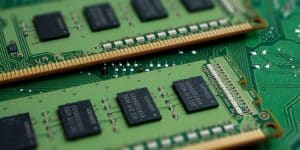
In the second part of Quick Tips series we will see what we can do, when our device doesn’t boot or no XMP after a new Processor or RAM is installed. Basically, are two main steps we could follow. If these steps don’t solve our issue we might face a failing hardware component. That’s unpleasant because we may have to contact the Store or the OEM that we purchased the faulty item. But before we start searching about phones and prepare for a battle, let’s see what kind of options we have.

Step One
First of all we unplug our device from the wall socket. Afterwards, we press the power button for about 30 seconds. It is always wise to remove any periphals we have plugged in our device. Next thing we should do is to safely remove the CMOS battery. After 15 minutes or more, we put it back on. This should do the trick for our CPU, most of the times. But what about RAM?
We could test the first step, but it’s unlikely that this would always solve the XMP or Boot issue. The best thing we can do, is to remove the RAM Modules, and put back only one, even in a different slot. Only if we have two or more Modules, of course. We just try another slot, when we have one available stick. If our device boots normally, we try to enable XMP, in our BIOS. If the issue appears when we enable XMP, then we disable it. In case we have two or more Modules, we enable XMP with only one RAM stick on. If our device boots successfully, then we add another stick. If the issue appears with two or more Modules on, then these are quite bad news. It usually means that our Mobo or the combo isn’t compatible. It rarely occurs, but still is a real life scenario. That’s why is always wise to check our Motherboard’s Manufacturer QVL. We avoid uneasy situations. But not everything is lost, yet. We proceed to the next step that hopefully could solve our issue.

Step Two
The next step we should try is a BIOS Update. Sometimes this solves issues like these, because OEMs address possible incompatibilities. Most of the time, a BIOS Update is required for a newer Processor installation. We should visit our Mainboard Manufacturer’s Site to check if any BIOS Update is available. Then we check if it addresses our issues or improves compatibility. Often an older CPU is required, for a BIOS update, to a newer one. We can always refer to OEM’s Site or the Store we purchased the item for more help and information. Newer Motherboards don’t even require a CPU for this, so we might be lucky enough. When ready we download the required file and follow the available instructions.
My only advice is to avoid updating BIOS through your OS. The best way is to install it in a USB device and run it by it. All the Manufacturers have detailed instructions on how to do it, so it isn’t much of a hassle. One thing you should keep in mind is that BIOS Update, isn’t always trouble free. It rarely causes issues and that’s why vendors advice against it. As we know, if ain’t broken, don’t fix it. But in my experience it is quite safe to perform one, unless something goes extremely wrong, like a sudden power shut down. But how unlucky could someone really be? I think is better to try a BIOS Update that might solve an issue, than not to. It is probably all we need.
Epilogue
If we perform these two steps the right way, and the issue persists then we might have a faulty hardware component and we should probably replace it. We can contact the Store or the OEM to learn what our available choices are. Of course, we can always refer to an experienced technician for further assistance. Most of the time, is all we need to do. As always, you can write in the comments section your tips and suggestions. I hope that this article would come in handy to any of you.
Till the next Quick Tip, be safe and keep teching!


