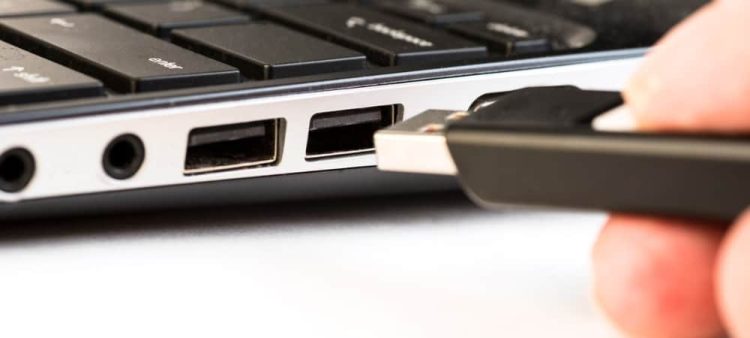
We use USB devices on our PCs daily for any purpose. From USB flash drives to a fancy external USB sound card or a gaming controller, keyboard, etc. When we no longer need them, we safely eject them (I hope) or unplug them the hard way. Many of us might choose to uninstall it using the Control Panel. However, for convenience, Windows doesn’t remove the device altogether; instead, it hides it for future usage. This might do the trick if we use the device regularly, but what about the single-used devices, or, for example, our work PCs, that we don’t want our supervisor ever to see that we used a flash drive to watch a movie during our duty?
The answer is simple and convenient. We have to remove this device entirely from our system. In this Quick Tips article, I will show you how to remove a device completely from Windows. It is convenient, simple, and quick, just like all of our Quick Tips articles.
How To
- First, we should preferably “safely eject” the device. This is still the best way to eliminate any device’s corruption.
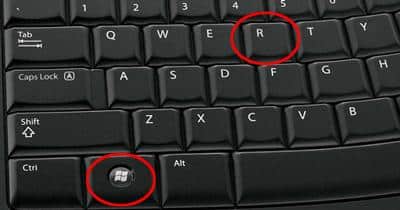
- Right-click on the Windows icon and choose Device Manager, or press the Windows key and R combination on your keyboard and type “devmgmt.msc” and “OK” (or press the “Enter” key) on the “Run” pop-up.
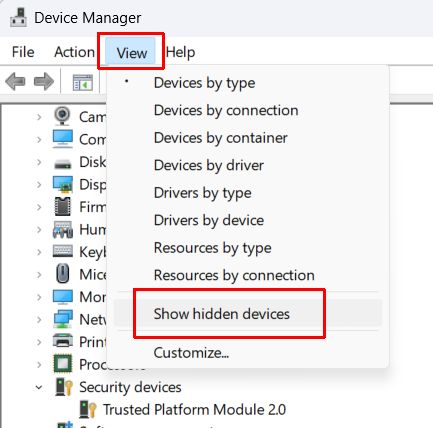
- On the Device Manager, choose the “View” tab and tick on the “Show hidden devices” option.
- Locate ONLY the device you want to remove from the grayed-out options (e.g., Lexar photos, etc.) and select “Uninstall.” Occasionally, tick on the “Delete the driver software for this device” option.
- In Device Manager, click on the computer’s name icon and select “Scan for hardware changes” to check if the device is no longer listed.
- Restart your computer.
That’s it! You have now completely removed the device from your system. It was quick, easy, and convenient, as it should be.