Steps To Follow For Proper Core Parking
- Update the BIOS to the newest one
- In BIOS, verify that the setting “CPPC Dynamic Preffed Cores” = Auto
- You should use a recent Windows 11 version. AMD recommends a fresh install but try all below if you don’t want to proceed with a clean installation (format)
- Run “msinfo32.exe” to check Virtualization-based security = running
- Verify that “Game Mode” = On
- Update the Xbox Gaming Bar app
- Install the newest AMD Chipset Driver and restart the system
- Verify in the Device Manager that AMD PPM Provisioning File exists
- Verify in the Device Manager that AMD 3D V-Cache Performance Optimizer exists
- Verify AMD 3D V-Cache Performance Optimizer Service (amd3dvcacheSvc.exe) is running
- Verify AMD 3D V-Cache Performance Optimizer Service #2 (amd3dvcacheUser.exe) Service is running
The final step is the most important and requires patience since it will take a while. Open a Command Prompt as an Administrator and execute the following command:
cmd /c start /wait Rundll32.exe advapi32.dll,ProcessIdleTasks
This command will take a while to end, about 15 minutes, and while it is running, you should not move the mouse or hit any keys on your keyboard. This command will process tasks that Windows typically performs only at idle, applying provisioning changes, including updating the Game Bar’s database.
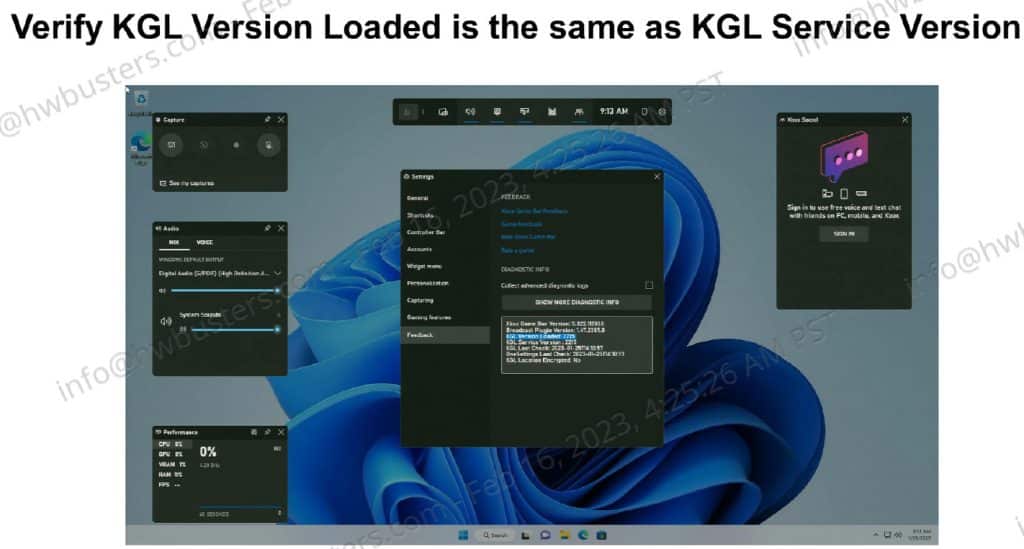
After the command is finished, press “Win+G” to open the Xbox Game Bar app again, and check if the KGL Version Loaded is the same as the KGL Service Version.
After everything mentioned above is done, open Resource Monitor and see if the cores of the second CCX are parked. Note that you have to have set this app identified as a game in the Xbox Game Bar. If the problem persists, you must perform a new OS install and follow the steps mentioned above again.


is this the same problem the 1800X has from zen?
+1